
A guide covering fight preparation and a whole bunch of other tips to help improve your BG3 experience.
This list should help illuminate new players and advanced ones alike. I have tried to limit spoilers to a minimum where I can, but there are some minor spoilers for act 1 ahead.
Guide Contents
Intro
Note: Credit goes to Gaming Existence
Welcome to my guide! If you prefer to watch rather than read, there is a fully voiced and animated video below that you may prefer.
Fight Prep
Many encounters have an equivalent of sneaking in and destroying key items. In this example we are dealing with eggs pre-fight, before they have the chance to hatch into enemies when the fight starts.
Sometimes you can destroy or manipulate terrain that enemies might use. Making it harder for them to get to you

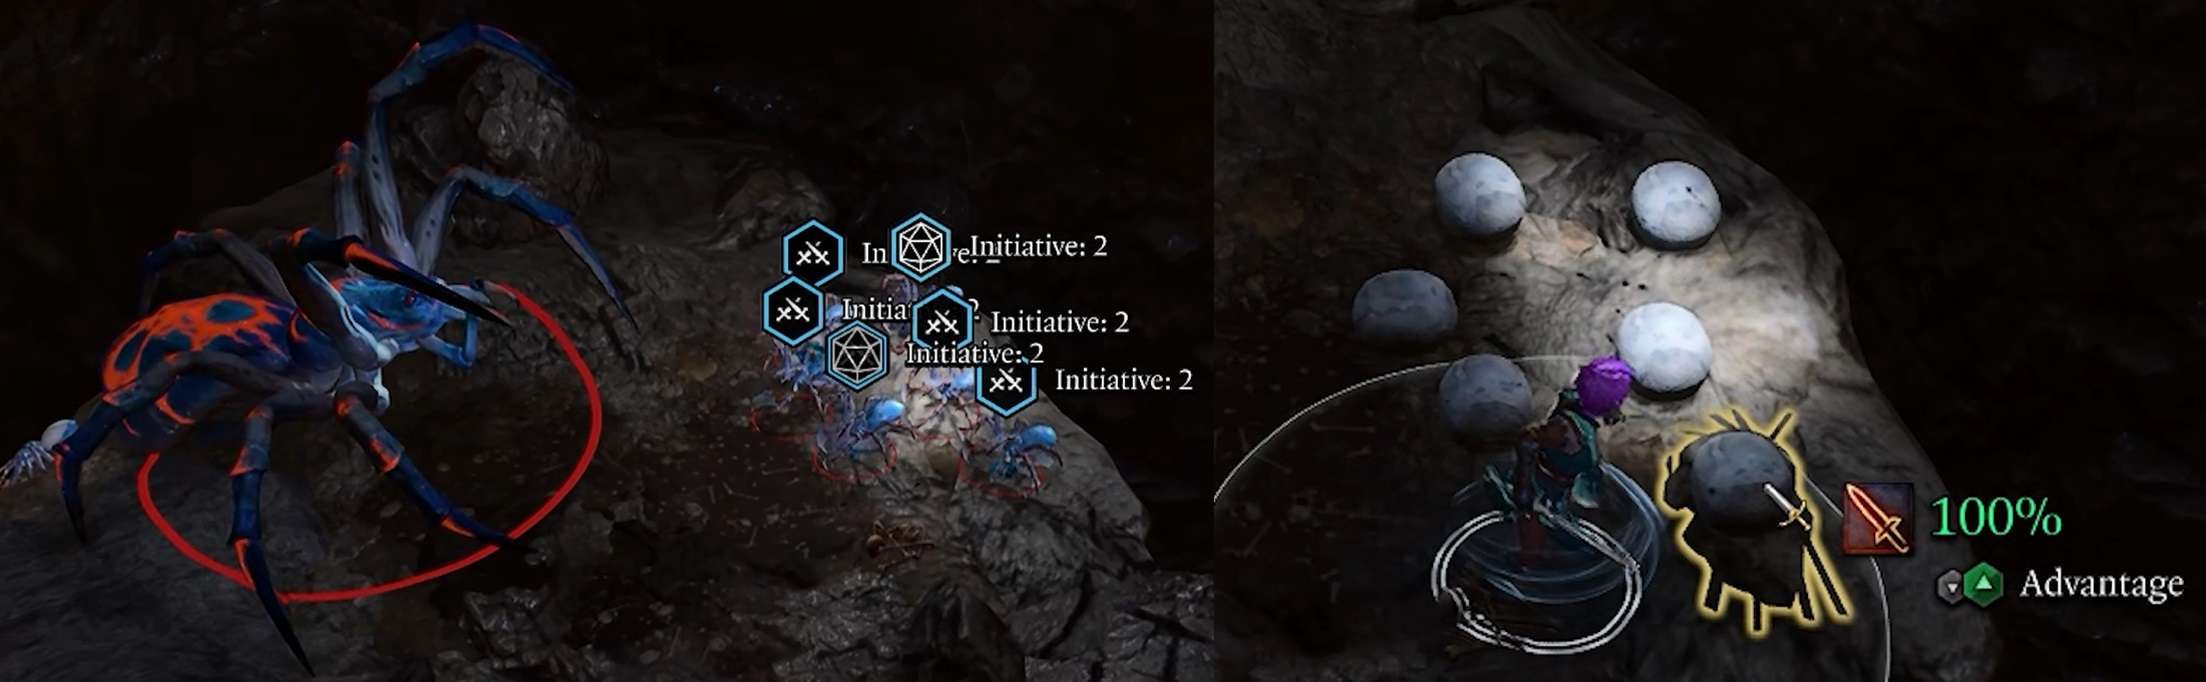
Placing items into key areas, ready to start a fight, or be used at the right moment in one, can be make tough encounters far easier to deal with.
Characters with high Strength can hold onto boxes. Ready to build combat towers for your ranged characters to gain benefits from.
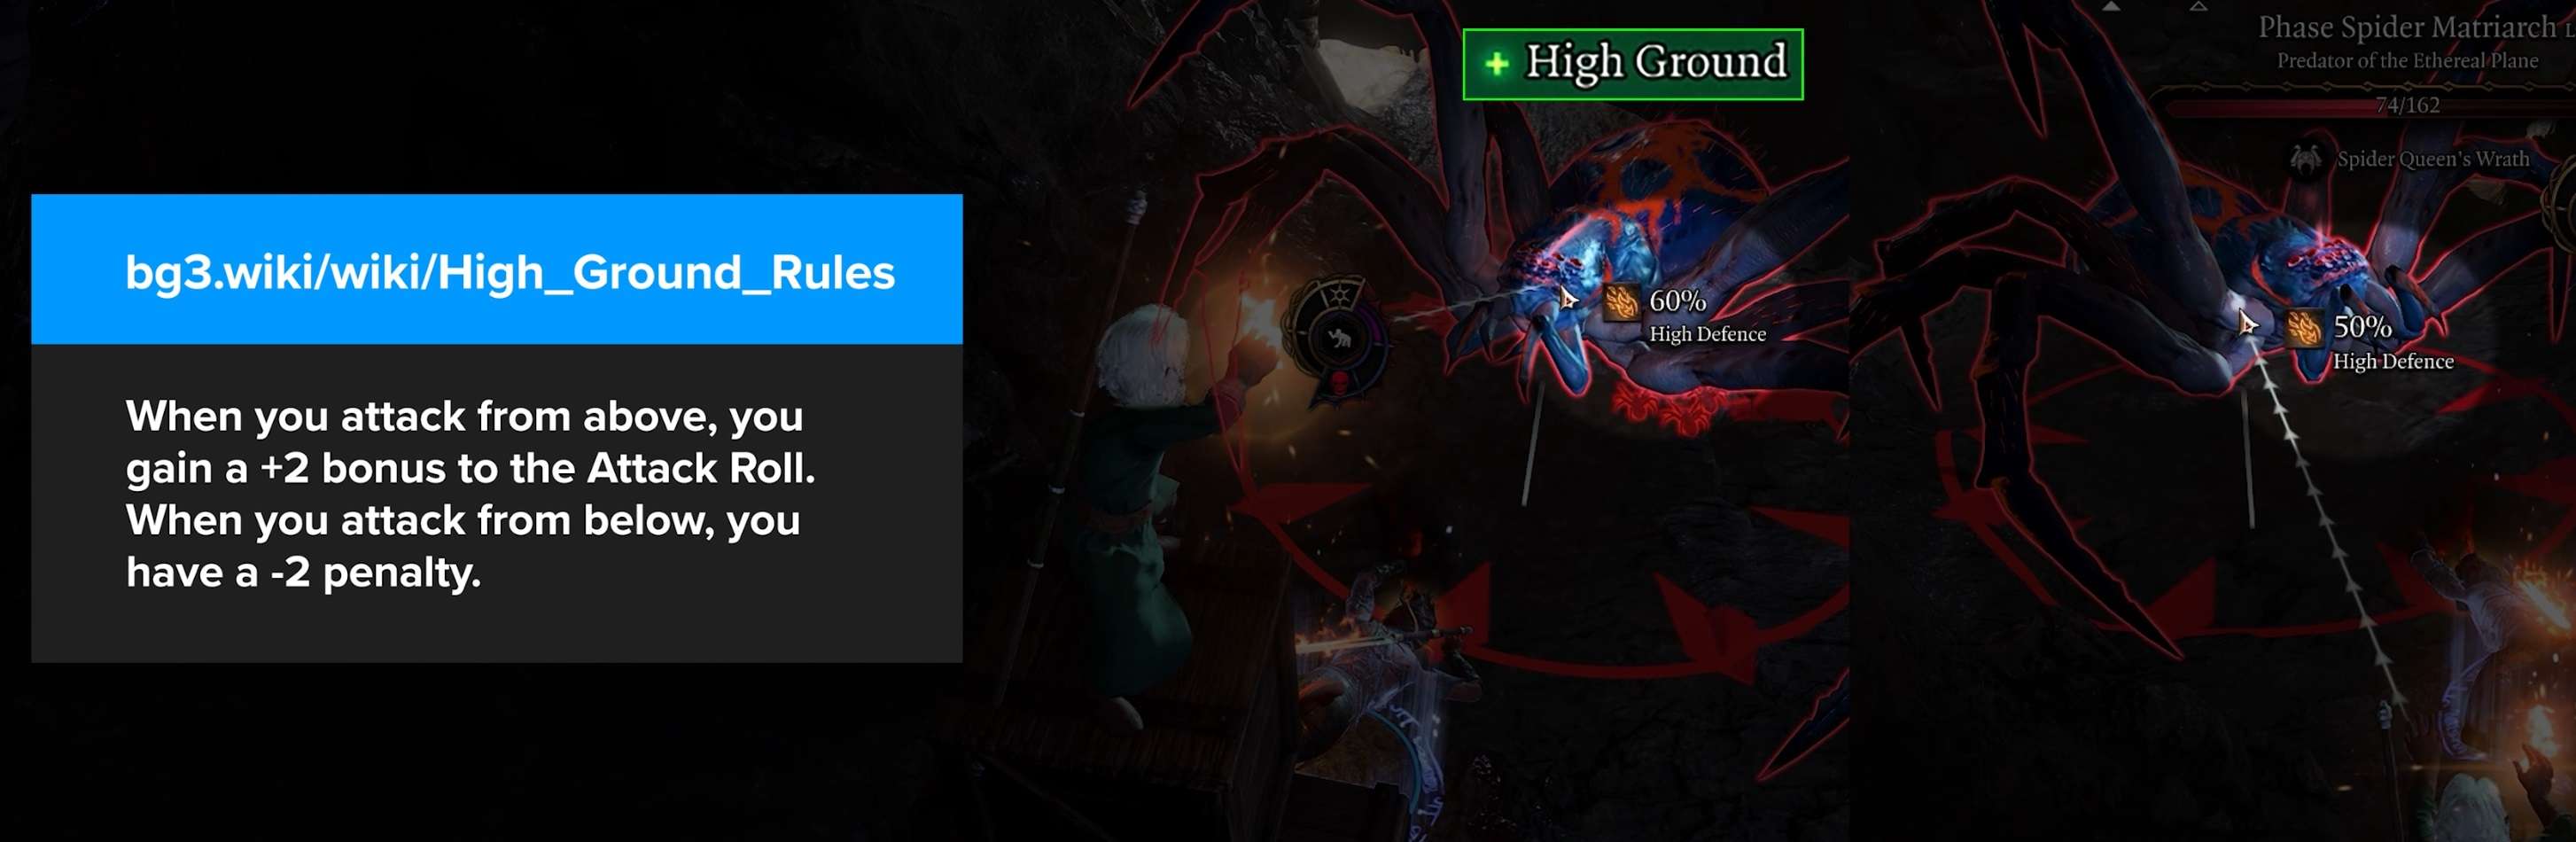
In some of the harder encounters early on, +2 to hit with High Ground can make a big difference. And you also get a defensive bonus for squishy ranged characters using them.
This tactic is absolutely not essential for your playthrough, but it highlights some of the interesting mechanics in the game.
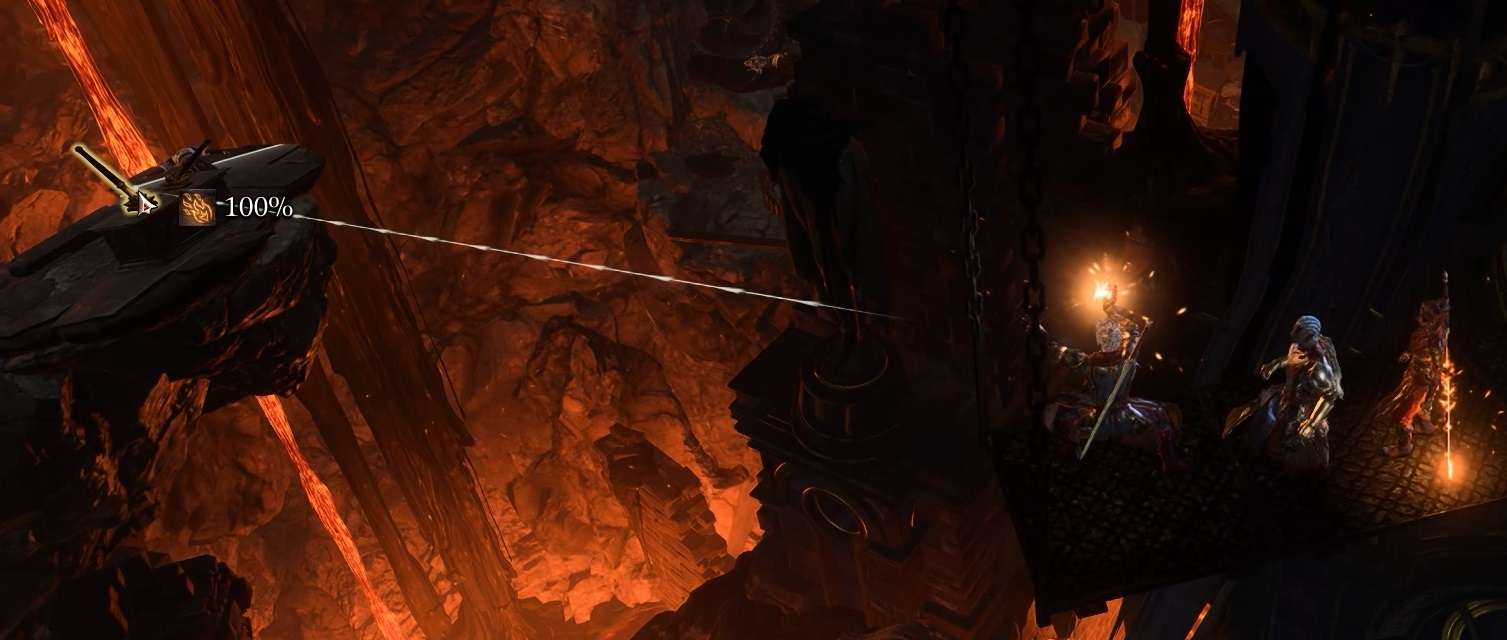
You can also run away and then use the flee mechanic if your prepping gets noticed. Potions of invisibility can help with this, or dashing away and hiding works also. Just ensure you get 27 metres away and you can check this by hovering over the “Flee” button. You will instantly return to camp once you flee.
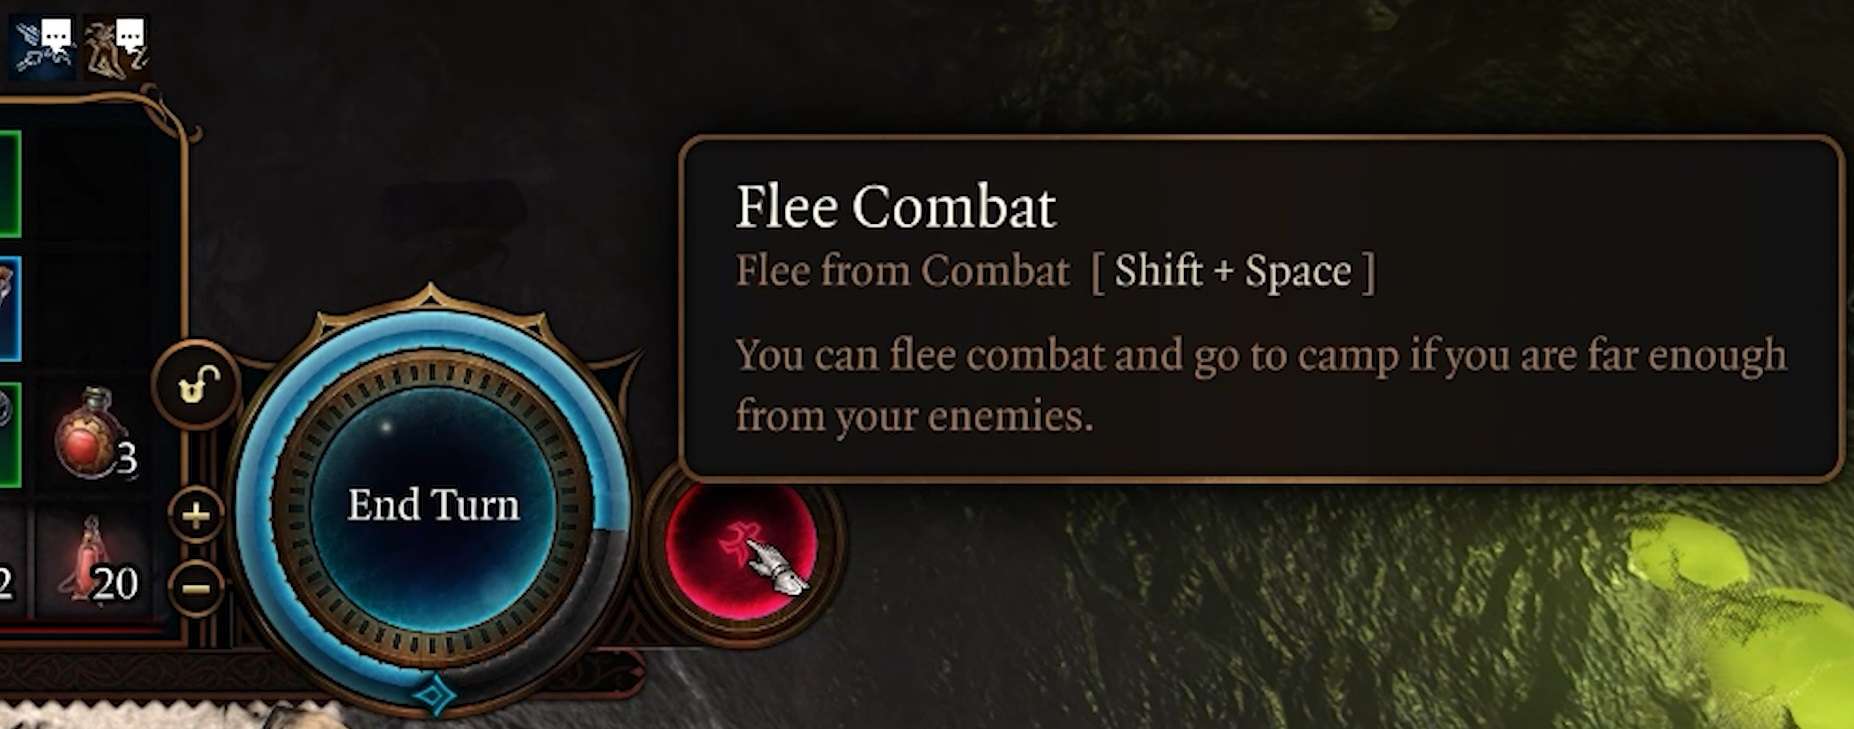
Fleeing can allow you to return later and start the fight when completely ready. Turn based mode can help you with applying buffs to your party. Ensuring they last for as long as possible when combat starts.

Flasks, Potions, Elixirs & Coatings
Flasks, potions and elixirs are very helpful early game, with some like the Potion of Speed being a staple throughout the entire play-through.
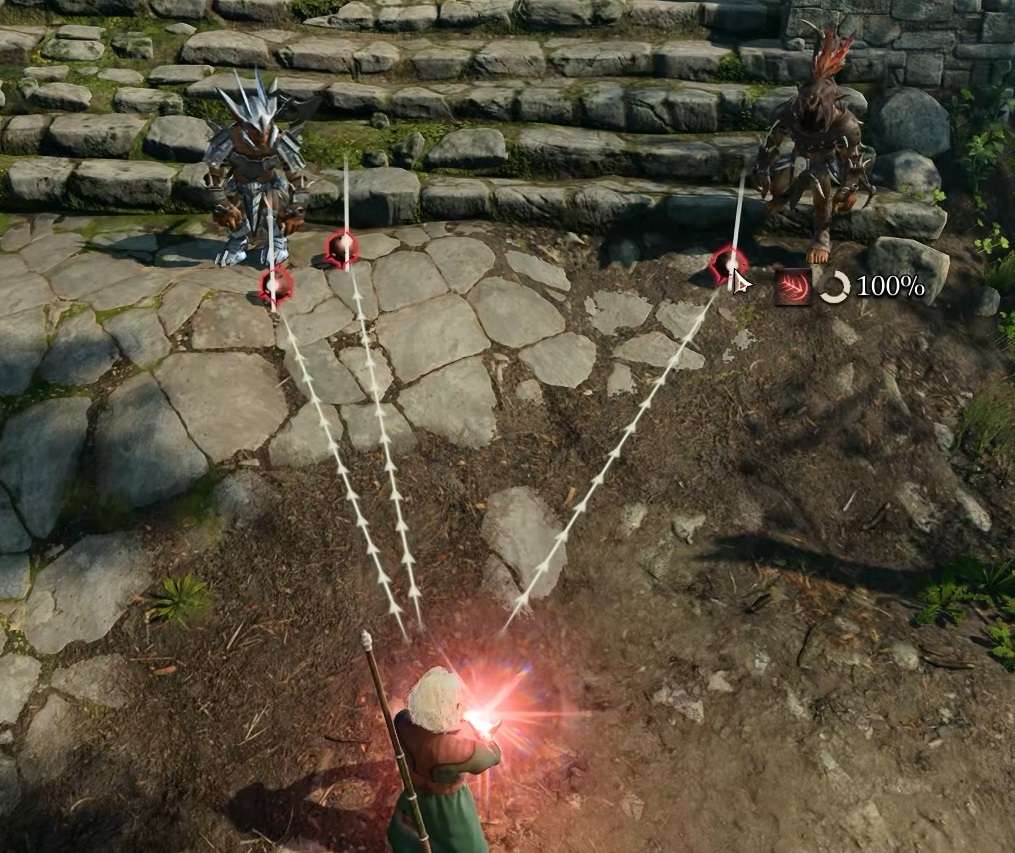
You can throw potions to hit multiple targets and spread the effect. You can also drop them on the ground, position your characters around it and attack, extending the range and buffing more targets. This can be temperamental in whether it buffs everyone or just one person, but it can be extremely powerful when it does work.
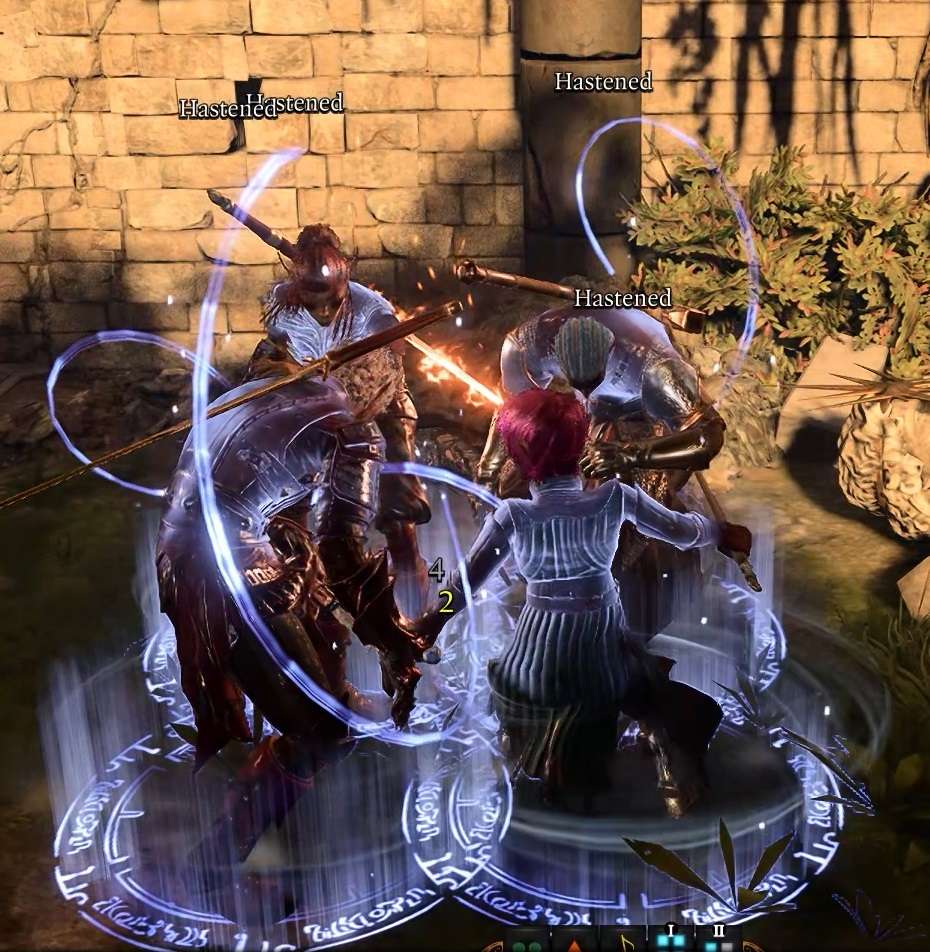
And the same goes for healing potions that can be thrown in combat to heal and even revive downed characters. Or dropped on the ground after combat to heal your entire party, extending their supply.

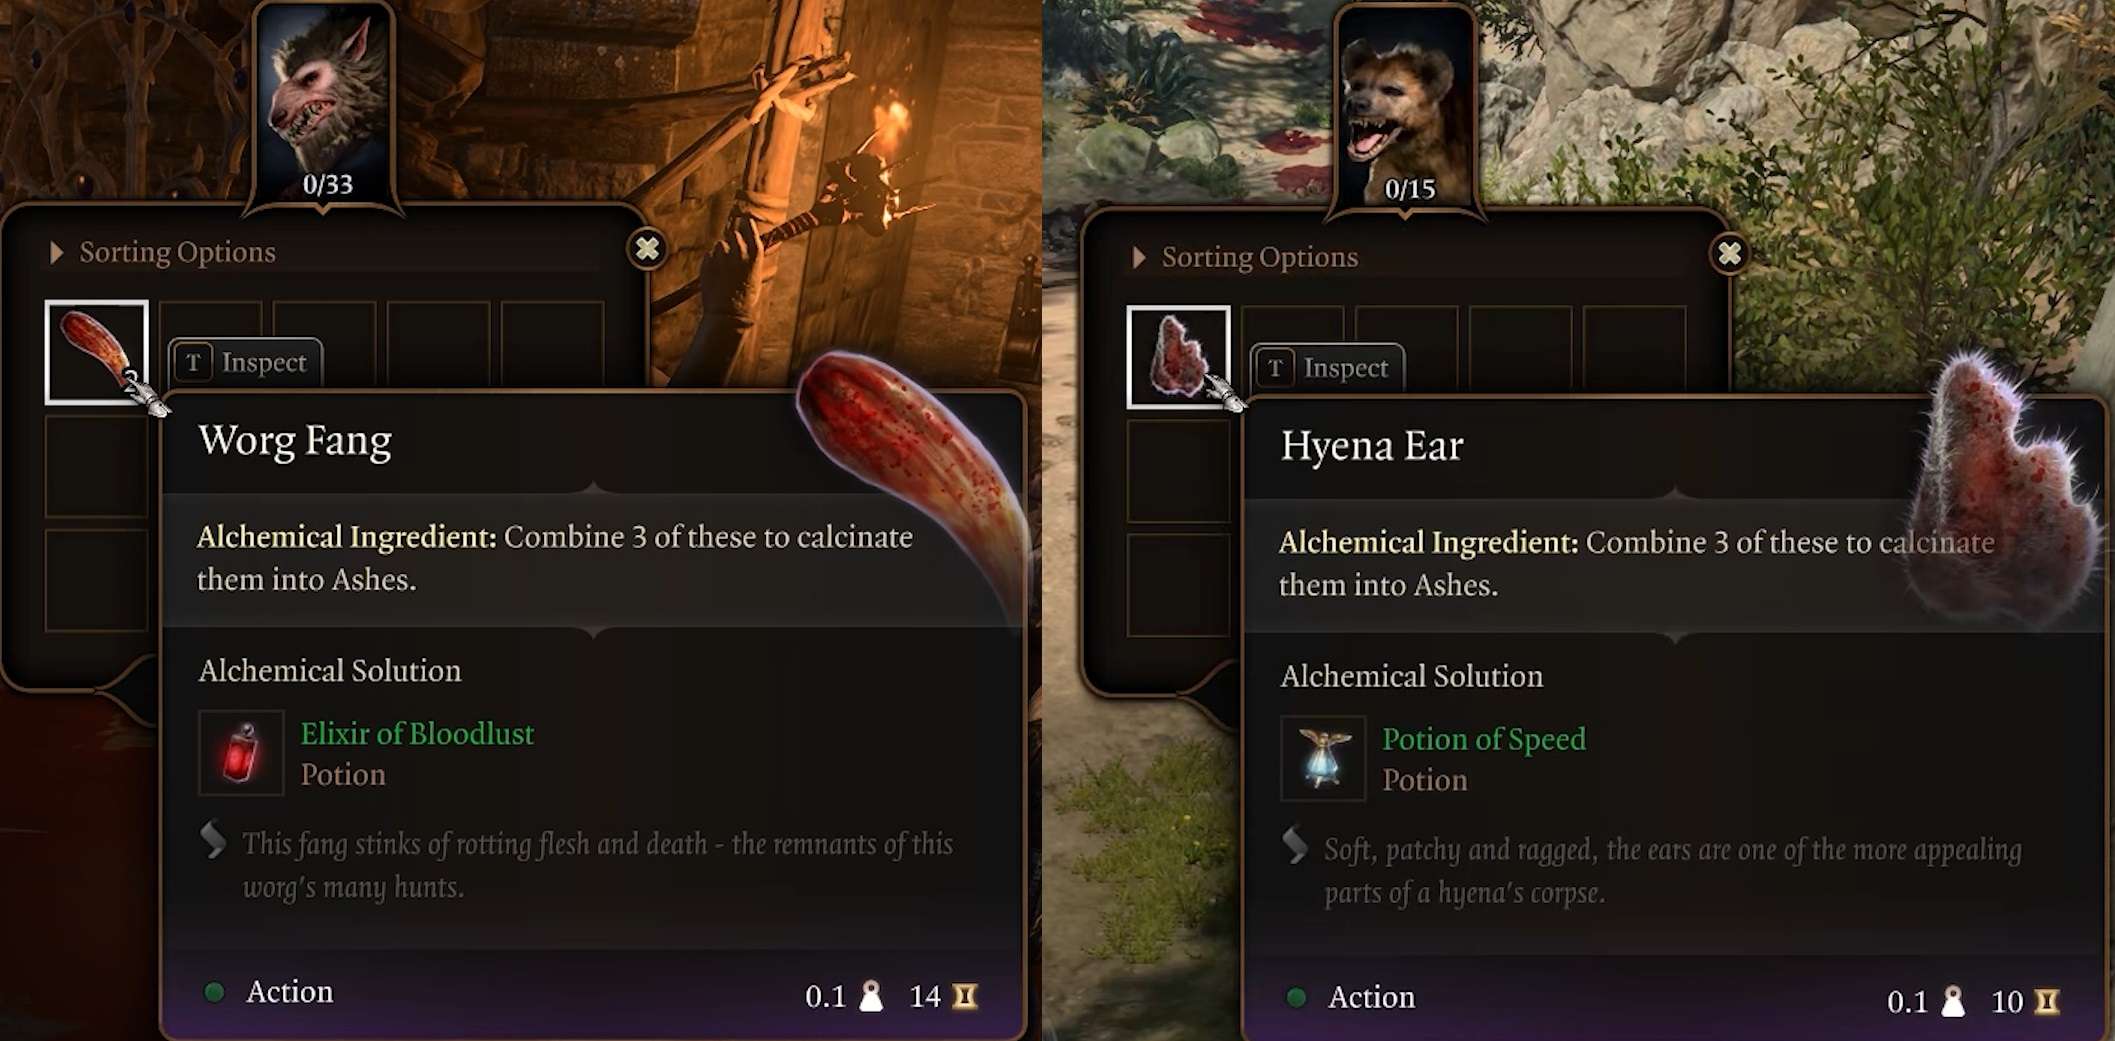
The Bloodlust Elixir provides an additional action when killing an enemy, this is an amazing item throughout the entire game.
Potions of speed need Hyena Ears and the Bloodlust Elixir requires Warg Fangs to craft them. If you see these ingredients always take them.
Vendors can sell them either in completed form ready to use, or the ingredients used to craft them, so keep an eye out whenever you’re at a shop for either.
On the topic of vendors, Charisma will reduce the cost to buy items from them. You only need to start the conversation with your character who has the highest value. Jumping to others mid purchase will still use the better price.
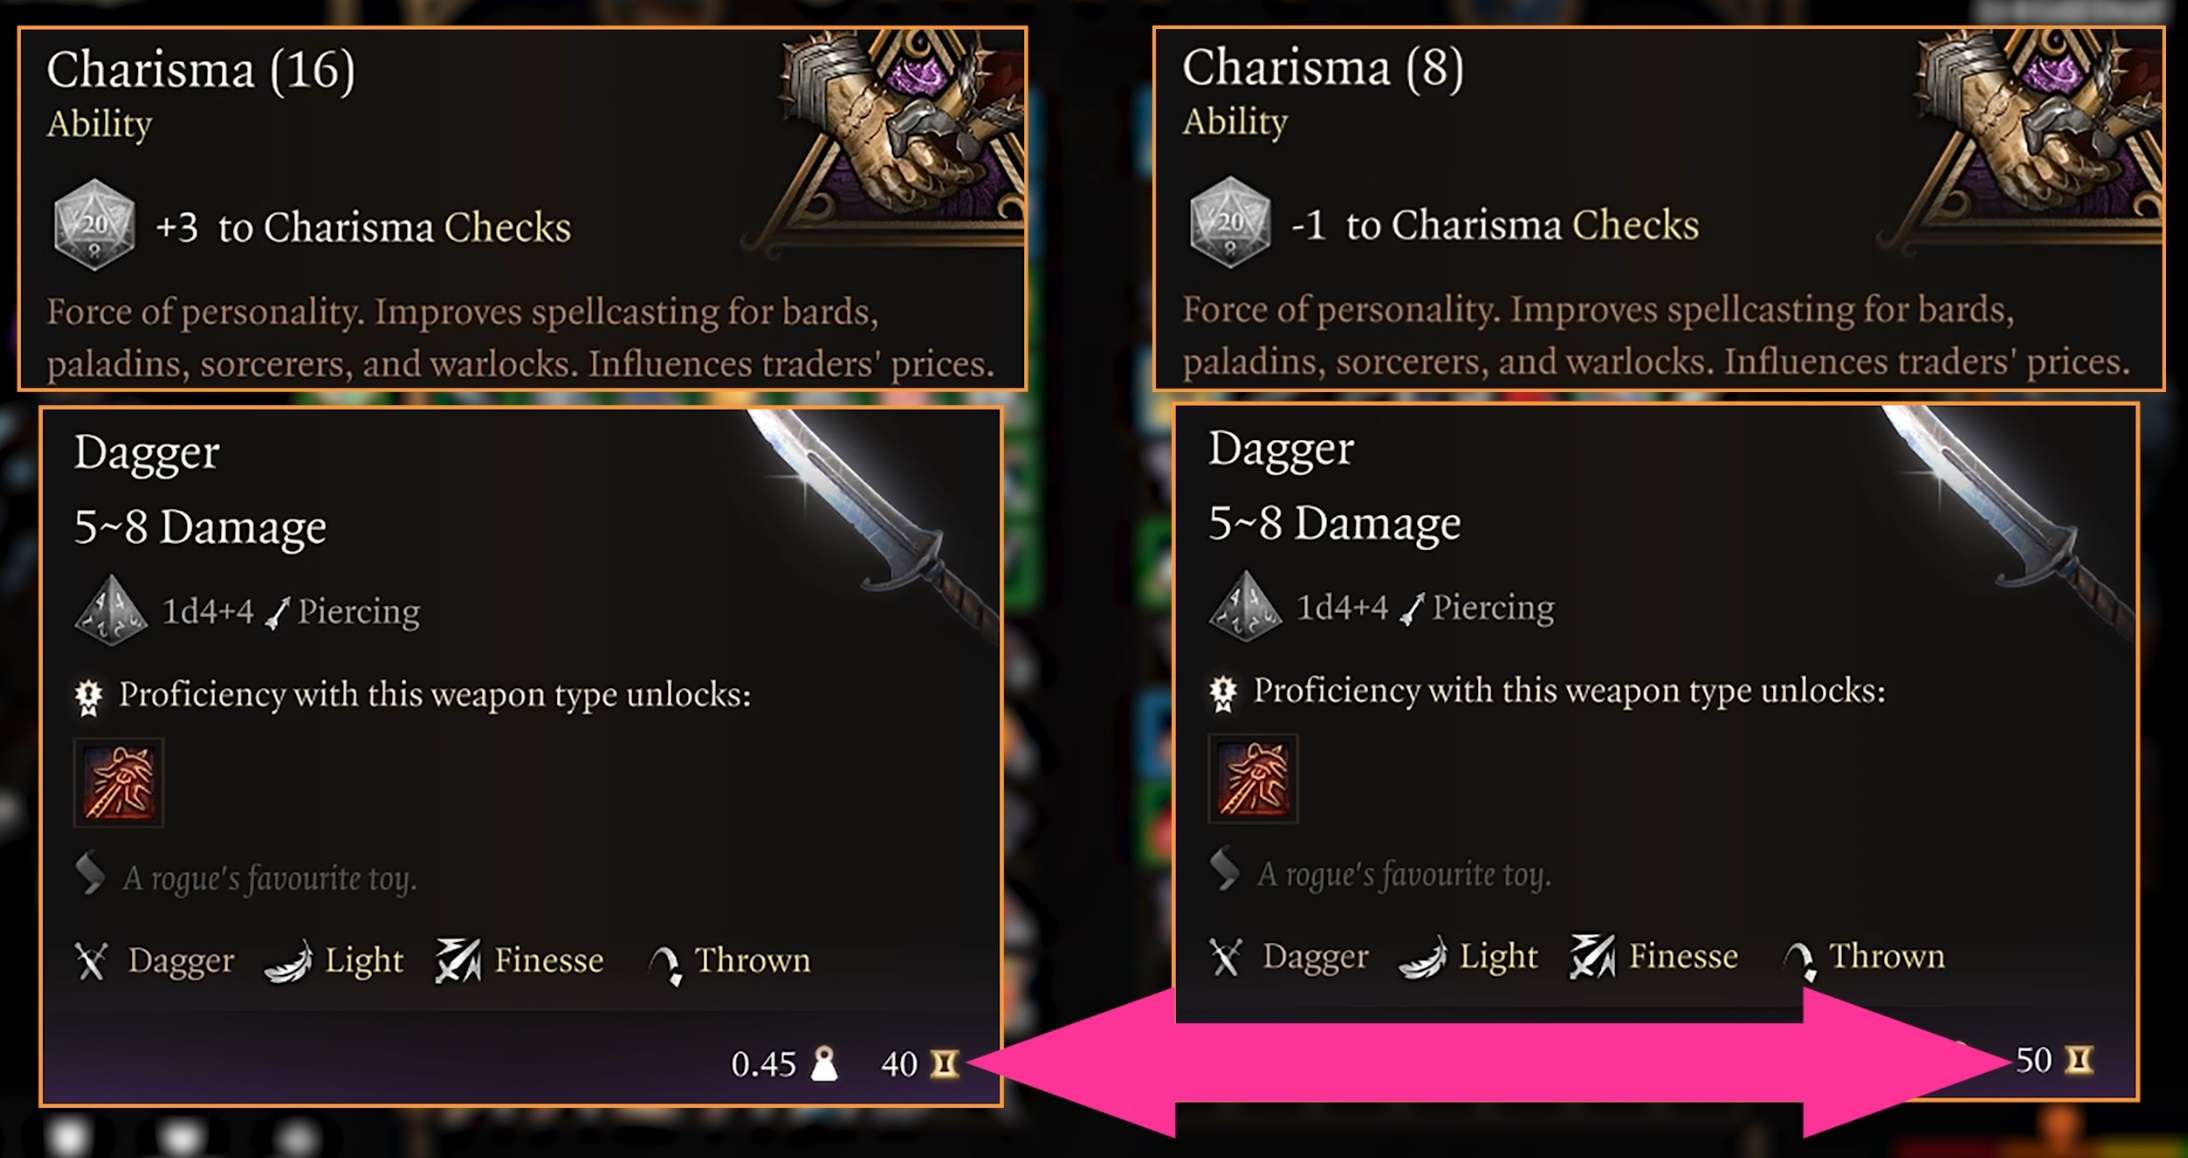
You can also switch to Barter Mode and give the vendor gold or items to boost their attitude towards you. This way they give you better discounts and buy items at a higher value. This is handy for vendors you will be using for a long time. And once again, remember to do this using the character with the highest Charisma value and always start the conversation with that character.

Weapon coatings can be powerful early game. Boosting the chances of hitting on low level characters with poor hit chances.
Some like Drow poison have a chance at putting enemies to sleep. This can help to reduce damage taken, and end fights quickly as you land guaranteed critical hits on sleeping targets.
Dropping a candle or a lit torch on the floor will allow you to dip your weapons in the flame to deal extra fire damage. It can also provide light in an area, helping your hit chances without losing a weapon slot to hold the torch.
Prone and Push
When you or enemies fall certain distances, additional damage is normally dealt, there is also the chance the falling creature becomes Prone, making them lose actions and other negative effects. Be vigilant for opportunities to abuse this mechanic such as in this example of destroying the spiders bridge when they are standing on it or knocking them off it.
Push is also a bonus action and early game you may not have many bonus actions to use. Push can help assist you to deal additional damage or avoid attacks of opportunity by knocking enemies back before running away.
Perception & Burrow Holes
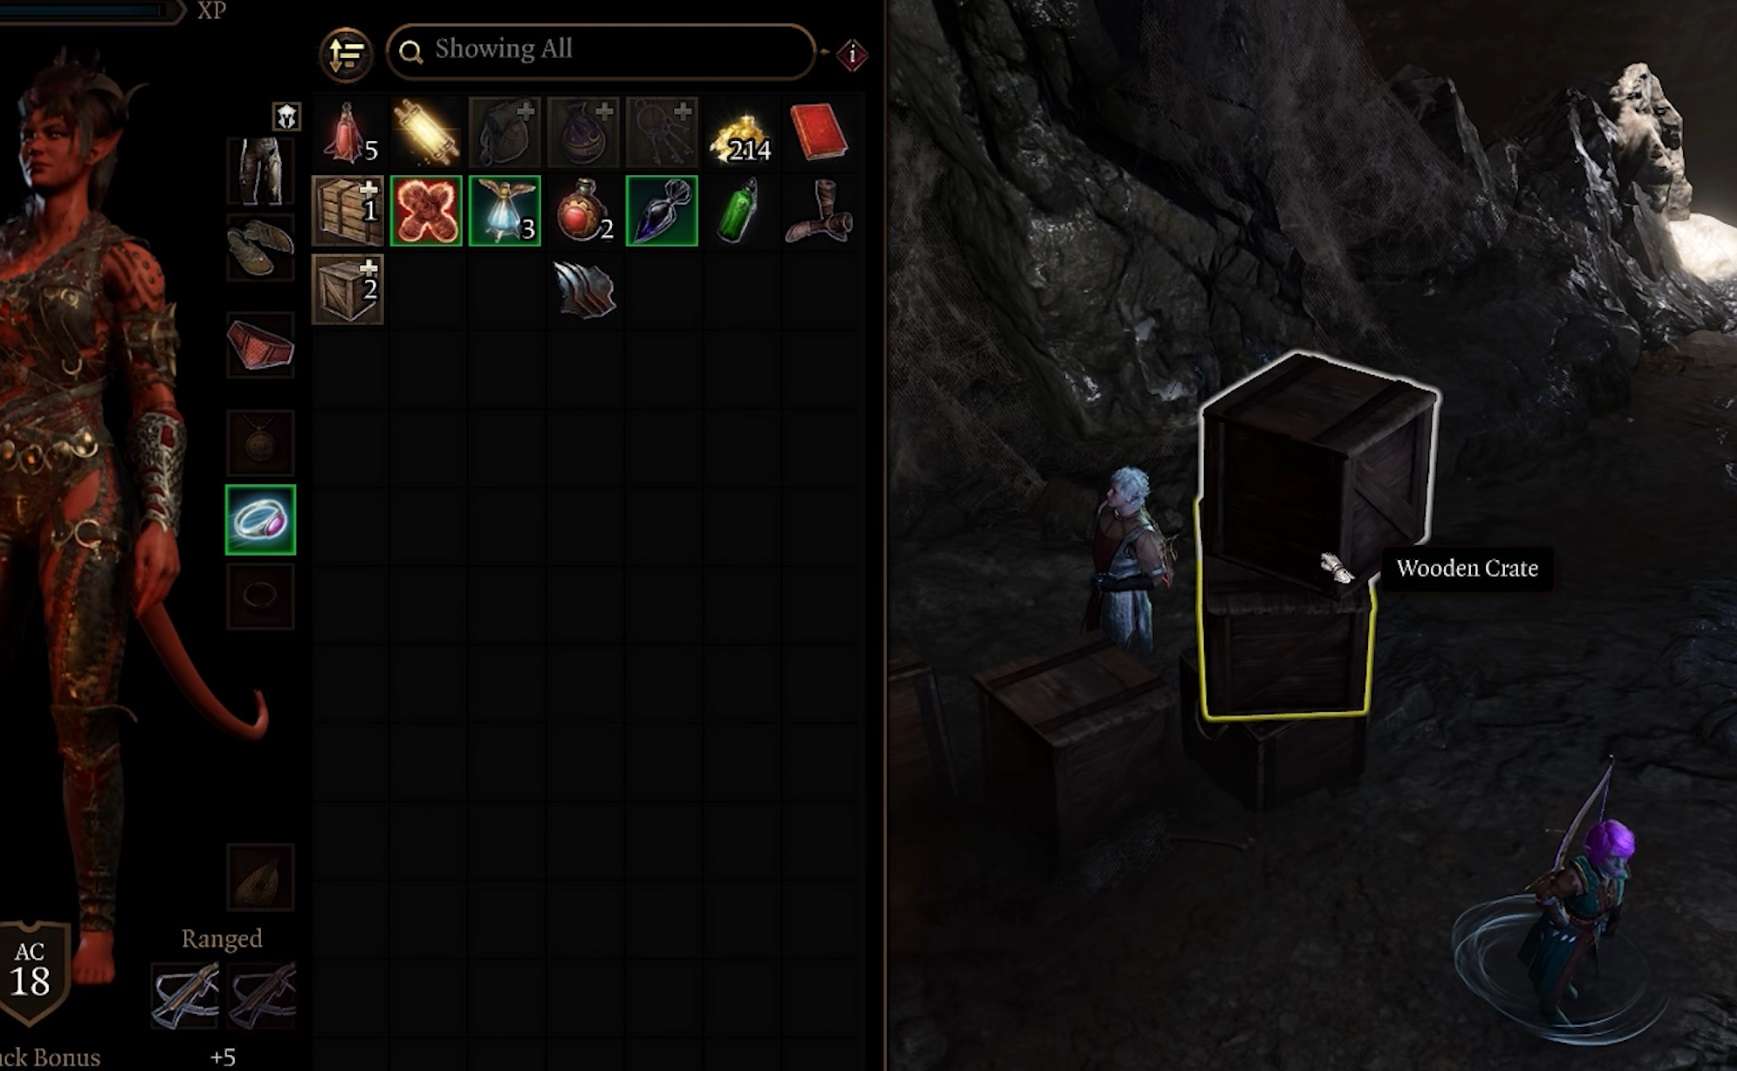
Pressing Alt on PC or holding down on the right stick on controller will show world information. This is helps when looting. It won’t reveal everything, so keep an eye out for crates and barrels still, but it will highlight loot on the floor.
Not everything is shown with ALT. And the Skill Perception is required to find traps and hidden items. Having at least one character with good Wisdom and Proficiency in Perception checks is a very good idea!
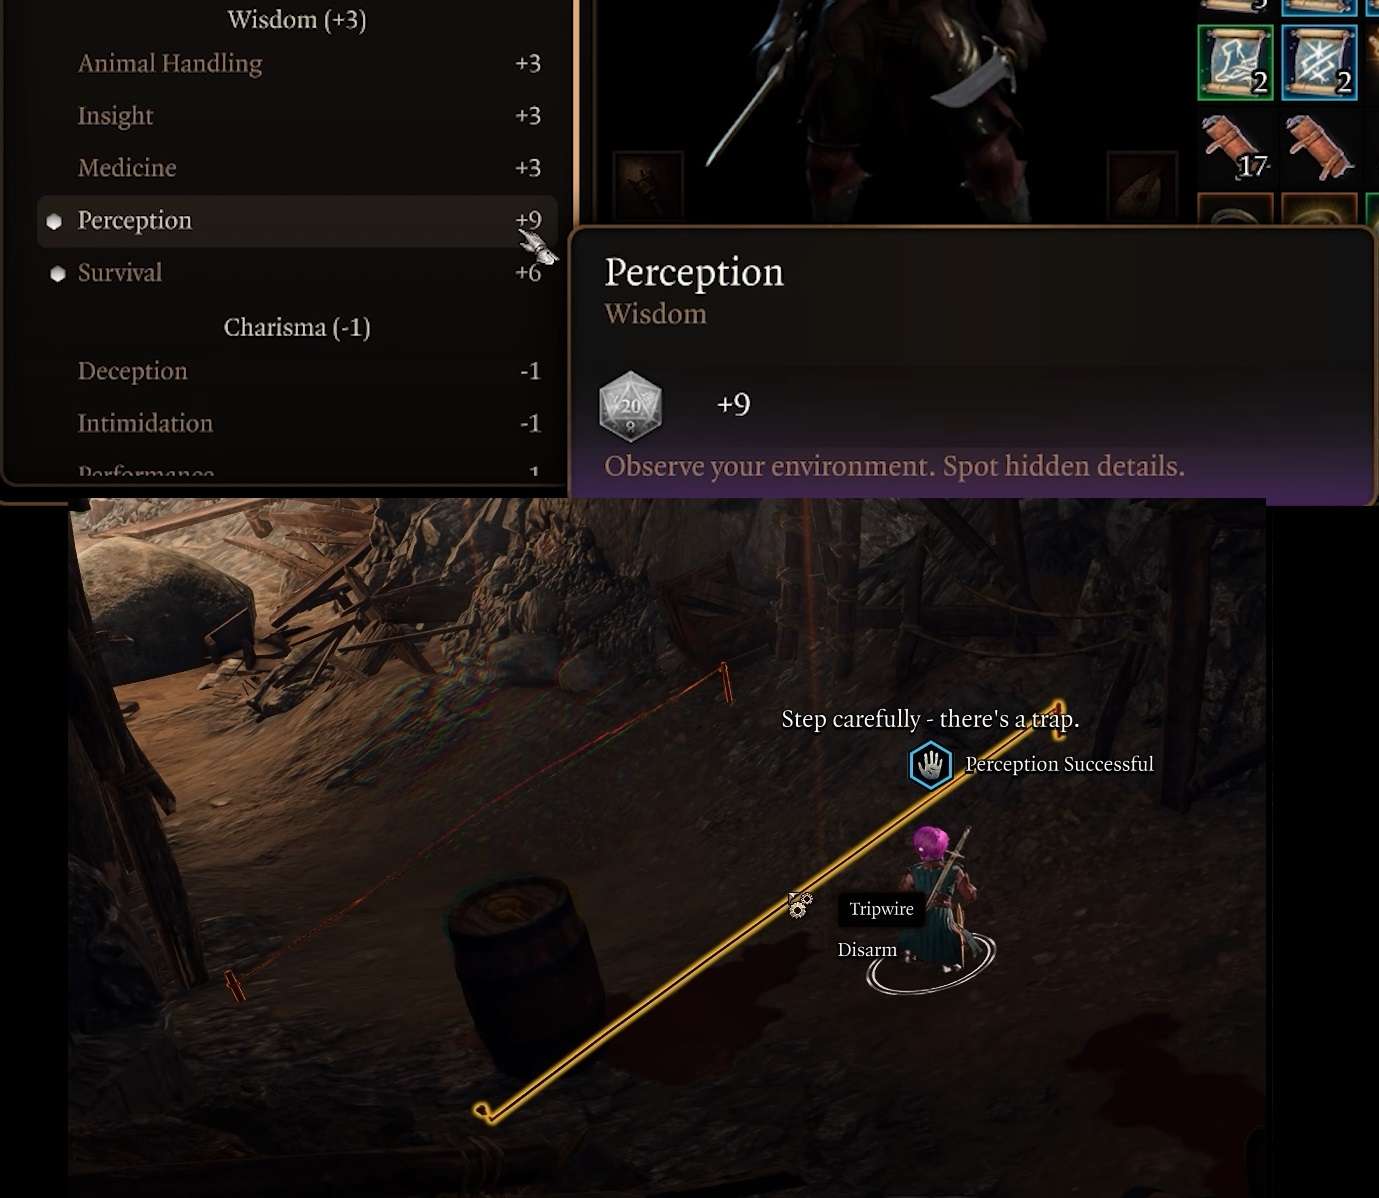
Using Perception, you will discover Burrow Holes. These are tight tunnels that often lead to a new area.
You can use the Cantrip spell Mage Hand to squeeze through and perhaps press a button to open the door.
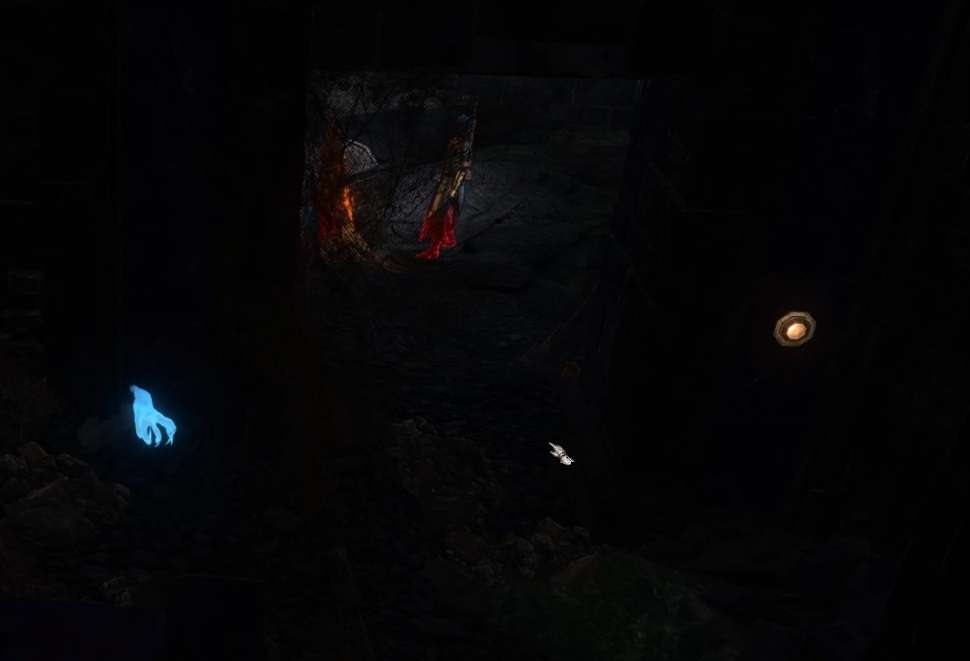
You can cast reduce on a character who is already small like a Gnome or Halfling to squeeze through. The spell disguise can help you to become smaller and you can combine this with Reduce.
The spell Gaseous Form allows you to float through. And some crevices only require you to be small not tiny to get through.
And with your own Perception as a player, keep your eyes peeled on the screen for secrets in the terrain. Panning the camera around can reveal locations you can jump to and get rewarded for your curiosity.
Jumping Tips
Jumping can lead to issues with party members refusing to jump or getting stuck though. This is often resolved by simply selecting a different character who has made the jump already.
If not remember to split or unchain the party members who have already made the jump, then select the others to manually control and jump them down.
Increasing Strength boosts jump distances, this is why you will often see your fighter classes have a better jump than the others.
You can also put items on your Quickbar. Equipping boots or other items that provide a jumping boost, and then changing back ready for combat.
Jump is also amazingly useful in fights, it is a bonus action and will allow you to leap over pesky enemies or allies who are in the way whilst retaining your primary action. It can get you to high ground which we know from earlier provides many benefits. Never forget Jump and on PC the default hot key is “Z”.

Random Tips
Shooting leavers and switches can activate them in most circumstances. If in doubt, give it a shot.
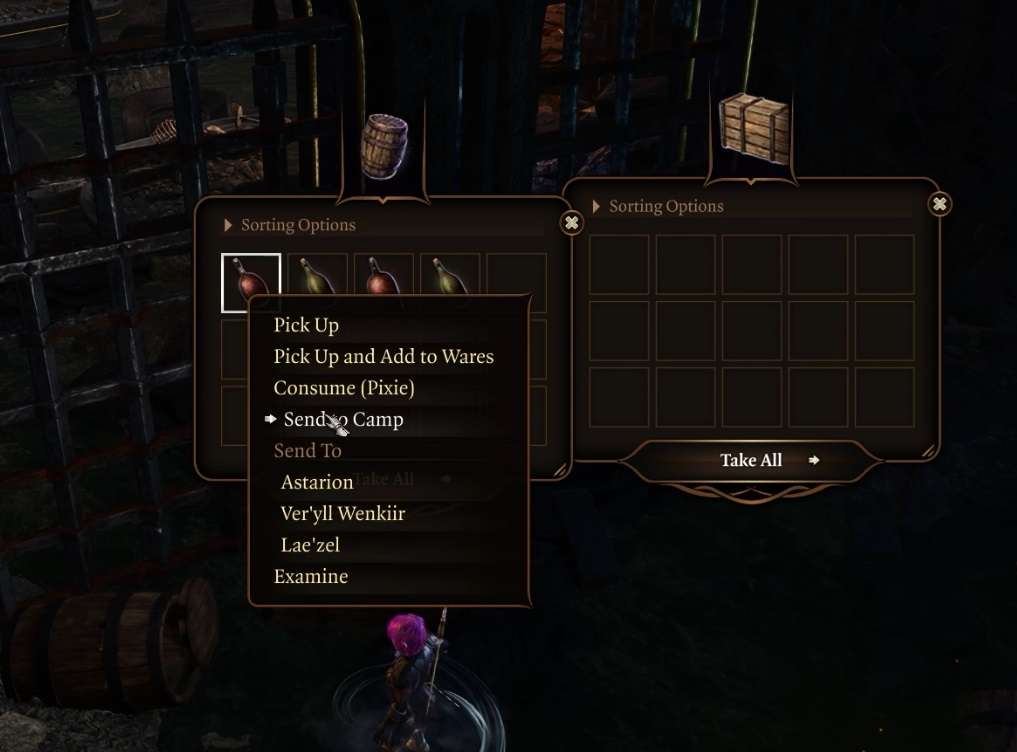
If your characters start to get encumbered with all the loot you have. You can send items directly to your camp ready to be picked up and sold later on. You can also do this with camp supplies, so don’t leave any fine wines behind!
Some items found are parts of a greater hole that can then be combined. Pay attention if the item name has a part in it or if you have multiple items that are named or look similar.
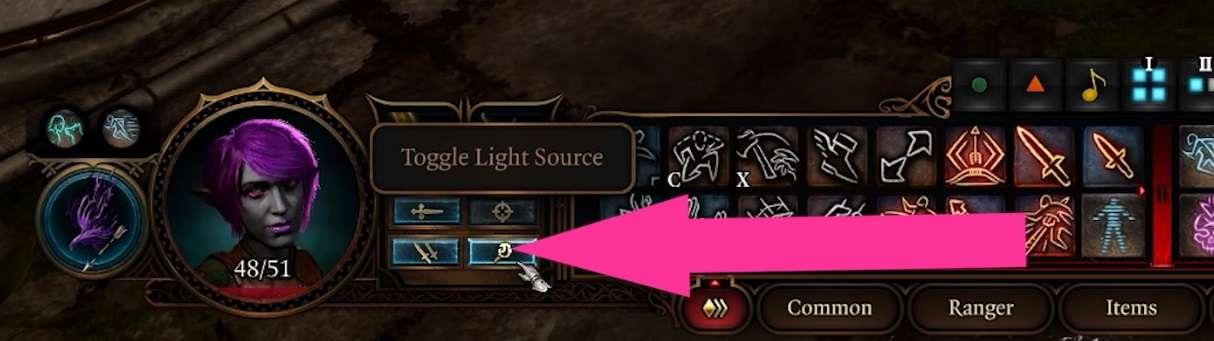
There is a Toggle Light Source option that makes you select your torch item, when clicked again it returns your weapons to how they were before. Saving you manually doing this each time and re-equipping your weapon.
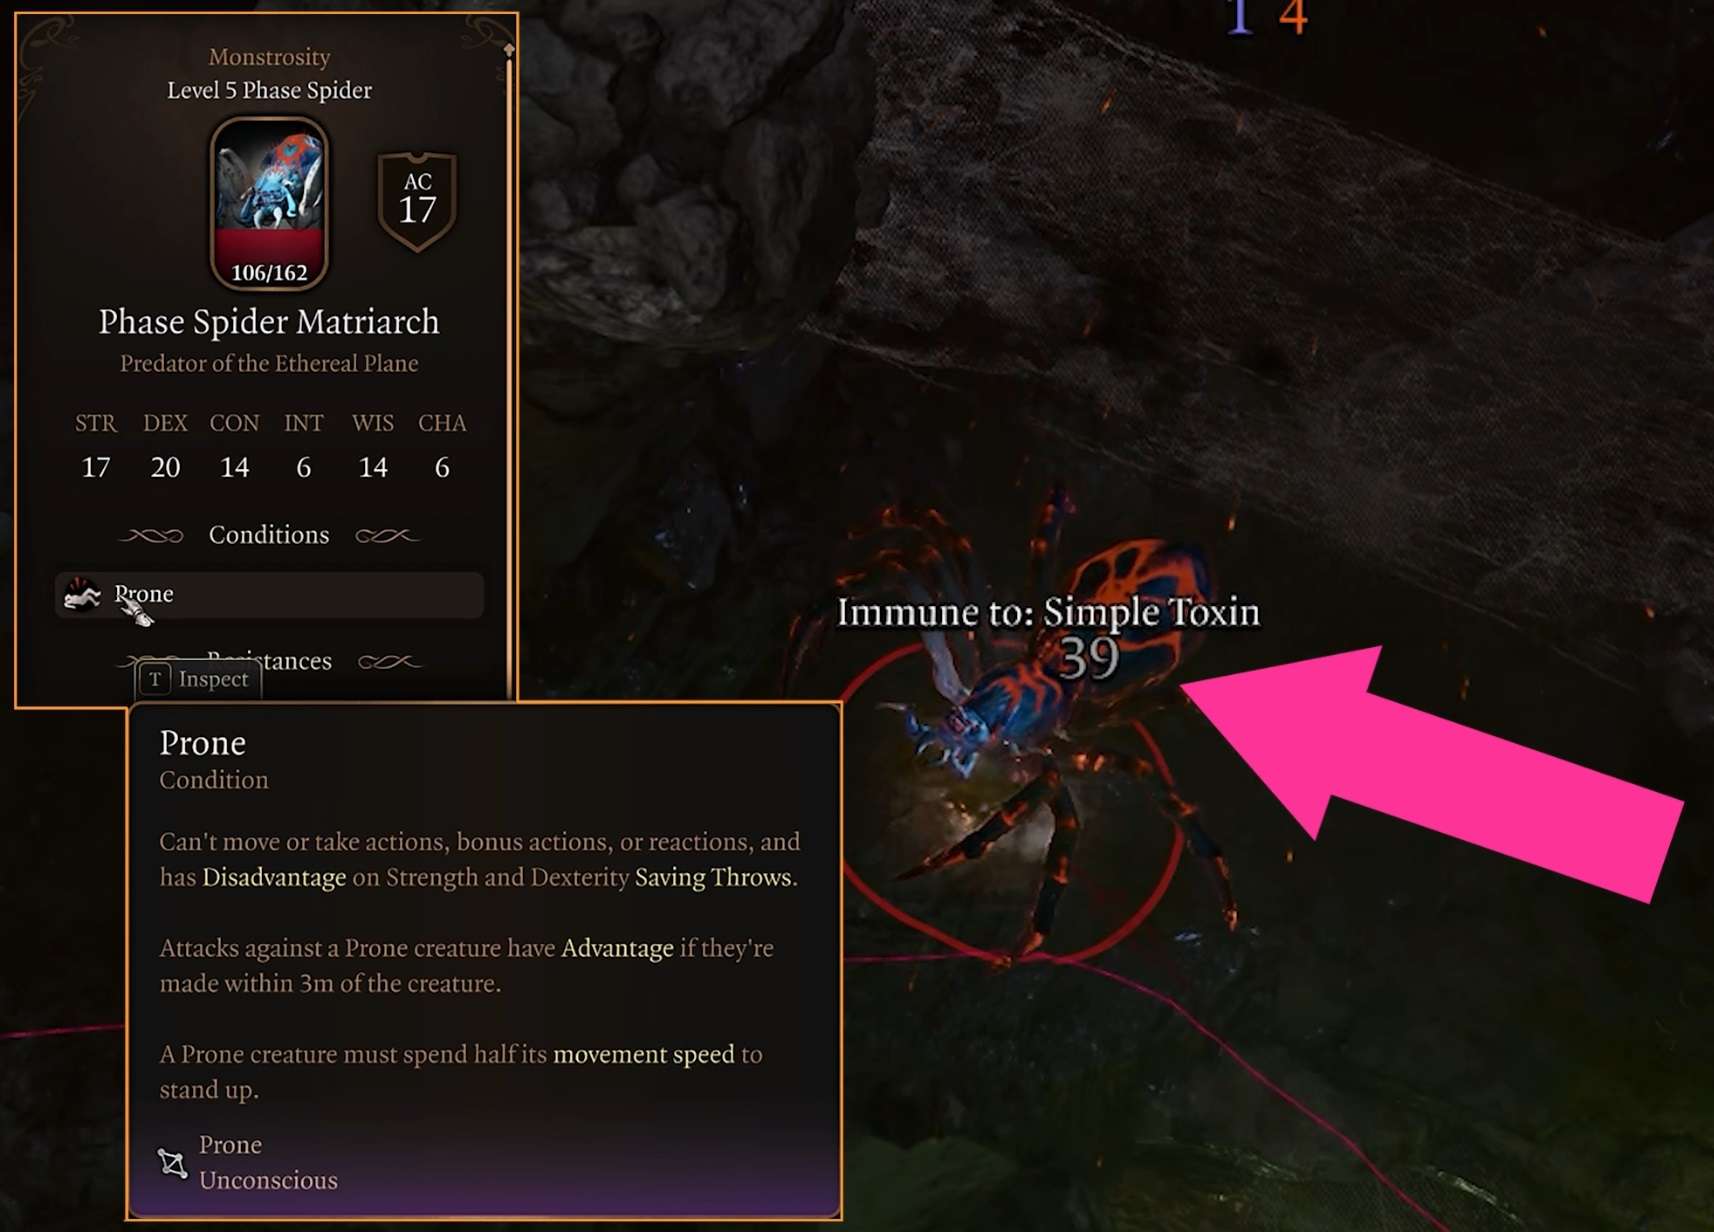
Pressing T or down on the controller D Pad, will allow you to examine enemies for resistances and bonuses. You can also do this on curious items to get more information and on spells and abilities. I highly recommend you use this feature in “Honour” mode to get an idea of what new tricks the enemies have.
Clicking an equipment slot will show everything that can be equipped into it. Handy for inventory management and ensuring everyone is using the best item.
On PC pressing “Tab” will allow you to manage the entire party at the same time. Useful for inventory management.
Advantage is super helpful in that is allows you to roll two dice and get the better result, once again make use of that quick bar to quickly change back again if it skill check dependant for example.
Bookshelves can often have scrolls in them, sometimes very good ones and so I normally always check them.
Water can be used to put out fires and remove acid puddles. It can also wash bloodied characters making them look a bit a more presentable when strolling through town.
This button will also help you look a bit more civilised when walking around. If you prefer this look to your armour, you can still use it in combat and retain all bonuses.
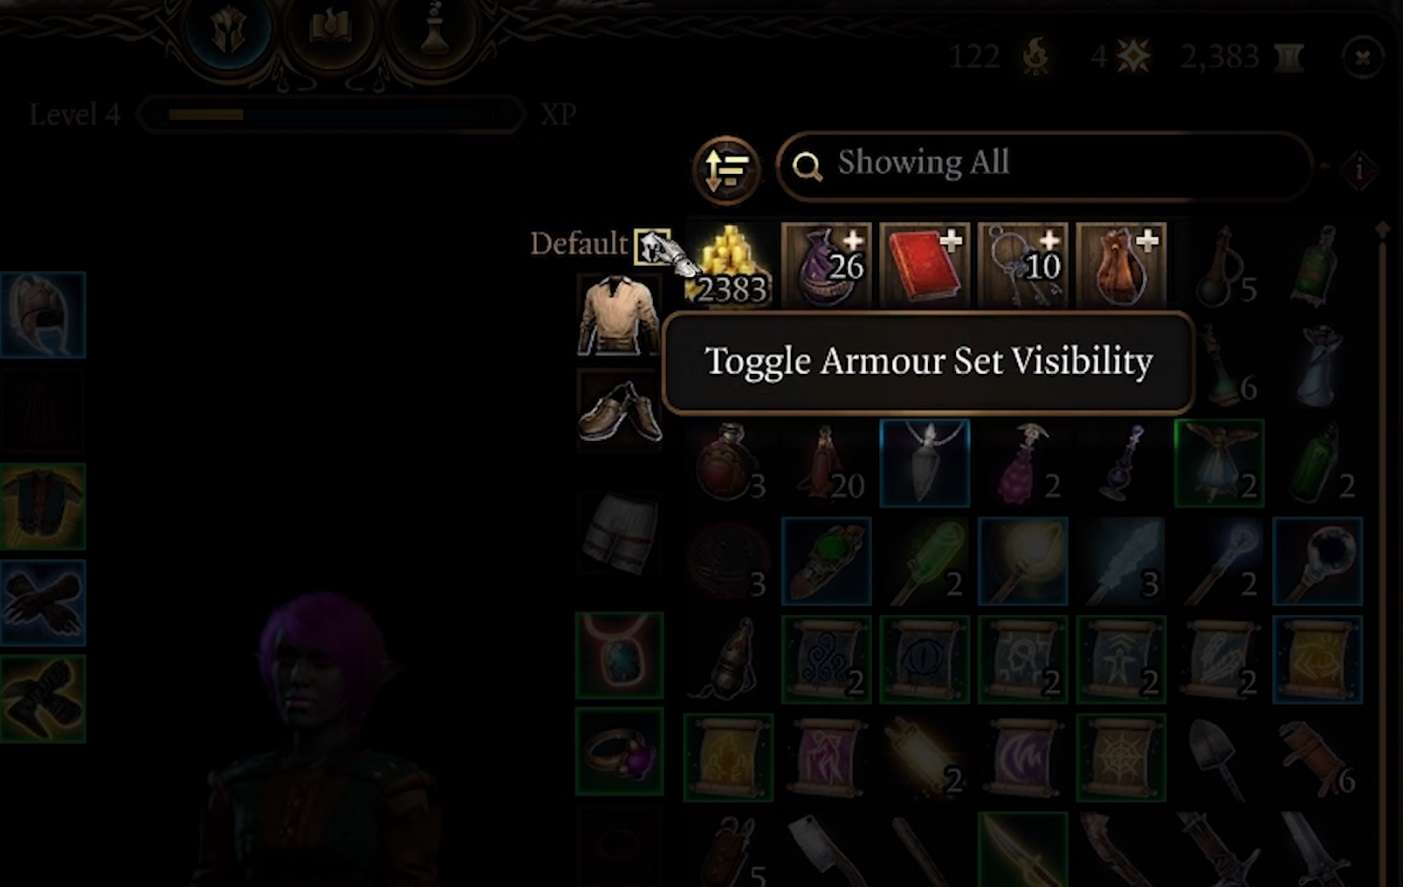
Nearly all the different type of gems no matter how exotic they look are only sold for gold. And the same goes for bars for metal like silver bars, I thought they might come in handy for crafting but they can only be sold currently.
There is plenty more for you to discover, but I hope this helps if you a new player or an experienced one. Thank you for taking the time to read this guide.
As a reminder the fully voiced and animated video version of this guide is below.


Be the first to comment