
Small guide that explains monsters.
Ultimate Guide to Monsters
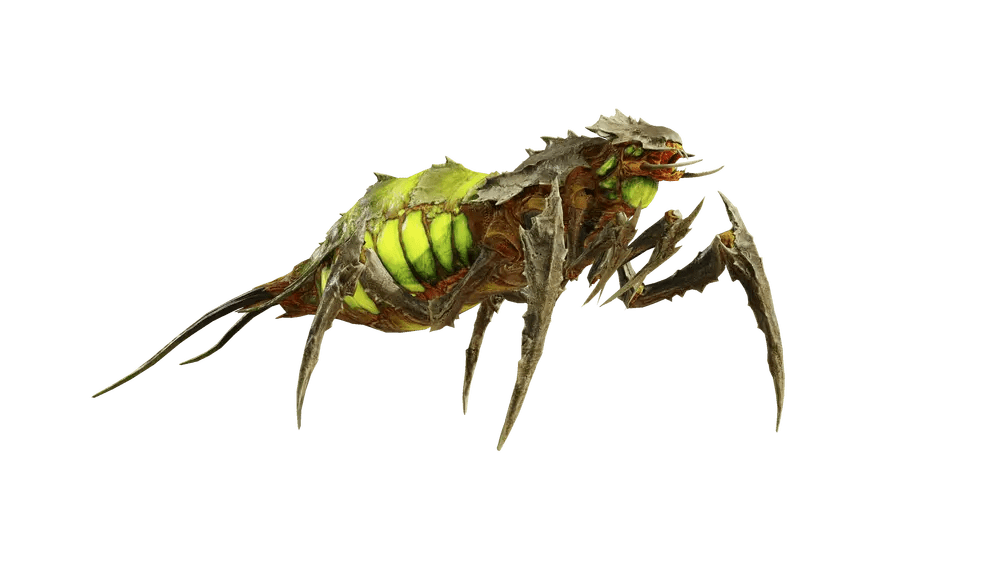
Terminids
Scavenger
Variations:
Basic Scavenger
This low level bug will be found in all difficulties. It has only a basic claw attack, but should not be underestimated when encountered in large numbers. They can easily kill an unaware helldiver in three to five hits.
Bile Spitter
This low level bug is actually a very young bile spewer. It can be found in easy difficulty and up. It has the basic claw attack as well as a short range bile spit. The bile spit is meant to slow a helldiver down to prevent escaping and allowing the swarm to surround. They can also be seen accompanying a Nursing Spewer and Bile Spewer portals in groups of five or more.
The Hopper
This low level bug is actually a very young hunter. It can be found in easy difficulty and higher. This bug is has a slightly higher threat level due to it’s ability to cover a large distance with it’s jump. They often come in groups of five or more but are easily dealt with.
Warrior

Warriors are predominately found on any planet with bug missions.
Hit them on the soft spots underneath them or directly in the face. Alternatively, use shotguns or armor-piercing weapons to take their shells off. When they come in groups, use Eagle strikes or anti-tank weaponry to blow up groups of them all at once
The Breaker shotgun is also recommended for taking them out in one hit.
Hunter

Found on medium to high level planets with a bug presence, you’ll see Hunters darting around and leaping from one place to another, to try and track it’s target. Hunters are agile, causing it to be more challenging to hit, but also easy to take down when they’re launching themselves at its target directly.
Any weapon will do against them, but explosives and rapid-firing weapons will take out groups of them and get the job done faster.
It is highly recommended to kill Hunters first since they have relatively high movement speed and attack damage.
Stalker

Can appear on every planets with bug missions, predominantly on Stalker Lairs. They can be quite hard to find as the nests are hidden as dark spots on certain maps.
Stalkers will camouflage themselves, but one can easily reveal their locations by using Smoke Grenades or by stepping on spore clouds that are released from eggs around the map. They also move quickly and have similar attacks to Hunters.
Stalkers can use their tongues to reach a target from a distance, but can be taken down with concentrated fire or high-impact weaponry. Nevertheless, they can withstand a lot of damage before succumbing to Managed Democracy’s powerful embrace.
Bile Spewer

Appear on planets with bug missions from Medium level onwards. They are sometimes assigned their own special quest. They’ll constantly spit bile at any Helldivers they target and it can hit from long range.
Can be killed by targeting their backs with explosives as any regular weapons will deal reduced damage. It is often better however to aim for the head as that is considered their “weak spot.” Their heads can be targeted by anything and the damage will not be reduced, (take note that you may need some form of armour penetration to target the head.)
A single well place grenade near or under the Spewer will often one shot or nearly kill them. The rail gun will instant kill with one headshot or two body shots. The grenade launcher will kill in two to three rounds and any other Spewer near the AOE.
Charger

Found on medium to high level planets with bug missions, They are sometimes assigned their own special quest like Bile Spewers and Bile Titans.
Chargers tend to hone in on one member of the team at a time, and then put all their efforts into taking them down. They’re almost entirely armored, except for the yellow patches on their body. While it may seem like these are their weak spots, they aren’t considered so, and any non-explosive damage to these areas will instead deal 10% of the original damage.
Attempting to trick the charger into hitting a wall or rock is a valid strategy, as the charger will be stunned upon impact and be rendered immobile for a short while. However, they can traverse smaller rocks and walls, so caution must be exercised.
To defeat them more effectively, coordinated attacks and team work are needed. Have one person attempt to draw its attention while other divers target one of the front legs. If you manage to blow off the armour on a front leg it will open up a weak spot and will then be much easier to take down. Destroying its rear will cause it to bleed and take damage over time.
A charger can easily be dealt with by a solo helldiver, but you must be equipped with some kind of armor penetration to strip the leg armor, which reveals its weak spot. Once any of the leg armor is removed the charger will take tremendous damage when shot in the exposed leg (it takes about 1/3 of a defender magazine to kill it).
You can also damage the charger’s leg without removing the armor if you are using the MG43 and you are able to hit the joints of the legs or the forelegs, which will count as weakspot damage. This, however, is quite difficult to pull off due to the joints being very small targets.
Bile Titan

Appearing on the Challenging difficulty level and above, they are sometimes assigned their own special mission. Bile Titans are enormous but still move quickly, and behave like the Bile Spewers, spitting out streams of corrosive bile at their target.
Bile Titans are one of the toughest enemies the Helldivers will face. The safest ways to defeat them are:
- Use Railcannon Strike stratagems. 2 will be needed to kill a Bile Titan at 100% health. If you’re lucky and the angle is just right, the railcannon shot will strike the head, killing the Titan instantly.
- Use Eagle 500KG stratagems. If you’re lucky and the bomb explodes in exactly the right place, there’s a chance to kill the titan in one shot. More than likely you’ll need two, assuming both are direct hits.
- Use the RS-422 Rail Gun in Unsafe mode to shoot the Bile Titan in the head. In theory this can be done in as little as 3-4 shots.
- Use the FAF-14 Spear missile launcher.
- Die, then maneuver your Hellpod to strike it on the way back down.
- Keep as much distance from them as you can.
- Use the terrain to your advantage.
Work with teammates to bait it, allowing some of the team to target its weaker spots while it’s focusing on another member.
Brood Commander

Brood Commanders can be found in every planets with bug missions, predominately found in hives. They are sometimes assigned their own special quest like Bile Spewers, Bile Titans and Charger. Brood Commanders are armored yet they’re much slower than the rest.
They will bring a whole swarms along with them. Using Sentry guns, Eagle strikes, or Orbitals can dispatch them and their crew pretty quickly.
Their weak spot is their limbs- similar to the warrior caste. However, blowing off both front limbs will not kill the commander. It will try to continue to crawl to the Helldiver. So make sure to send a few extra bullets its way to ensure it stays down.
Automatons
Trooper
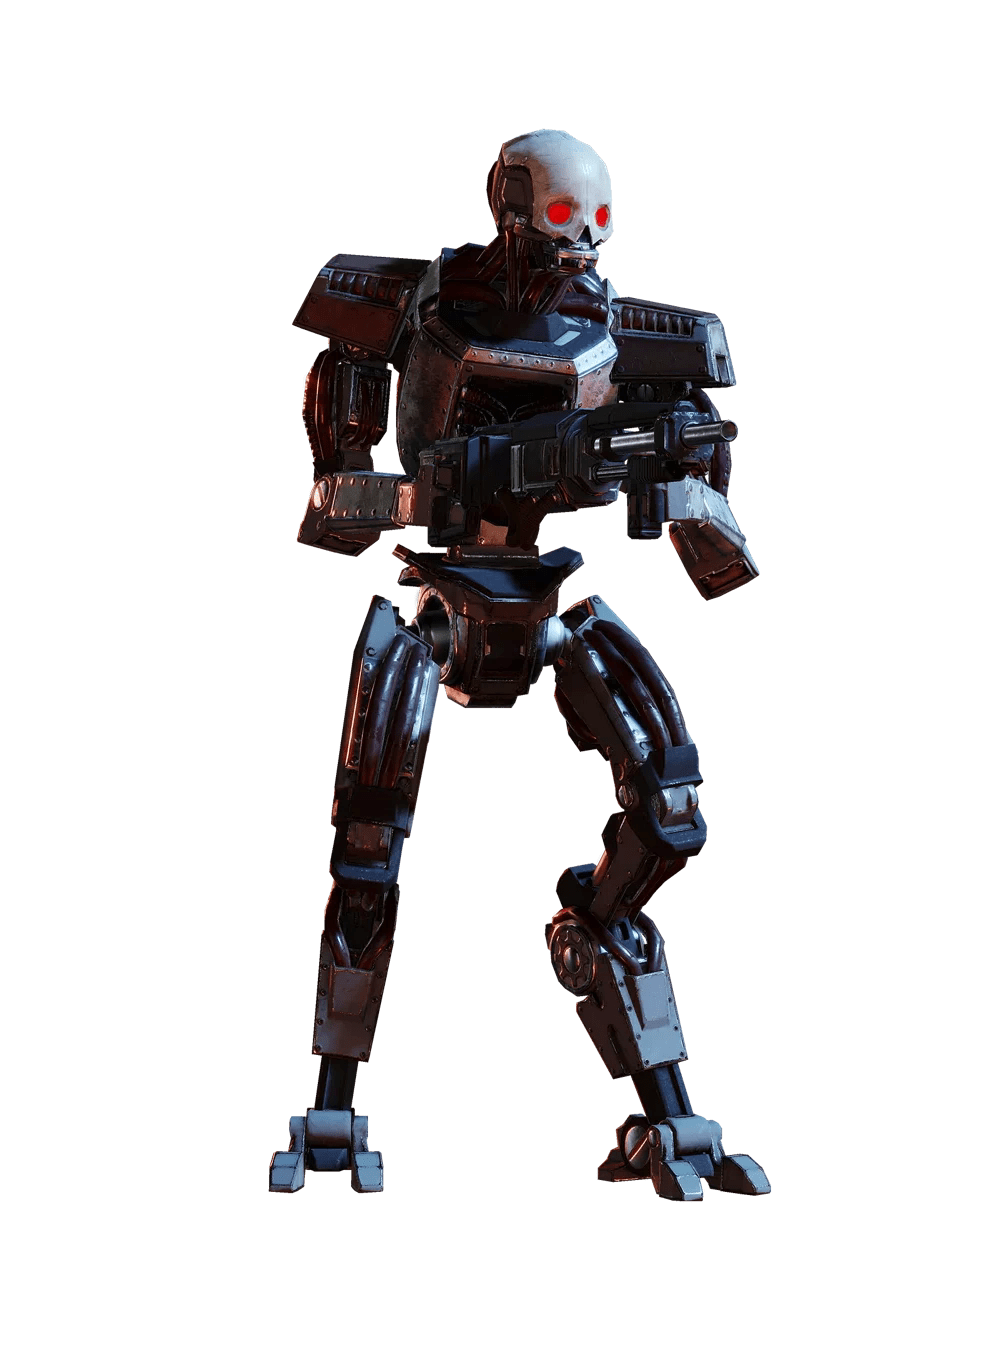
Troopers, Raiders and Marauders are susceptible to grenades and headshots. The Helldiver can exploit their armor similarities by aiming for headshots or using grenades for a quick takedown.
Raiders are particularly deadly due to their use of rocket launchers, which are very accurate with long range and typically kill instantly. They can easily kill you or one of your squad mates if you’re all distracted or if they simply go unnoticed.
Commissar

The Commissar is a unique bot responsible for calling in bot drops.
They perform a combo of melee and ranged attacks, but they’ll only start to come after Helldivers once the Troopers, Raiders, and Marauders have been cleared out.
The Commissar is vulnerable to grenades and headshots. The best way to defeat it by avoid getting close to it, aim for headshots, or use grenades for a quick takedown.
Scout Strider

The Scout Striders are protected by boxy armor and operating a powerful turret inside. They’re also quite fast and will shoot at Helldiver continuously. In order to defeat it, one must find cover when facing it and use armor-piercing weapons. If a helldiver manages to get behind them (they struggle with turning large amounts), shooting at a Trooper operating the turret will destroy it.
Their legs are also vulnerable. Target their legs to immobilize it, then focus on the exposed pilot to finish them off.
Getting on elevated ground gives you a huge advantage over them. Even a slight height advantage will frequently allow you to headshot the Trooper from the front over the armor.
Berserker

Berserkers are reliant on melee attacks and slower than other Automatons. However, they do tend to group up. Their weak spots are their head and the stomach area. Shotgun, grenades or armor-piercing weapons are effective against them.
Maintain distance to avoid melee attacks.
While the torso of the Berserker is well armored, allowing it to soak up a decent amount of damage from light armor penetrating weapons, their chainsaw arms are far less protected and can be shot off to deprive them of their weapons.
Devastator

They can be divided into three types:
- Standard – Devastators equipped with cannons.
- Heavy – Devastators equipped with machine guns and shields.
- Rocket – Devastators equipped with shoulder mounted multi-rocket launchers.
The body of a Devastator is protected by medium armor and thus can soak up a decent amount of small arms fire, however, their heads are fully exposed, allowing Helldivers to quickly down them if aimed there.
Despite their slow movements, they’ll use different weapons to try and target any Helldiver. The best bet is to use shotguns or heavier weaponry on their limbs, which can slow them down or remove their weapons.
For the tougher variants, explosives and stratagems (like the Eagle Cluster Bombs, Barrages, and Autocannon) are excellent at taking them down.
The shield of a Heavy Devastator is classified as heavy armor and require high caliber weapons such as the Railgun to penetrate. However, the shield is not large enough to protect their heads and their machine gun arm. A Helldiver can shoot off a Heavy Devastator’s machine gun arm which leaves it only capable of performing a shield bash melee attack.
The rocket variant can be especially deadly and troublesome, especially when there are multiple units of them present, as their rockets not only pack a tremendous punch but are also fairly accurate. Thankfully, their rocket pods can be destroyed with concentrated fire. Attacking them can also prevent an impending launch via staggering them, which can save lives.
Rocket Devastators telegraph their attacks by taking a wider stance and leaning forwards, as if to brace for the rocket pods’ recoil, if a Helldiver is unable to disarm them in time, it’s time to take cover.
Hulk

They can be divided into three types:
- Standard – Hulks equipped with autocannons and rocket launchers.
- Flame – Hulks equipped with flamethrowers.
- Rocket – Hulks equipped with a rocket pod.
Hulks have two weak spots: their head and back. Notably, their backs are lightly armored, allowing for continuous fire (even from medium weapons) to eventually kill Hulks.
Destroying its head will instantly kill it. The Anti-Material Rifle or Railgun can achieve this easily.
Explosive stratagems like Orbital/Eagle Strikes can also pierce its armor.
Their weapons can be broken, they become slow melee units that can be killed more easily or ignored for more active threats.
Tank

The Annihilator Tanks have a 360 field of view, so Helldivers will need physical cover to evade its cannon.
The vents on the back of the tank’s body and turret are weak-points, allowing Helldivers to damage it more.
Top armor of the tank’s turret is thinner, allowing for rockets and grenades to deal more damage.
Just two grenades (preferably impact grenades) can kill tanks with this method.
Destroyed (and active) tanks can be used as physical cover if needed, especially from enemy infantry.
You can jump directly on top the tanks turret, making it impossible for it to shoot you.
This can be combined with the strategy above, allowing you to target its top armor easily with armor-piercing weapons.
Do note that it will eventually explode upon death, so jump off once it’s dealt with.
Dropship

Dropships are designed to quickly bring additional Automaton soldiers to the battlefield.
They lack an easily identifiable weakpoint. However, if you aim at one of the thrusters with either the recoilless rifle or disposable anti-tank weapon, it will down the ship.
If a Dropship is downed with Automatons on board, they will be crushed; If they survive, the Dropship also explodes on impact and can kill all bots on board. Any bots that survive usually are pinned under the ship, and though they can’t move, are still able to fire at you.
It is possible to shoot the bots as the dropship opens up to deploy them, although this is not recommended due to the risk of being crushed and not arriving in time to destroy all the bots before they deploy. If you do decide to do this, using explosive weapons like the grenade launcher can expedite the process as the splash damage can destroy multiple bots.
Tips and Tricks
You can destroy bot factories with any kind of any high explosive damage through the door when it is openened. A grenade launcher, grenade, rocket, autocanon shot will do the trick
Weapon reach REALLY far. You can snipe some objectives with autocanon/railgun from about the other side of the map.
Damage to bots structures aren’t very clear but they do take damage from the front if it goes through armor. Towers, tanks & hulks will blow up if you keep shooting them with railgun/autocanon. but it can take a while.
You can shoot down bot ships with rocket launchers/ recoilless by hiting one of the 4 engines on the sides. destroying one before it land the troops will kill them. If they already landed, it will crash on them and kill some. Somehow, shooting a ship before it arrives on the drop site seems to leave the troops inside unscatered.
Hulks (giant mecha robots) can be sniped in the head in the middle of the torso, resulting in a one hit kill with sniper/autocanon/railgun.
Destroyable radio towers side objectives can be done from the distance. one or two autocanon shots, a rocket, or a grenade blowing near the top will destroy it instantly.
Spore trees are vulnerable to explosives, but still take damage from any weapon. You can snipes thoses from afar with sniper, railgun, autocanon, rocket, machinegun… anything, really.
Landing on a big ennemy will kill it (except tank). Landing on a tower/objective will also destroy it. sticking a support beacon/resuply on an ennemy will kill it with the landing.
You can destroy some objectives bases by calling in a hellbomb. You will have to activate it and run.
Keep your eyes open for dud hellbombs littering the battlefield. If you see one, you can lead ennemies nearby and annihilate them by shooting the bomb.
Don’t bother shooting the charger’s butt. It is not a weak point, and iit will soak up 2-3 clip from any weapon before dying. Instead, destroy the front leg with rocket/recoilless, two railgun shot, then shoot the exposed flesh with main weapon. It will die fast. Alternatively, you can shoot the butt & back legs with autocanon for a relatively fast kill.
At difficulty 5 and above, each mission set will carry a modifier. thoses can range from more scattering with orbital bombardment to +100% arrival delay from support gear, including some flavors like stratagem codes not giving what you want. Read thoses before starting mission.
You can win a mission even if you deplete all your reinforcments if you managed to do all main objectives (orange). That’s why it’s important to do thoses soon.
If the timer runs out, you won’t be ablle to call stratagem or reinforce anymore. The evac ship will start going to the evac and will leave 20s after landing. You can still finish main objectives in that short window. Contrary to normal evac, emergency evac won’t make additional patrols spawn to the evac pad, so you won’t necesarily have to fight to reach it.
Number of patrols spawns depends of two factors. Time left in mission and number of nest factories left on the map. Additionally, nest & factories allow an increased spawn rate of patrols in their vicinity. That means, if your objective is close to a nest/factory, expect tons of patrolls spawning really close to you. When all factories are destroyed, the number of ennemies patrols will be greatly reduced. Carefull, that doesn’t mean thoses patrols cannot call in reinforcment, and thoses are not affected by the number of factories/nests left.

Be the first to comment