
HQ Tips
The first building always has to be a HQ. Some maps already have HQ pre-placed, but if you start a custom location you’ll need to place your own. The HQ provides some storage space and some basic accommodation.
The size of the HQ determines how many squads it can host. Normally it’s about 4, but you can get more if the building is big enough, or less if the building is too small.
At game start, you have limited resources. If you put HQ on too big a building, it will only partially adapt (not enough resources) and you’ll be limited to 2 squads. Only way to fix that is to create a warehouse or another HQ (so you have access to resources) and then complete the adaptation of the first HQ by plopping another HQ on top of it.
Each additional HQ you make will increase the number of teams you can have.
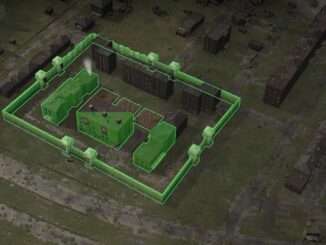
I tend to make numerous small-ish HQs along my IFZ walls so that I can station squads in the HQ to shoot at hordes if they reach (or break through) the walls. A taller building helps squads shoot over the walls.
Note that storage in the game works like cloud computing. All your resources are available from any HQ or warehouse. If you deliver a gun to one HQ, it’s immediately available from every HQ and warehouse in your IFZ.
Random Note: When new survivors join your IFZ, they’ll always make their way to the most recently adapted HQ.
At time of writing, HQs can’t be deadapted, but the developer is aware and subsequent update will likely fix that.
Food Tips
Early on, you’ll send squads to search for food in unsearched buildings. However, that quickly grows tiresome. The best way to ensure constant supply of food is as follows….
First, build some fields and get farmers there growing crops.
Next, build a cookhouse to turn those crops in to rations = food.
There’s no benefit (currently) of adapting big buildings in to cookhouses, because each cookhouse can only make one ration at a time, then it has to get more resources for the next ration, and so on. Sure, having more people will reduce time taken to make a ration, but you still only make one ration at a time = super slow.
So what I do is create several small cookhouses, each with a few staff. They take a bit longer per ration, but because you’ve got multiple cookhouses you’re making several rations at the same time, not just one.
Increase fields and cookhouses until your population is fully fed all the time.
Now we can take it to the next level: Build some barns, again in small ish buildings. They’ll produce meat and fertilizer.
As the fertilizer starts to gather in your warehouse, tell the farm fields to use it for growing crops – this massively increases the amount of crops they produce in the same amount of time.
Now you should be getting meat in your warehouses, and a surplus of crops. Tell your cookhouses to use mean for rations, instead of crops. They’ll produce more rations this way, allowing you to have bigger population.
You can build a cannery if you want, to preserve food for winter. If you do, use several smaller buildings for parallel production. However, I find that if I have a big surplus of crops that I don’t even need a cannery; I can just set the cookhouses to use crops if the meat runs out in winter.
Defense Tips
In the early game, I found that placing several wood towers close to each other worked well – when swarms come, there’s a limit to how many hordes can attack each tower, so they’ll spread over the available towers… meanwhile, each tower is shooting at everything that moves. Be sure to use pistols as they use less ammo.
As the game goes on, the swarms get bigger, more frequent, and stronger. You’ll need walls and gates to keep them out, because if they get near any adapted buildings they’ll tear them to pieces very quickly.
The first thing to note, is that barbed wire helps A LOT. I was surprised how important it became in the mid-late game. Not only does it slow the swarms down, giving more time for towers to shoot them, but it will damage and even kill some of the horde. You can also repair any broken barbed wire during day time, ready for the next attack. It does use up huge amounts of metal, however, so be sure to have a good supply.
For walls and gates, I generally do a tech rush to get the reinforced walls/gates which are vastly better than the alternatives. I tend to make lots of gates, which are very strong, and then join them with short sections of wall (usually 4 or less segments of wall between each gate). That ensures that adjacent towers can defend each other, so you can get 12+ people shooting the swarm at a single gate.
As mentioned earlier in the guide, placing HQs near the wall gives you a good place to station squads to help with wall defense, with the additional benefit that if they run out of ammo they can just get more from the HQ.
When swarms are particularly huge, placing squads in any building near the wall will help – just get them in range of the swarm in a building that can see over the wall and they’ll be shooting the infected all night long.
Be careful of what weapon you use in towers and gates. Assault rifle uses lots of ammo, and they’ll run out in big swarms. A sniper rifle has long range, but has slow firing rate. A shotgun is good at gates as it will hit multiple infected at the same time, but it’s short range. A pistol uses least ammo and has medium range. I’m currently experimenting with shotguns at gates, and then sniper rifles in towers behind the wall, and assault rifles for my squads who can move to buildings near the wall and also visit HQ/warehouse to reload if they run out of ammo.
Vehicles Tips
The game randomly spawns a vehicle somewhere on the map for each squad (although there might be limit to max number of vehicles at any time).
Vehicles I’ve seen so far are:
- Sedan
- Combi (bigger car)
- Pickup truck
- Van
- Oil tanker
- Truck
- Tank (military)
The sedan, combi and pickup are fastest vehicles. They’re useful for getting a squad somewhere quick to provide support or ambush a raider. They have pretty good capacity for resources too.
The pickup, van and truck have much more capacity for resources, with the truck being able to store 40 items!
The oil tanker is weird: It has huge fuel tank, so can travel long distance, but only 4 storage spaces.
If you want to transfer fuel to another vehicle:
- Send vehicle towards the other vehicle
- Click the drop fuel button, that will add a fuel can to the vehicle storage
- Click the squad driving the vehicle to show their info panel
- Click the Exchange (two arrows) button on their info panel
- Click the vehicle with the fuel and it’s info panel will appear
- Drag the fuel to the squad
- Move the squad in to the other vehicle
Hopefully devs will simplify it to just driving an oil tank to near the other vehicle which would be much easier and less hassle.
You can bait infected horde with your vehicles – they’ll run towards them and start following them, especially if the squad driving the vehicle shoots at them. This way you can lure a horde away from a building and towards towers or some other ambush.
You can also squish the hoard by driving over/through them. Be sure to use a vehicle with high hit points though, because impacting with a horde will damage it. The oil tank is a good choice, but make sure it builds up speed first; it will slow down to make turns or when it collides with the horde, making it an easier target for the horde to tear apart (then they’ll kill everyone inside).
If the horde destroy a vehicle, you can repair it just as you would do with a building. However, only do that if close to your base, as workers will need to carry metal to the vehicle to make repairs. If it’s too far away, try sending a squad to the vehicle, as they can often do some basic repairs and slowly drive it back to base where you can do more complete repairs.
To get the tank, you’ll either need to fight the military or, if you’re lucky, they’ll die fighting a swarm of infected. The tank has insanely high hit points and is very costly to repair.
Vehicles can also pick up dropped items. For example, if you shoot some raiders (or they die crossing barbed wire, etc) they often drop guns and ammo. You can drive a vehicle over the items to collect them. Squads can also be sent to such items on foot, but that’s obviously slower.
Be the first to comment