
Getting Started
This is a brief guide in hopes to aid you at the very start of the game
Once you have generated your world and have gotten into the game, go ahead and get started with the first part of the tutorial.

Now interact with Apotheos to awaken it along with the mainframe. To the left of the mainframe should be some vines, go ahead and climb up those to collect the Ancient Tech. You can now go to the mainframe and unlock the main frame upgrade “empower”
Empower: Boosts Health by 4, Harvest power by 50% and crafting speed by 25%.
From here you will wanted to get started on the next step called “Forge Ahead”
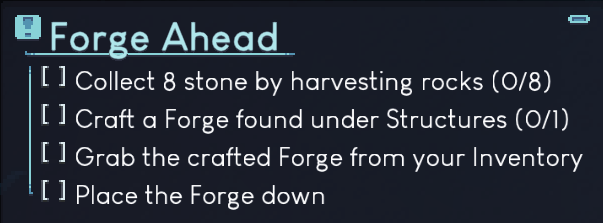
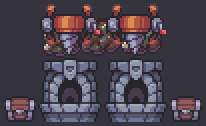
You can quickly gather the 8 pieces of stone from the large and little rocks that are scattered along the floor. While you are doing this, its also a good idea to harvest the cursed and normal logs too as you’ll be needing them in just a minute. Its a good idea to harvest some of the vines as well for some easy biofuel. From here you will want to go ahead and craft 2 forges and place them directly below the iron deposit as shown.

Now we’ll be moving onto the third part of the tutorial “Research Tech”

From here you should craft 2 chests and place them at either sides of the forges. Hover over the forges and make sure the green arrow is facing the direction of your adjacent chests. This way, the ingots will automatically be put into your chests. No go and manually mine 22 pieces of iron ore from the deposity instead of the requested 5. Once you have them you can interact with your forges and begin smelting them into ingots.
Quick Tip: You will want to save your wood at this point and use your biofuel instead. Wood at the start of the game is a finite resource.
Once you have the required ingots in your inventory go ahead and open up the research screen with “T”, hover over basic extraction and add it to the queue and research will automatically begin. Now’s a good time to grab some more resources from the vines and stalagmites that are dotted around the map.
Once research has finished, go ahead and craft 4 crank drill to get the next part of the tutorial “Get Cranking” underway.
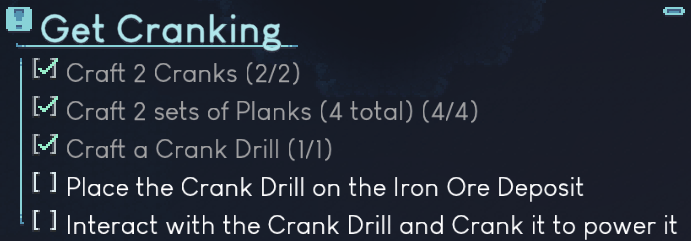
The reason you’ve created 4 crank drills is so that you can have 2 on the iron deposits feeding your forges while the other 2 chip away at the wood deposit.
Quick Tip: Have a look below in the Starter Blueprints section for the Starter Iron Patch and Starter Wood Patch blueprints to get these setup.
With these steps complete you can begin “Emitter Expansion”

With the 10 remaining iron ingots in your inventory head to the right of Apotheos and loot the ancient chest for 2 pieces of void matter. With the iron ingots and void matter in your inventory go ahead and interact with Apotheos and expand your emitter range
Quick Tip: Expanding your emitter range from now on will unlock new areas to explore
Since we have already grabbed our first piece of ancient tech and upgraded at the mainframe, “Mainframe Upgrading will auto complete.

Finally we can begin heading up to the surface to explore our world with “surfacing”

Before heading up, be sure to go back to the ancient chest and loot the 6 oil clot inside so you can craft 2 lots of torches for a total of 10. You’ll want to use these as you navigate up to the surface, and dont worry about the finite amount you have as we can farm oil clots in just a moment.
As you journey upwards be sure to harvest vines for biofuel, get stone and wood and make a mental not of any areas that are sparkling if you can. These areas are resource deposits. You can also place a torch next to these deposits or dig a small entrance so you won’t forget where they are.
Once you have made it to the surface you will be tasked with killing an Oil Slime and the spawner. Before doing this take a moment and explore the open area and see if there is more than one spawner for the Oil slimes. If uou were lucky and have multiple go ahead and destroy one for now but keep atleast one alive. You want to do this as killing oil slimes will reward you with oil clots which are invaluable early game as they are needed to craft torches.

Also, destroying these spawners is how you will acquire void matter. Be be sure to keep an eye out for them as they can spawn underground too.
Quick Tip: Farming the poisonous snails is a worthwhile venture too, as the fungi can be used as fuel and later refined into biofuel
Go ahead and return to base and drop off your loot. From here you will want to begin “Node Discovery”

Remember thos sparkling spots before you checked out while you were exploring? Hopefully while searching these areas you managed to find all of the 4 required deposits. To mark these deposits as discovered, you will need to approach them and mine a single piece of the resource.
From here on you should be good to head out and adventure on your own. Your next quest will be “Transport Items”
Quick Tip: Be sure to check the Frequently Asked Questions for useful tidbits and Starter Blueprints for a quick mall and efficient forge setups.

Starter Blueprints
Starter Iron Patch
Credits to Fletcher for the design
Starter Wood Patch
Credits to Fletcher for the design

Starter Combustion Mining
Hand fed. Combustion drills are a 2:3 ratio with forges for Iron ingots.
Credits to Fletcher for the design
In-line Buffer Chest
Credits to Ulysees for the design

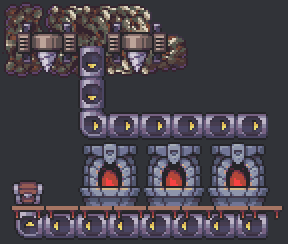
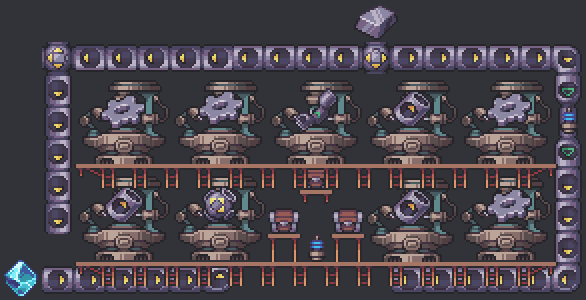
Forges
A single transport tube has enough throughput to feed 10 forges
This setup can be mirrored so additional resources can be smelted while maintaining a small footprint and feeding from the same fuel line

Automation Mall
Credits to Bijitz for the design
Turret Stack
Credits to Marlorn for the design

This question is going to make me look stupid, but I’m new to the game, so I’m looking at guides. Anyway, if you have a line of smelters being fed by a tube in the blueprints section with the smelting line-up, and a single tube of fuel has enough to feed 10 smelters, how can you mirror that and have another 10 smelters fed from the same tube? Will half of the smelters not be starved as a result of that?
I believe the “feeds 10 Smelters” refers to the ore, but the fuel in the middle pipe would be sufficient for 25 smelters, I believe.
Thus, from top to bottom, the pipes in the “Forges” picture are: Fuel, Ore, and Production… I hope that helps with the remaining calculations.