
A comprehensive guide describing how to employ Ship Launched Fighters (SLFs), how to fly in them, multicrew capabilities, limitations, and loadouts.
Hangars and Fighter Types
Hangars
In order to use SLFs, you need to have a hangar bay equipped into your ship. Only certain ships can have a hangar bay mounted:
- Alliance Crusader (Class 5-6)
- Anaconda (Class 5-7)
- Beluga Liner (Class 5-6)
- Federal Corvette (Class 5-7)
- Federal Gunship (Class 5-6)
- Imperial Cutter (Class 5-7)
- Keelback (Class 5)
- Krait MkII (Class 5-6)
- Type-9 Heavy (Class 5-7)
- Type-10 Defender (Class 5-7)
Each hangar bay houses a certain number of fighter blueprints that it uses to be able to produce, deploy, and service a fighter belonging to that blueprint.
- Class 5D Hangar – Houses one fighter blueprint and can produce up to 6 until needing a restock.
- Class 6D Hangar – Houses two fighter blueprints and can produce up to 8 of each fighter for a total of 16 fighters before needing a restock.
- Class 7D Hangar – Houses two fighter blueprints and can produce up to 15 of each fighter for a total of 30 fighters before needing a restock.
Generally speaking, the class 7 hangar is usually unnecessary since it would be extremely rare for your ship to go through 30 fighters before the ship itself would require services, but if you plan on using the fighters at long range or have a loadout designed for long operation, it can be useful. The class 6 hangar is a massive upgrade over the class 5 as you can house two different blueprints at once (and, with multicrew, have both fighters out at once).
Regardless of fighter blueprint, replacement parts for destroyed fighters always cost 1,030 CR per fighter. This makes fighter replacements incredibly cheap and disposable.
Fighters
There are four main fighter blueprints, most of which have several sub-blueprints containing slightly altered loadouts depending on your preferences. Unfortunately, ship-launched fighters are not customizable beyond the available blueprints and variants.
- F63 Condor – All-rounder. Good speed, turning, passable durability (for an SLF). Hard to go wrong with.
- Gu-97 – Almost excessive amounts of manuverability, but paper-thin shields and hull. Will get vaporized as soon as it is focused. Requires extreme skill and attention to hide out of sight of enemy weapons, or else it will be forcibly disassembled.
- Taipan – Heavier shields and hull compared to the F63 Condor, but slower and less manuverable. A solid trade-off as it still has good boost speed and can get out of trouble if needed. Will tend to last in protracted engagements since it can shrug off hits much more easily compared to a Condor or a Gu-97.
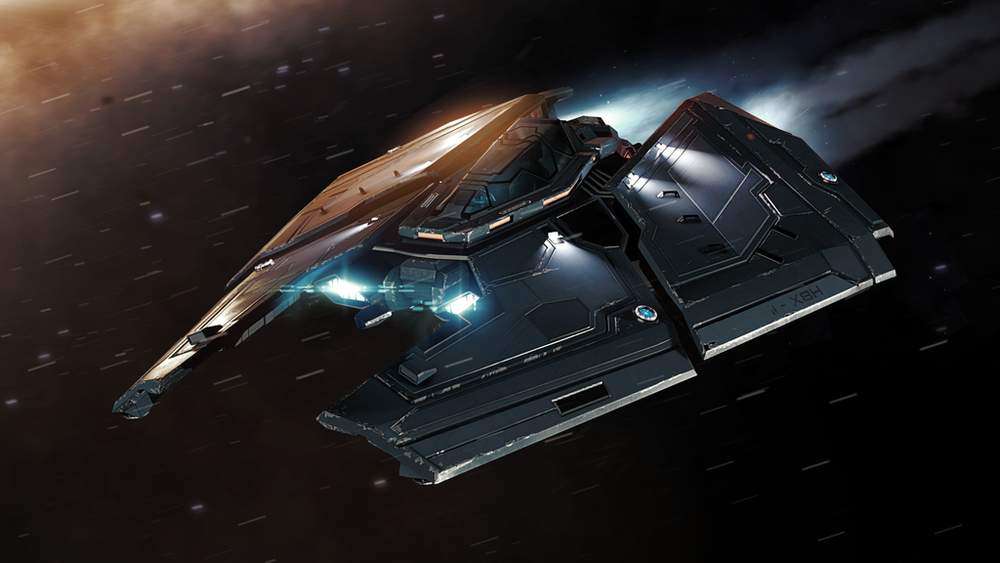
- XG-Series – Guardian SLF’s that need special prerequisites to acquire. I’ll be real, I have never used them. They have paper thin hull (even less then the Gu-97) and okay shields, and are slightly less manuverable then the Gu-97. Honestly I would stick with a Condor/Taipan.
A few general notes about fighter loadouts:
Variants ending in “G” have gimballed weapons, while variants ending in “F” have fixed weapons. Gimballed variants sacrifice overall DPS for an easier time targeting, but are therefore vulnerable to chaff launched by enemy ships. Realistically speaking, since SLFs have superior manuverability to any other ship, you should have a much easier time using fixed weapons against them and should opt for them when possible. Even modestly skilled AI also has no issues landing large amounts of fixed weapon shots, so there’s even more reason to favor them.
Ships with Chaff for utility can make good use of it to escape enemy gimball/turret fire if needed, or to protract an engagement that would otherwise get them vaporized. All SLF’s can restock/repair their ship at anytime by boarding with their mothership, so they can spam chaff with reckless abandon. Same goes for heat sinks, though those are more used for heat control on ships equipped with beam weapons. SLF’s equipped with point defense are the only SLF’s that have any defense against seeker missiles, which will absolutely shred an unshielded fighter.
All primary weapons generate some heat when firing, but it can be pretty easy to stack up a lot of heat in an SLF. What you need to take note of is past 100% heat, you start to take minor module damage within the ship. This is okay for short periods until your modules start to malfunction, at which point you have a problem. If you really want to push the limits, past 150% heat you start taking hull damage. SLF’s have very little hull to speak of, so doing this for prolonged periods of time (especially when damaged) can be lethal. But always remember, your fighter is very expendable (only costs 1,030 CR to replace) and if you survive, you can get a full repair by quickly docking with your mothership. So, don’t be afraid to push the fighter’s limits if you have to.
Fighter Deployment & AI Crew
AI Crew Members
If you want to get any use out of your fighter flying solo, you will need an AI crew member to pilot it for you. Without crew to fly your figher or mothership, both enter an autonomous static mode that is almost entirely defenseless (though the mothership will try to engage nearby ships with turreted weapons while stationary). AI crew members can be hired from any station that has a crew lounge. AI Crew will have a one-time hiring fee (from 15,000-150,000 CR, depending on skill level) and will receive a small percentage of CR every time you turn in a combat bond or bounty voucher (percentage also dependent upon skill level). While it may seem like it burns a hole in your pocket to be paying an AI for flying an SLF, they can be well worth it as they provide great distractions to help you take down ships.
The following skill levels are available for hire from crew lounges:
- Rank Hiring Cost (CR) – Profit Share / (%)
- Harmless – 15,000 / 2%
- Mostly Harmless – 30,000 / 4%
- Novice – 55,000 / 6%
- Competent – 90,000 / 9%
- Expert – 15,000 / 12%
The character generator is kinda… lacking most of the time, so you may want to shop around until you find someone who looks passable, because you’ll be staring at them a lot for the following reason:
It is EXTREMELY important to note the following mechanic: NPC Crew will level up and increase in skill the more you fly with them and use them in combat. Hiring lesser-skilled crew and leveling them up will result in them taking a smaller percentage share of your profits then immediately hiring a similarly skilled member. It is pretty much needlessly wasteful to hire anyone but a harmless pilot and train them up. A Harmless pilot trained up to Elite only takes 10% share, which is already 2% less then the starting share for an Expert pilot.
Obviously, pilots with higher skill are smarter and more effective in combat, but even low skilled pilots can make decent distractions for you. Crew are also paid whether active or inactive so, having more than one is pretty wasteful. Also, if you ever unequip your fighter hangar or swap to a ship without a fighter hangar, your crew member will automatically be shifted to inactive. Make sure you verify you have your crew set to “Active” when planning to deploy with a fighter bay.
Deploying Fighters
All SLF’s are launched using the roles panel (Panel #3, located between your legs). In order to launch fighters, your hangar bay must be powered (note, your bay does not need to be powered to build new fighters or dock existing ones, so if you are squeezing your power plant during weapons deployment, you can turn your hangar off if you deploy fighters before you deploy hardpoints).
Once you access the roles panel, select the fighter you wish to deploy. After selecting “deploy” you will be prompted for who will be flying it. If you have an AI crew member on board, you can choose to deploy the AI to the fighter automatically. Otherwise, you can deploy yourself to the fighter.
If you deploy yourself to the fighter and have an AI crew member, the AI will assume control of your helm. Otherwise, the helm will stay stationary and fire on any nearby targets using turreted weapons (And will also try to use shield cells to keep its shields up), but otherwise it will mostly be a sitting duck. If you switch back to the Helm while your fighter has no crew to take it over, the fighter will try to follow you but is incapable of docking on its own.
When flying without any multicrew members, you can swap between your fighter and your helm at any time. This can be useful if you want to take your much faster fighter out for a spin and scout around, leaving your helm stationary. Just be careful to keep tabs on the status of your helm in case it comes under fire.
Fighter deployments have the following limitations:
- Outside of multicrew, only one SLF may be deployed at a time, even if you have two fighters in your bay.
- If inside multicrew, one player can fly an SLF while you can deploy your AI crew in the other fighter.
- Players in multicrew can deploy fighters from the role panel at any time outside supercruise, as long as the fighters are available and the bay is powered.
- If your ship has enough seats and fighter bays, two players can each fly one SLF from your hangar if it has two fighters available.
- If in multicrew, the owner of the ship (helmsman) cannot fly fighters.
- Players can force an AI crew member out of an active fighter and fly it themselves if they select it from the role panel (warning in advance: this is buggy and in my experience sometimes results in ED’s transaction server’s kicking you or the fighter pilot out of the game briefly. Apparently this is a long-standing bug).
Fighter Deployment Tips
- If using a Hangar with two fighter bays (Class 6/7), you can instantly deploy your other fighter bay if your first deployed fighter is destroyed.
- Hangars with two fighter bays will assemble fighters in parallel, so if both go down quickly, they’ll both be back up within the same timeframe.
- Each ship has a specific orientation for their fighter bay. Example: The Alliance Crusader will launch fighters forward and down, and has fighters dock to the rear of the ship. Conversely, the Type-10 Defender will launch fighters backwards but dock them forwards.
- Don’t forget to redeploy your fighter if destroyed in combat. It can be a helpful distraction to keep pressure off of you for some time.
Flying Fighters
I’ll just touch on generalized tactics here and some tips that might help you out.
General Strengths/Weaknesses
As an SLF, you’re insanely fast, zippy, and manuverable. You can make it extremely difficult for less manuverable ships (especially those with fixed weapons) to target you by virtue of your high manuverability and low profile. With correct positioning, you can stay out of the firing line of larger ships while dealing consistent (though not insignificant) damage. If the target manages to focus you, you can quickly engine boost away at over 500 m/s, outside the effective range of most weapons. Deploying chaff can also be an effective solution against gimballed or turreted weapons tracking you to extend the time you can attack or cover your escape. The chaff is free, so don’t be afraid to use it.
Also as an SLF, you are extremely fragile and you cannot afford to be focused on by an enemy ship for long. If you are focused on by a larger ship, you’re unlikely to survive whatever they shoot at you unless you dive out of range or in cover (asteroid fields can greatly help break up a sight line on your craft). If it looks or feels like the enemy is turning to focus on you, it may be time to break your attack and duck out, or else you risk getting flattened.
Seeker missiles will also decimate a fighter with down shields almost assuredly. Outside of having a fighter with point defense or being in close proximity to a ship with point defense, there’s pretty much nothing you can do if you get an <> warning on your HUD.
On the upside, you don’t really have to deal damage to be successful in your role as a fighter. If you can merely distract your target long enough for an ally to engage them, you’ve done your job. Some ships will get strung out and chase after a fighter despite having little to no means to effectively pursue them which brings the pressure off of your Helm and allied ships in the area. Even if you get destroyed, your cheap, 1000 CR fighter is highly expendable and another one is either already good to launch or will be within 70 seconds.
Combat/Systems Tips
- Fighter shields have a very fast recharge rate. Dumping 4 pips into systems on an F63 Condor can bring a collapsed shield back up and barely skip a beat to recharge. A full system bar on a condor can usually get a shield back up to around 75% rebuilt. Take advantage of your quickly recharging shields to extend your lifetime.
- AI pilots have a habit of disabling modules that run out of ammo. Namely, they love to disable the chaff module after they’ve used all the chaff, and this carries over between deployed fighters. Make sure you just check and activate it if you get into a ship with chaff.
- Condors with 4 pips in engines while engine boosting can easily maintain over 500 m/s. You can use condors as interceptors from long range and you can quickly duck in and out of fights combined with chaff, making you the ultimate annoyance to deal with.
- Fighter weapons will build heat with sustained fire (especially twin plasma cannons). Do not be afraid to push your heat bar past 200% to keep slapping down consistent damage. You’ll assuredly melt a lot of your internal systems, but your fighter is highly expendable and can get a full repair from a quick dock. The benefit of dealing more damage usually outweighs the very minor setback of losing a single fighter chassis.
- All fighters have a maximum operating range of 30km from the mothership. Past 30km, a self-destruct countdown will initiate on the fighter. You will receive a warning from your Helm when passing the 25km mark that you are reaching the edge of radio range.
Docking/Maintenance Tips
To recall a deployed AI fighter, either issue a fighter recall order (Numpad 0 by default) or manually issue the order by using the roles panel (#3 panel: Select the deployed fighter, select ‘Orders’, use ‘Recall Fighter’). The AI is fairly capable of docking with your ship, but you must either be holding still or traveling relatively slowly in a straight line for them to successfully dock.
Fighters have a certain distance at which they become ‘attached’ to the ship as they go through the docking animation. Once they’ve attached to the docking bay’s skids, you can freely move and accelerate without losing the fighter’s docked status while it gets recovered in the bay.
A fighter will fully repair hull and modules, as well as restock anything with limited ammo (chaff, heatsinks, point defense, etc) when docked. A docking fighter only needs about 5 seconds for a maintenance check-up, regardless of how damaged it is, before it can be redeployed.
You will destroy any deployed fighters if you enter supercruise or hyperspace before they’re fully and completely docked. Even a fighter attached to your skids as mentioned above is not yet fully docked and will be destroyed the moment your supercruise countdown engages. You can charge your supercruise and orient yourself, but as soon as it engages it will destroy anything deployed. But by all means, if you need to make a hasty escape, don’t be afraid to burn up to 2,060 CR of fighter chassis.
Provided your orientation is correct (top of your fighter is in line with the top of the Helm), docking skids will ‘capture’ your fighter at relative speeds of up to 100 m/s. With practice and proper timing, you can burn into your launch bay at nearly full speed, slow down appropriately, and make a fast capture into the bay.
Targeting your Helm on approach is a great way to figure out how you need to align your fighter when docking. Generally speaking, an AI pilot will try to face the docking area of the helm towards you and will try to rotate the helm so your fighter’s orientation is correct for docking (essentially doing most of the alignment for you).
Fighter Orders
Fighters that are being controlled by AI (and by extension, your Helm when controlled by AI) can be given orders to influence how they react to situations and hostiles. It is highly recommended that you know these binds and are comfortable issuing them, since they can be extremely useful to mold a situation as you need it in the heat of battle. The only other option for giving orders without keybinds is to issue them through the roles panel which is extremely slow and cumbersome, both requiring you to shift your focus to the roles panel and momentarily stop controlling your ship.
- Defend [NUM 1] – Fighter/helm will attempt to keep up with you and stay nearby. The fighter/helm will only attack ships that attack the fighter or helm first. Otherwise, the ship will avoid engaging anything on its own, even known hostile ships. This is the default mode when an AI crew member assumes control of a ship.
- Engage at Will [NUM 2] – Fighter/helm will attempt to attack and destroy any hostile targets within sensor range at its own discretion. This has the benefit of your fighter/helm automatically jumping in on fights you initiate (for instance, when you attack a target with a bounty or when a pirate attacks your ship).
- Attack Target [NUM 3] (requires a locked target) – Fighter/helm will engage the target that you currently have selected. This is dangerous to issue on ships that you are not lawfully allowed to attack. If you issue this order on a ship that is not wanted or otherwise lawful to attack, you will incur a fine or bounty if not inside an anarchy system. Make sure that you are issuing this order with the correct target selected. If you issue this order in mistake, give your fighter another order (such as defend) to prevent it from engaging.
- Maintain Formation [NUM 4] – Fighter/helm will attempt to stay with you and will hold fire.
- Hold Position [NUM 5] – Fighter/helm will remain stationary at its current position until given another order or engaged by the enemy.
- Follow Me [NUM 6] – Fighter/helm will attempt to stay with you. The helm’s turreted weapons will still attempt to engage nearby known hostile targets.
- Recall Fighter/Request to Dock [NUM 0] – If piloting the Helm, this orders your deployed fighter to dock with you. As mentioned earlier, you’ll have to stop or travel slowly in a straight line for the AI to successfully dock with you. If you are piloting a fighter, this puts a docking request in with your Helm. The helm will slow down and try to orient its docking approach to your current position. If you are multicrewing for another player, you may need some coordination with them to get the docking bay in the correct orientation or wait until combat dies down to dock.
F63 Condor
A well-rounded fighter that has dependable speed, agility, and durability. With a top speed around 300 m/s and a boost speed around 575 m/s, it’s quite fast and can easily keep pace or close on an engagement at a distance. It has 25 shield health and 25 armor health, making it able to at least take a few glancing blows without severe damage. It has a very good turning rate which makes keeping inside the blind spots of larger ships quite easy if you can manuver well.

- Variant / Hardpoints / Utility
- Aegis F / 2x Fixed Plasma Repeater / Point Defense
- Rouge F / 2x Fixed Multicannon / Chaff
- Gelid G / 2x Gimballed Beam Laser / Heatsink
- Rouge G / 2x Gimballed Pulse Laser / Chaff
- Gelid F / 2x Fixed Pulse Laser / Heatsink
Of note, this is one of the few fighters that can mount non-AX ballistic weapons, making the Rouge F variant more effective against hull compared to most other fighters. The multicannons on the Rouge F variant also do not have limited ammo, unlike most ballistic weapons and the multicannon counterpart of normal ships.
The Aegis F plasma repeater variant makes a good companion that has decent DPS against both shields and hull, though when piloting it as a player the plasma repeaters can quickly overheat your ship if you lay on the trigger for too long. In comparison, the multicannons on the Rouge F tend to generate much less heat (but are still at risk of overheating if sustained for too long).
The Condor is sold at any shipyard that is controlled by a faction aligned with the Federation.
Taipan
The Taipan is the toughest SLF in terms of raw protection afforded to each fighter, with a chunky 30 shields and 45 hull, for a total of 75 health. In comparison to the F63 Condor (50 total health) and the Gu-97 (30 total health), this makes the Taipan capable of taking a fair shake more damage compared to the other fighters, requiring more than a glancing blow to disable. Unfortunately, this makes it less manuverable then either option and its non-boost speed is a lot slower as a result.

- Variant / Hardpoints / Utility
- Rouge F / 2x Fixed Plasma Cannon / Chaff
- AX1 F 2x / AX Multi-cannon / None
- Aegis F 2x / Fixed Pulse Laser / Point Defense
- Rouge G 2x / Gimballed Pulse Laser / Chaff
- Gelid F 2x / Fixed Beam Laser / Heatsink
- Gelid G 2x / Gimballed Beam Laser / Heatsink
While slower then the F63 Condor or the Gu-97, the Taipan can still maintain a very respectable boost speed, allowing it to quickly travel if all power is dumped into engines. While the Taipan has a harder time staying out of reach, it has a much easier time taking punishment compared to other fighters. It is, however, still a fighter and will get flattened if appropriately focused by a larger craft. Still, the survivability tradeoff may make the Taipan an attractive alternative to the Condor for pilots who want something that can survive as a distraction longer or for newer SLF pilots wanting some additional protection instead of manuverability they’re not yet used to.
Uniquely, the Taipan has a variant which mounts Anti-Xeno (AX) multicannons. It should be noted these multicannons are less effective against normal ship hulls then the actual multicannon hardpoints of the F63 Condor Rouge F variant. If you want a multi-cannon equipped fighter at full strength, the F63 Condor is the only SLF which sports ballistic, non-xeno weapons.
The Taipan is sold at any market that is controlled either by an Alliance-aligned minor faction, or a minor faction with no allegiance.
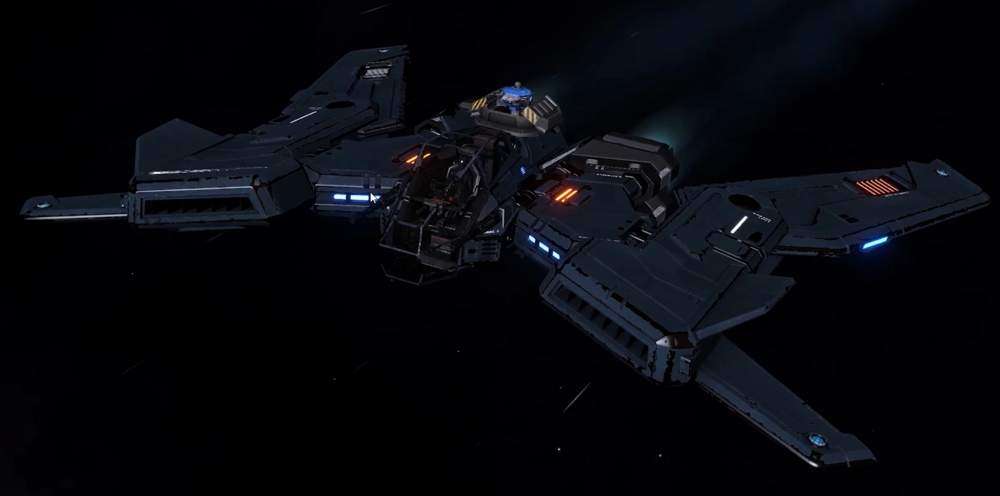
Gu-97
An SLF that trades durability for manuverability. The Gu-97 is almost uncomfortably manuverable and can spin around with ease. With a skilled pilot, this makes it great at out-manuvering almost any ship and staying within their blind spots, but it has almost no health to speak of (15 shield HP and 15 hull HP), meaning it gets splattered almost instantly by any focused weapons fire. This makes it difficult for a lot of crew to employ, as even missiles will make short work of it. As far as speed goes, the Gu-97 is slightly slower overall compared to the F63 Condor.


- Variant / Hardpoints / Utility
- Aegis F / 2x Fixed Pulse Laser / Point Defense
- Rouge F / 2x Fixed Plasma Cannon / Chaff
- Rouge G / 2x Gimballed Pulse Laser / Chaff
- Gelid F / 2x Fixed Beam Laser / Heatsink
- Gelid G / 2x Gimballed Beam Laser / Heatsink
Due to extremely high manuverability and being made of glass, this fighter relies heavily upon pilot skill to stay out of reach of larger, slower ships. Any ship that can spin around fast enough and get a bearing on the Gu-97 for even a few moments unobstructed can almost certainly turn it into scrap, requiring the SLF pilot to make careful, calculated use of chaff/heatsinks or make careful manuvers to avoid damage. Usually, this fighter is scarcely fielded due to its fragility.
The Gu-97 is sold at any market that is controlled by a minor faction aligned with the Empire.
Be the first to comment