
A guide on the basics of ZvZ or zerg versus zerg, the large scale person versus person that makes Albion so unique.
Preface
Welcome to Wardergrip’s ZvZ guide! Forgive the structure, spelling and all other bells and whistles because I’m not used to writing guides (yet).
First of all, I want to introduce myself and others that work on this document to not only show how great we are but also show you where our context lies and where our experience lies.
Hello! I am Wardergrip. I started Albion around easter of 2020, this is around the time of the first lockdown. I started off in a potato farm guild (or I consider it a potato farm) and later formed a small guild with some friends just to be in the same guild. 3 out of 5 friends stopped playing so me and the guy that were left looked for a new guild. I then joined Mongol Khanate were I learned 80% of all my game knowledge. I grew as a person and as a player both fame wise and skill wise. I eventually started leading activities, later on got responsibilities and eventually lead ZvZs. I also had a role on the ZvZ officer team of the alliance. After I left my guild I called my home, I ventured and joined a couple of ZvZ focused guilds.
Learning the Basics of Albion Online ZvZ
Next off, we need to have the basic ZvZ questions. What, how, why, when?
What?
ZvZ stands for Zerg Versus Zerg. The word zerg comes from the game Starcraft made by Blizzard. Zerg is an alien race that has one singular unit controlling the whole race. At first this is “the hivemind” later on, this is “the queen of blades”. I would love to elaborate on the Starcraft story about zerg, but I don’t want to clutter this doc with too much info and I also don’t want to spoil the Starcraft story. Anyway, the Zerg are often compared to ants because of their quantity, hierarchy and efficiency. In the Zerg species, most units do not think for themselves.
Okay Warder, very cool, but what does this mean in Albion? To put it simple, we talk about zergs when we want to say an army. Now “army” sounds a bit too serious and maybe that’s why the community gave it a different name. We often talk about a zerg when they have a full party or more. And we talk about ZvZ when 2 or more zergs fight. Makes sense right? Small scale zvz is often 25vs25, midscale often means 60vs60 and large scale zvz often means 150+vs150+. Regardless of these small categorisations, we always refer to ZvZ as a whole as “large scale pvp” starting from 20+vs20+ up to 175 vs 175.
How?
When making a zerg, we divide them into parties. Each party has a maximum of 20 players. The composition of the party depends on the current meta, the objective and preference of shotcaller. An average ideal composition will be 4-5 tanks, 3-4 supports, 4 healers, 2-4 melees and 3-7 ranged dps. For party 1, one of the supports or tanks will also be the shotcaller.
The shotcaller is the one that will lead the battle and guide the zerg. A good way to show what a shotcaller does is by video. 5please watch at minimum the first 4 minutes).
In this clip/video you can hear Mamono which is the main shotcaller of Elevate (at the time of writing). He is considered one of the best shotcallers in the game.
So what does he do?
He tells his zerg where he wants them and when, what to use and what to do, which direction to go and when to engage, when to mount and when to dismount. What he also does, is hyping up his zerg. Morale is important and definitely in a full loot pvp game. Even if people get regeared, even if they don’t lose any money, it is important.
What you can also see, is that the person that is recording isn’t alway listening. That’s because everyone in a zerg has his role, and his role is to fend off flanks, jump on engages and make sure his allies won’t die that easily.
Sometimes, you have multiple shotcallers, and the shotcallers will communicate through teamspeak or another VoIP program.
As you know, “everyone is different!” and that means that every shotcaller has its own style.
Apart from the shotcaller, there is also an answer on how you as a member of the zerg should play in the zerg. First of all, always listen to your shotcaller but use common sense. If the shotcaller says to retreat and get out and he says get out x direction, but from your perspective there are 30 people dismounted blocking that way, do not suicide and escape a different way.
Positioning wise, you should keep this formation:

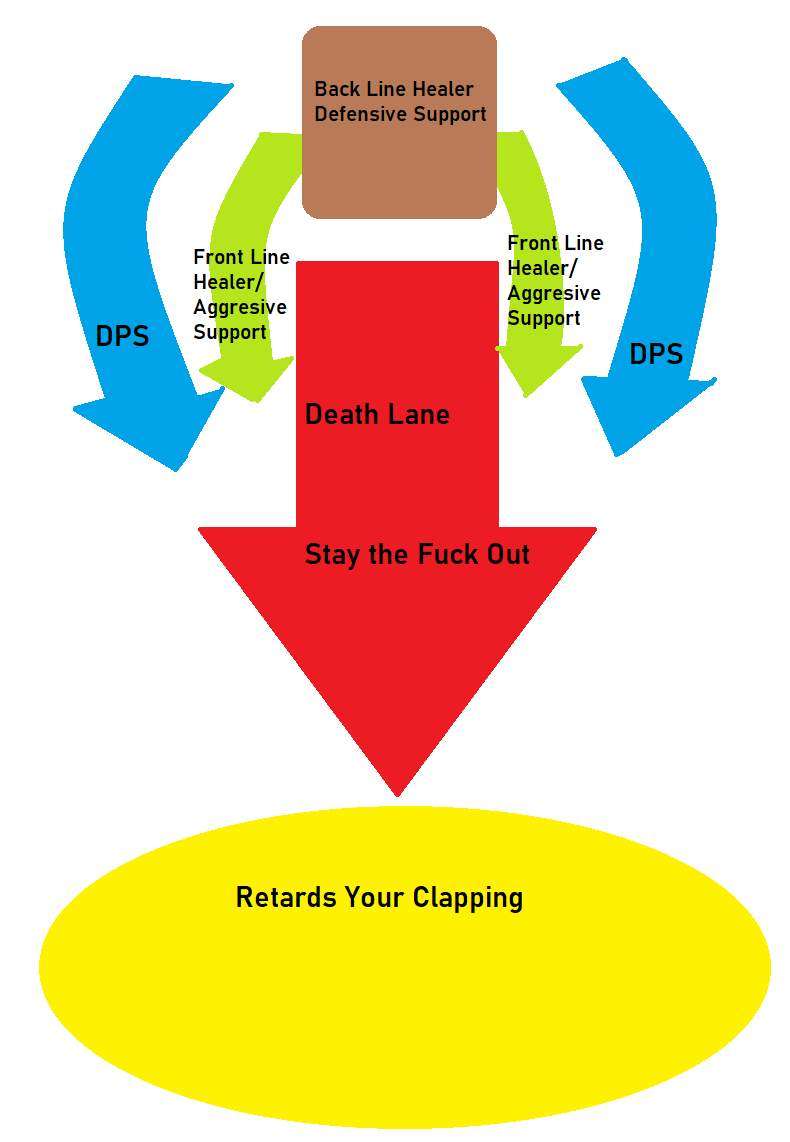
Forgive the language used in the picture above, I am not the author of this masterpiece.
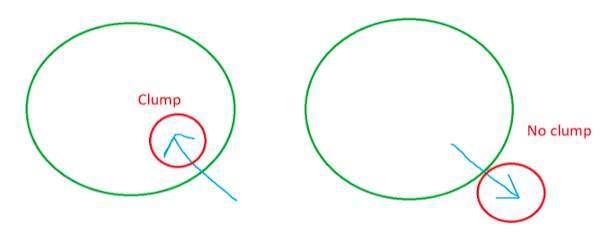
Next to positioning, ALWAYS KEEP YOUR E ABILITY FOR THE SHOTCALLER. I can’t stress this enough. DO NOT use your E whenever you feel like it, use it when the shotcaller calls an engage (for rdps, mdps, offensive healers, some supports and most tanks) or disengage (supports, defensive healers and some tanks). Of course, use common sense! If you are engaging and do not see a good clump, feel free to keep your E. If you’re a healer and do not see anyone needing heals, do not use your E (Unless you’re aggressive healer, then you use your E preemptively). Same goes for any role really, do not waste your E!
Another very important thing is builds. ZvZ builds are designed for ZvZ (duh). Let’s look at the generic rdps build, the siegebow.
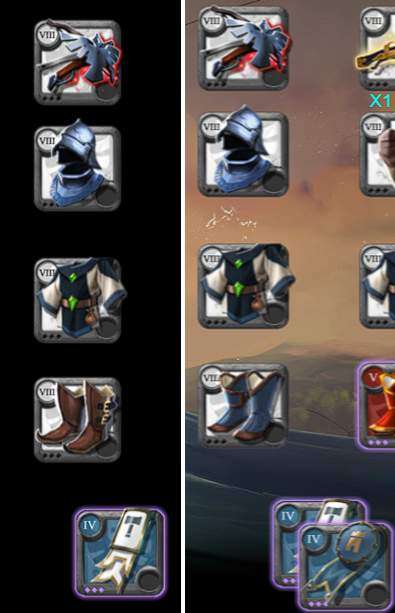
An average rdps build consists of knight helmet, cleric robe, scholar sandals and fort sterling cape or martlock cape. Let’s dissect every item and what it does.
Knight helmet: Increases Crowd Control Resistance by 76, and makes target immune to any displacement effect like pulls, knockbacks or fears for 6s. The spell affects you and up to 5 allies in a 4m radius.
So, what does this mean? This means that the enemy will have more trouble stopping you when this effect is active. There are more applications of this ability but I just want to touch the surface.
Cleric robe: Upon activation, if you take damage in the next 1.5s, you get the Everlasting Spirit shield. This shield makes you invincible and increases your damage and heal power by 30% for 3s.
You often use this one while you take damage or as a way to amplify your damage.
Scholar sandals: Increases your move speed by 70%, and makes you immune to movement-impairing effects for up to 5s. During the focus you can’t attack or cast spells, but you regain 7 energy every 0.5s.
This can be very useful to go through slowing abilities, however, you need to be careful since this can be interrupted!
Fort sterling cape: Condition: Automatically activates when you get stunned, silenced or rooted. Effect: Removes any movement-impairing and debuff effects from you. (Doesn’t remove damage over time spells.)
This is a passive ability and just gives you more survivability.
Martlock cape: Condition: Activates when you take damage and your health is below 25% Effect: Increases your defense by 50% for 5 seconds.
This is a passive ability and just gives you more survivability.
To really see why these items are good is knowing which abilities are popular in ZvZ. More on that later on in the doc.
To sum it up, weapons and abilities are picked for ZvZ builds because of their area of effect (AoE for short) or effects overall (purge, cleanse, …) and then abilities that counter these are also chosen for ZvZ builds.
Why?
Hah! The why question! Hah! Well uhhh… yeah. It’s fun, right? Right?! RIGHT?8!
Uhum. Sorry for that! ZvZs often have an objective. This objective can range from loot to hideout to territory to bragging rights. In most cases, it’s season points and fun. Season points that can be achieved by the result of ZvZs consist of outposts (small scale ZvZ), castles (mid to large scale ZvZ) or territories (mid to large scale ZvZ).
Often, some fights play a large role in the bigger picture. If you keep fighting for hideouts at for example 18UTC at x place for 3 consecutive days, they will not expect you when you turn up at y place to take something else. Or, you can wipe out an enemy to make place for a potential ally or renter. The why question has many answers and/or is sometimes not really present.
Now I have been a little vague. What can the objectives be? Here is a quick summation:
Territories, castles, outposts, hideouts, content, world boss, resource boss (like aspects, elites or whatever they’re called) and transport.
Territories, castles, outposts are the most common ones because they are a reliable way to make season points. The guards of these structures are easy to defeat, making it not that much harder in case you’re attacked by AI when you already have enemy players present.
Hideouts are more long term investment attacks since they will prevent your ally to regear for future fights or damage their morale. I have personally seen guilds and alliances get severely damaged just because they lose hideouts. Hideouts are often people’s homes and safe havens.
Content is the community’s way of saying “it’s for fun”. They won’t fight for any objective whatsoever. They will just see each other, see each other’s numbers and try to force a fight.
World boss, resource boss and transport are less common but it is very normal for guilds/alliances to mass up zergs just to protect whatever they’re doing.
When?
The “when” question depends on what objective we’re talking about.
Blackzone
The attack of a territory starts with the declaration of the attack. Every zone where a hideout can be put in has a prime time. This prime time is 4 hours long and starts at 12, 15, 18, 21, 00, 03 or 05 UTC. When an attack is declared, the attack will happen at the start of the next prime time.
Castles happen every 6 hours starting with 12UTC. Outposts happen every 3 hours, starting with 12UTC. (Outposts and castles can be taken by anyone at anytime, it just requires you to kill the AI guards. Hideouts are a bit more complex. To put it simple, if the hideouts is getting set up, anyone can attack it during the first 20 min of the prime time, if it’s fully built it needs to have an attack declared first and a defense point can be chipped of every day after that at the start of prime time of the next day.
World boss is every 2 hours on every odd number hour and resources bosses + transports are “random”.
Others
Bandit event is “random”. We know that it is every 4-6 hours (aprox.) but we can never say for sure that it will happen.
Random yellow zone ZvZ, objective would be faction points or fun.
Combat
We went over the important surface questions, now it’s time for a more in depth dissection of the actual ZvZ combat.
ZvZ combat has a few different styles. The most common one is the engage and disengage style. One side will engage, burn all cooldowns and disengage afterwards. The other side will counter engage while the first group is disengaging. After they disengage it’s mexican stand off until the first side has his cooldowns back.
The second less common but still present (mostly in smaller scale zvz) is the brawl. Brawling is when both sides are constantly poking and fighting. Engages will still happen but less intense and dramatic. Brawling often results in a slaughter on both sides.
Let’s now talk about commonly used important ZvZ weapons with their abilities. (Weapons and abilities everyone should know about!)
Locus (+ 1h Arcane)
This is the motivating cleanse ability. It is a W-slot ability that you will see on pretty much any arcane staff. It is casted on an ally and removes any movement-impairing and debuff effects for up to 5 allies. It also gives a 40% movement speed boost for all the allies affected. It does not remove damage-over-time effect spells.
This is the one handed arcane staff special ability (E-slot). The purple ball it shoots out will explode on impact with the first enemy it hits. It will purge, silence and damage all people in range of the small explosion. This staff and ability is mostly used to hold off flanks. It will purge buffs so that means boots spells and damage amplifiers like royal hood and cleric robe. It also silences, so the enemy will have trouble getting out as fast as they came in making them vulnerable to an engage.
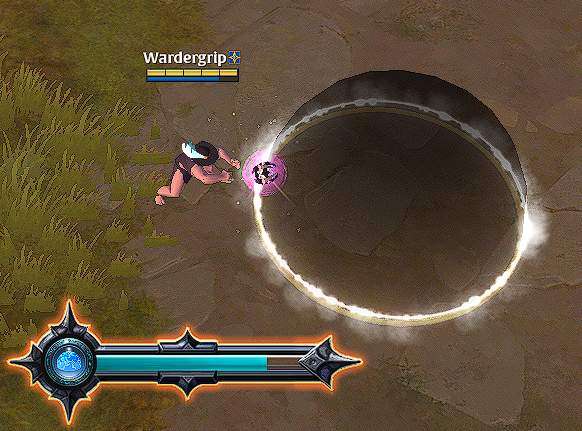
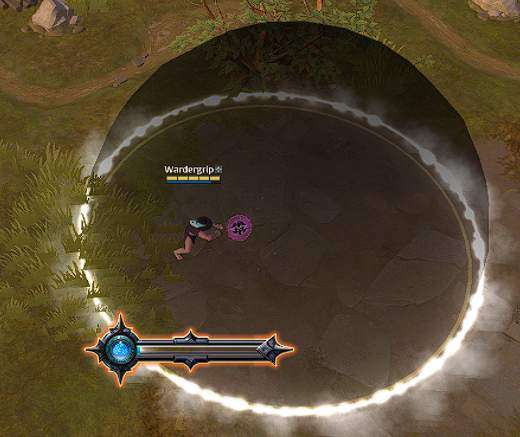
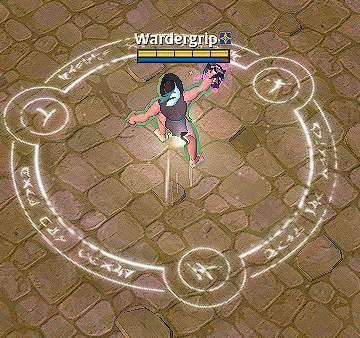
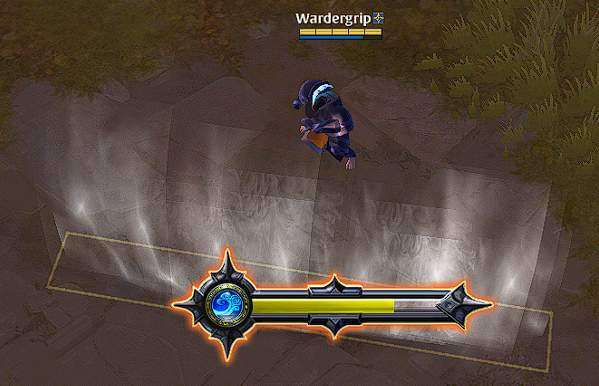
This is the malevolent locus or just locus for short special ability (E-slot). It is an uninterruptible cast which creates a dome. The dome increases in size over time (as you can tell from the pictures). The dome will purge all positive effects from enemies, remove all negative effects from allies while also increasing the resistances of all allies in the dome. This ability will make or break fights, it is the MOST impactful weapon of all weapons. A locus’ impact won’t be that obvious until you focus on when and what it did in the fight.
Grovekeeper

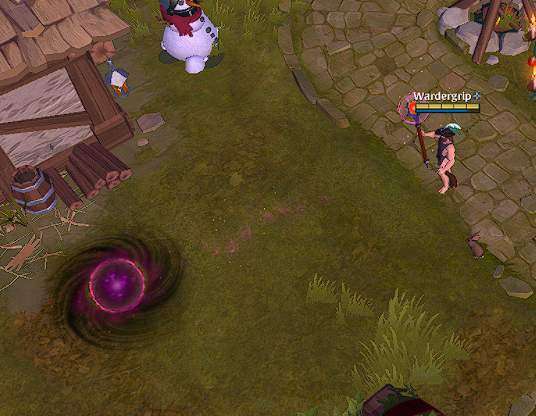
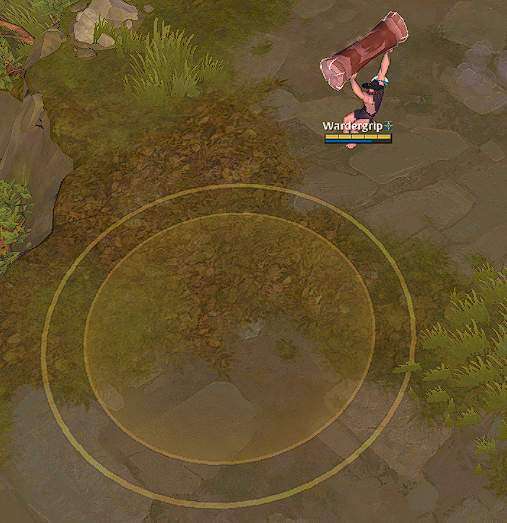
This is the inertia ring ability which is the last unlockable of the W-slot of the hammer tree. This ring is often referred to as onion ring or piss ring. This ring slows all enemies for 90% that are in the yellow part of the ring. This ability is often used to prevent an engage or make it as hard as possible for the opponent to get a successful engage. The ring can be countered by using the focused run ability which is found on the scholar sandals.
Ideally you would want multiple of these rings next to each other, slightly overlapping and used when the front line just passed the front line. This will make a gap between the opponents front and back line, either forcing the backline to stop their engage or get in a “sticky” situation. The front line is forced to go in deep and hope for the back line to reach or go back early. Be careful though! These abilities can be baited, what sometimes happens is that only a part of the zerg will engage to try to force out these rings. When they get used, they wait until they disappear and engage.
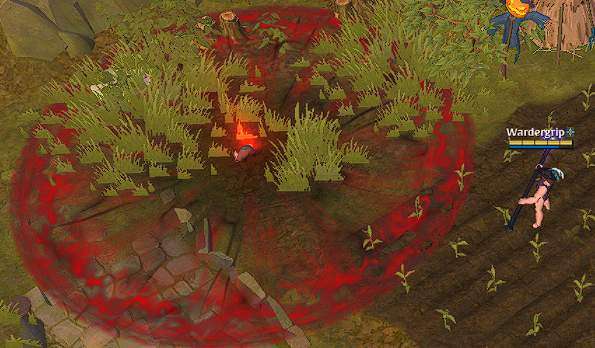
This is the grovekeepers (or wildly known as the pog log) signature ability (E-slot). The signature ability makes you jump (after a short delay) and will stun and damage all enemies in the center of your impact. This weapon and ability combined with the inertia ring is a very solid combo for a disruption weapon. Many zergs use this weapon and ability purely defensively, jumping on enemy dps that try to engage. However, this weapon has also seen aggressive use and is also a favourite for some shotcallers because of its range and impact. This signature ability is “countered” by knight helmets. The knight helmet’s ability will reduce the duration of the stun.
Camlann
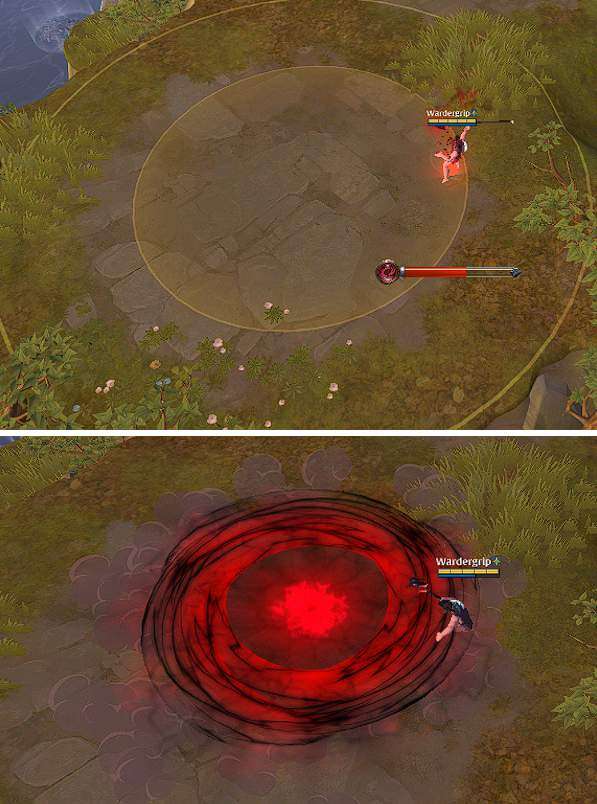
This is the signature ability of the camlann mace (E-slot). It sends out a small red object that will latch on the first target that it collides with. After it collides it will make a large red circle and after a brief moment everything in that circle will get pulled to the middle of this red circle (a.k.a. the person the shockwave latched on to). This ability is one of the major clump makers in ZvZ. It is VERY important that if you get camlanned, you DO NOT walk to your allies.
But Warder, won’ that mean I die and all the others live? I don’t want to die! First of all, don’t be selfish. It’s better to sacrifice a few for the many. Second of all, if they engage on you alone, they will almost instantly lose the fight. It is dumb and inefficient to engage on a single target. The worst that can happen to you is that they use Q’s and W’s to chip you down, but in an ideal scenario a front line healer will come to your aid. It’s also possible that they start clumping to get closer to you, making it even better for us. This ability is countered by the knight helmet. The knight helmet’s ability will make it so that the pull does not drag you to the center. In case you are in range of the pull, simply walk out or use your knight helmet.
Grailseeker
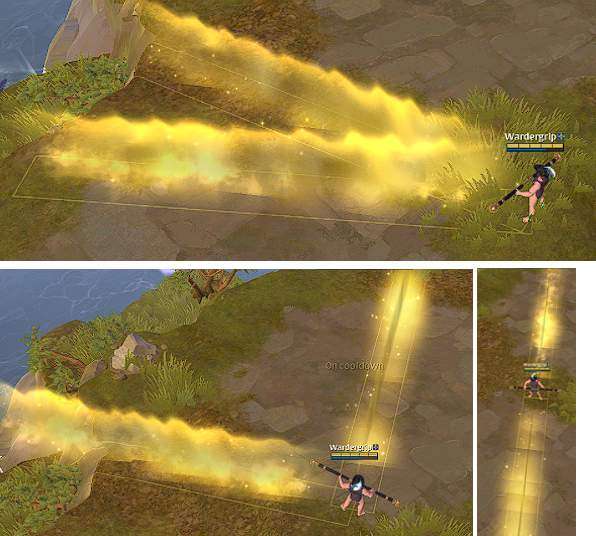
The grailseeker signature ability (E-slot) makes a long yellow line that roots everyone in place. The yellow line lasts for a moment and will still root all enemies that walk in it. The ability can be recast (but will double its cooldown) to make a secondary line which does the same thing. As you can see from the pictures, this ability has a high skill expression and can prevent engages or make engages very hard. The person with this weapon will often use it defensively and will prevent the enemy from engaging, similar to the grovekeeper. However, I personally enjoy playing it aggressively because it has a long range and high skill expression and that makes it a great tool for catching.
This ability is countered by cleanses mostly (which can be found on the arcane and mercenary hood) however, since it ignores crowd control resistance and duration modifier, the knight helmet does not help against this ability.
Judicator Armor
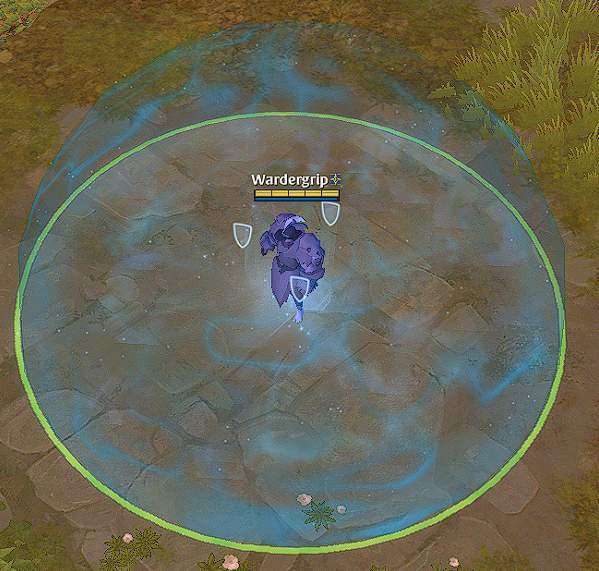
This is the signature ability of the judicator armor (R-slot). This creates a dome that increases resistances and healing received. The green outline on the border of the dome indicates if it’s an ally judi or not. There is nothing much to say without dragging this out. Use it to get better resets, use it before allies are dying, use it in the front, …
Icicle
This is the icicle signature ability (E-slot). It creates a large field that deals damage and most importantly, slows you by 75% for 3 seconds. The area itself lasts for 5 seconds. This ability is also used to hold off flanks but also has seen play in disrupting engages or disengages. If I recall correctly, this ability is countered by the scholar sandals. Knight helmets have no effect.
Knight Armor
This is the signature ability of the knight armor (R-slot). This wind wall will bounce you back when you want to walk through it
Damnation
This is the signature ability of the damnation staff (E-slot). This ability will pierce (reduces resistances) and applies a damage over time effect on everyone that is hit. The casting time is long, however, this is solved by using a scholar robe, making the cast time relatively short.
Fallen

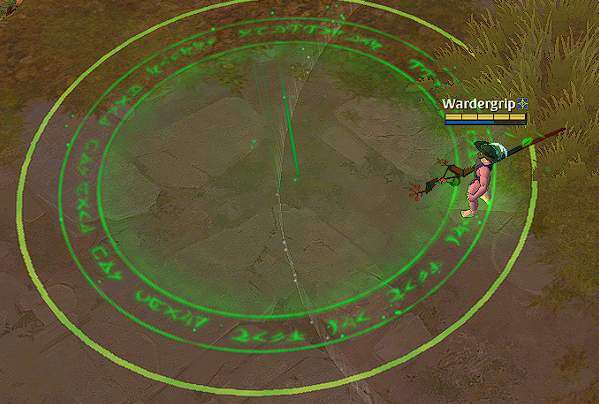
This is the fallen staff’s signature ability (E-slot). After a brief cast it will create a green circle, once the circle in the middle grows and touches the outer circle, it will heal and cleanse up to 10 allies that are in the larger circle. This ability can be used aggressively (which is hard but is also the best use of this ability) but should also be used defensively to make sure people are healthy fast.
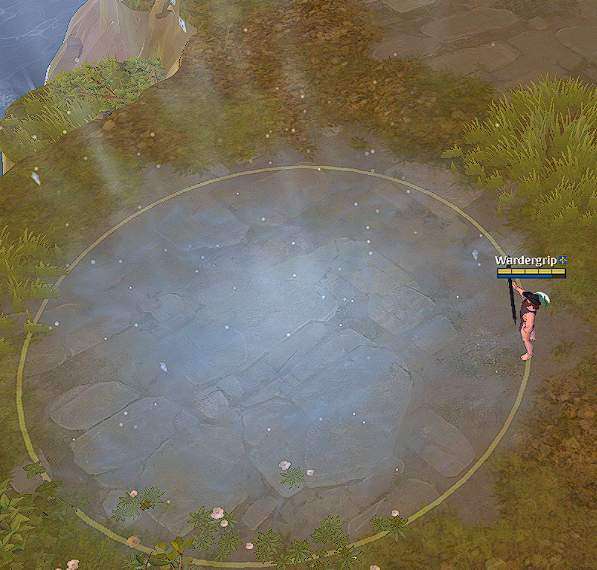
Wild Staff
This is the wild staff’s signature ability (E-slot) and will create a large circle that will heal up to 10 allies standing in it over a period of time. This ability is generally used as back line healing but also gets some use when your allies are disengaging and walk through the same choke.
ZvZ Systems
Albion Online has some systems that play a role in ZvZ. We will start with the disarray system. The TLDR (too long, didn’t read) version is, more allies means less stronger the individual is. Disarray starts at 26 players, giving a 1% debuff on bonus damage on enemy players, on bonus defence versus enemy players, CC duration on enemy players and received healing.
Second important system is cluster queue. This is one of the systems that most people hate and will complain about. During my playtime, I know of 3 reworks of this system. The TLDR version is basically that once 350 people are in a zone, the zone gets cluster queued. This means that the zone is locked and low IP players in the zone will get kicked out and higher IP players out the zone will have the chance to queue in the zone. It’s also possible to skip the cluster and hop zones. If I recall correctly the attacker and defender of the zone (if there is a territory attack present) has priority and people in queue will determine what the ratio of players is in the zone. On top of that, people in queue also add in the disarray debuff of the cluster queued zone.
Third system is the blob system. You surely have seen these red circles (or other colors, in the royal continent). They appear starting from more than 10 people being near each other. There isn’t a lot of documentation about it, just know that we refer to them in tiers, I know that a tier 1 blob starts from 11 people and t2 blob appears with 21 people.
Be the first to comment