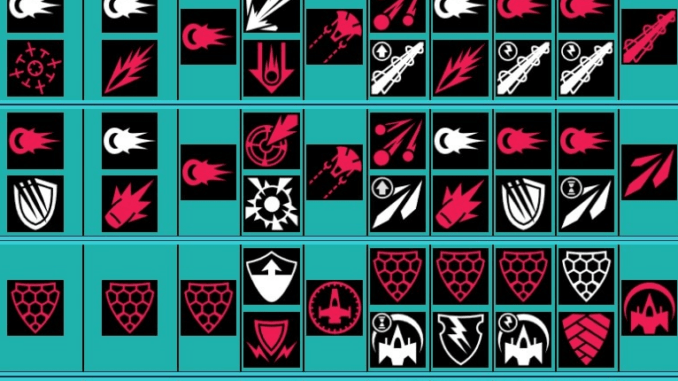
An infographic crib sheet (a.k.a. “cheat sheet”) to help you remember what settings to prioritise on various tabs (modules, shards, ship cores, reactor, research, base, and crew) in order to synergize and maximise your boost to a specific stat (damage / shield, salvage, compute, research, synth, void matter / power / reactor, shard drops, warp essence) Hopefully you find this picture format quicker and more intuitive than reading some bit elaborate guide.
Cheat Sheet Guide
Spoiler Alert
This aims to be useful to players up to sector 51+, so it will naturally contain some spoilers, including features you haven’t unlocked yet if you are in an earlier sector. If you don’t immediately recognise an icon or image, you can safely ignore it as something you haven’t unlocked yet.
How to Maximise Each Stat
Click to enlarge…

Hopefully you find this picture format quicker and more intuitive than reading some bit elaborate guide.
Each column is a stat that can be boosted across different tabs of the game. As many other guides will tell you, to progress quickly you’re better off focusing on boosting one stat at a time to the maximum, rather than doing everything poorly.
Sometimes, it’s possible to completely maximise two or more stats simultaneously (Like Synth + Compute) – especially when more module slots and links are unlocked.
Here’s an explanation of a couple of visual choices I made above:
- Large shard icons directly boost a stat. Small ones either indirectly boost it, or only provide additional boost once you unlock the ability to link shard slots.
- Similarily, large module icons directly boost a stat, small icons indirectly or only sporadically provide a boost.
- Modules are roughly ordered by importance (left to right, top to bottom) in providing additional boost. Without many module slots unlocked, you will need to pick the best ones for your situation.
- Greyed out module icons are situationally useful, depending on your setup and e.g. how quickly you’re clearing waves in your current sector.
- Bases shown are where a base’s parts contribute to the stat. The exact layout shown is a sample that works well, but different layouts will be optimal depending on how much you’ve upgraded each block.


Be the first to comment