
This guide explains how to make basic roads, intersections, highways, and even custom advanced road designs.
Ultimate Guide to Roads
The New Roads System
Welcome to the new roads system! This guide explains how to make basic roads, intersections, highways, and even custom advanced road designs.
The new roads system is basically just track with a new visual look, and “cars” are actually “trains”, but instead of running on “track” they run on “roads”.
This means that roads and cars have all the same functionality as track and trains.
You can make cars follow AI triggers, and you can create your own modded versions of both.
Each lane on a road is like a piece of track, so intersections are just advanced arrangements of multiple lanes.
Here are some examples of how “lanes” are just like tracks:

Since road lanes are each separate pieces of track, this means you can run vehicles in each lane!
Just like having two trains on a double-track main line:
Creating Roads
There are a few different ways to make roads, but the easiest is to use the automatic road generator.
You can find this in the new “roads” category:

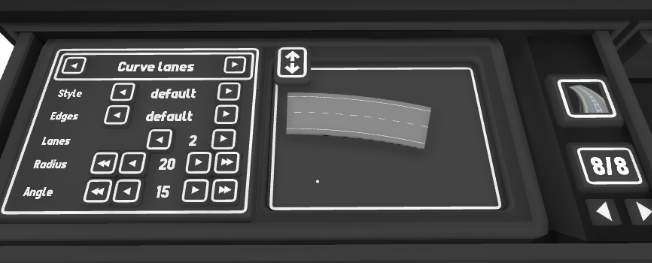
Using the road generator you can easily create segments of road just like you would for track.
You can customize things like angle & radius (for curves) and length (for straight segments).
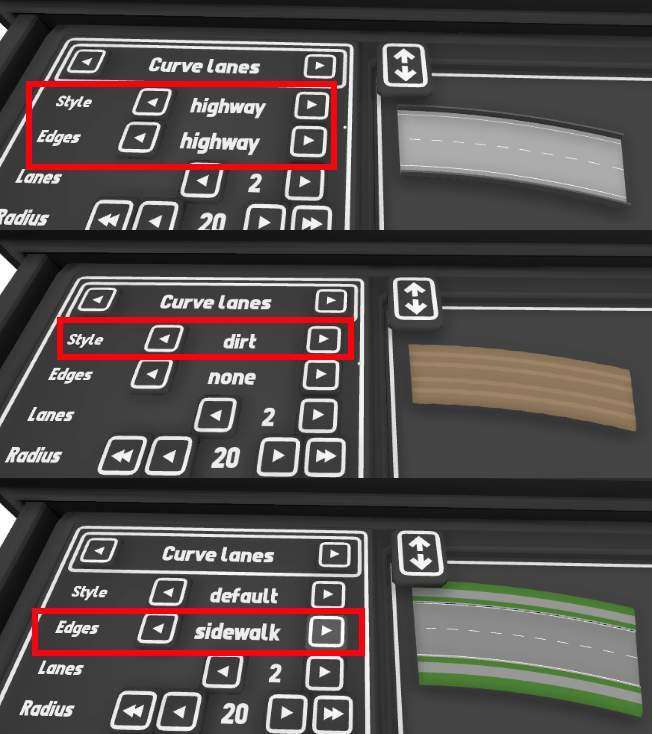
Styles
You can toggle between a few pre-set road styles using the “styles” and “edges” options:
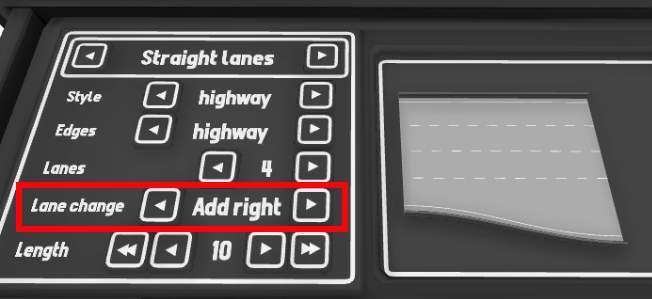
Lanes
You can also adjust the number of lanes:
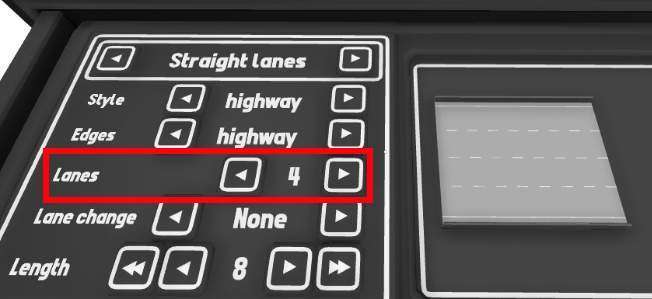
And you can even generate lane-changes automatically (these can only be made on straight segments, not curves).
Intersections
You can use the same road generator to create intersections automatically.
Change the main type to either “4 way intersection” or “3 way intersection”:
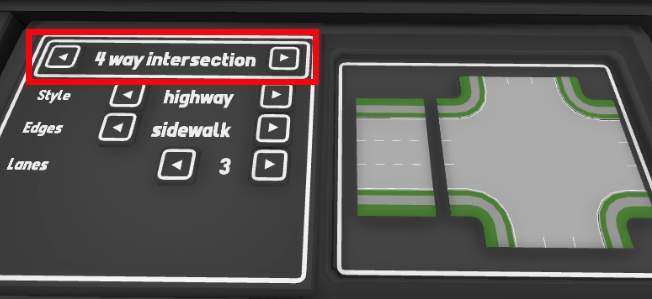
Just like with the other types of road generators, you can adjust the style and number of lanes.
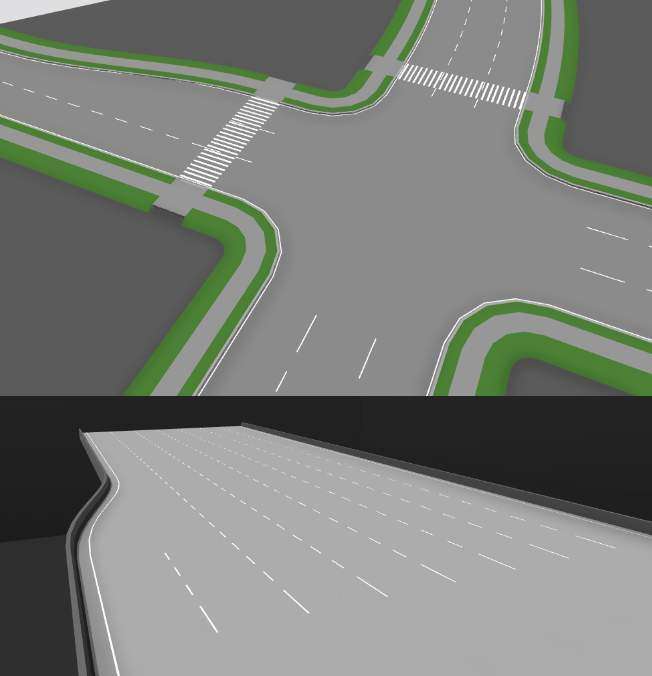
Combine these pieces together to create all kinds of roads!
Editing Styles
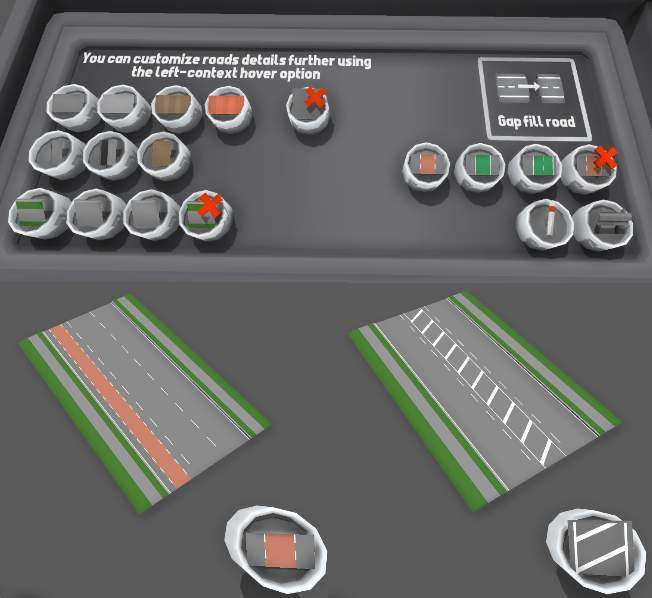
Just like with track, you can use a range of “style painters” to make visual changes to your roads!
There are several drawers full of different style painters you can use, simply pick them up and left click on individual road lanes to apply the style:
As well as the style painters, you can also manually edit styles using the popup window.
Press Q when hovering over a single lane of road to open the “style options” window.
From here you can fully customize everything like markings, bike lanes, edges, etc.
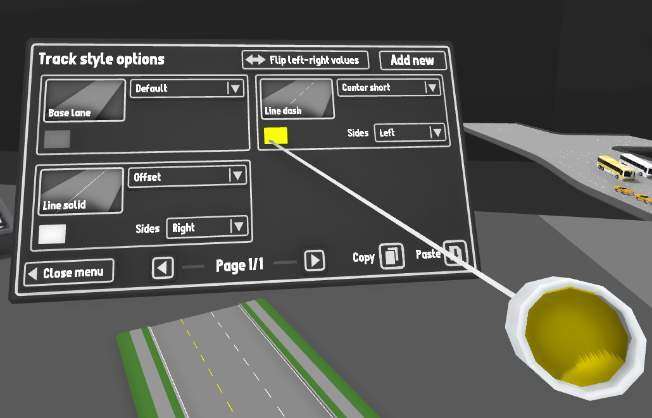
Lots of styles (like the line markings) are actually on the sides of lanes, not in the center.
You can paint the same lane multiple times with the same painter to flip which side they appear on (left, right, both, or none).
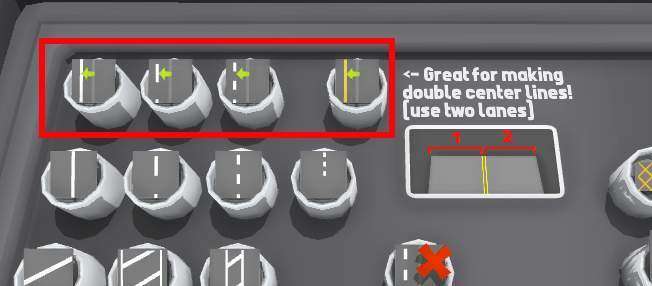
There are a bunch of line markings which are “offset” which means they aren’t perfectly in the center between two lanes, instead they are slightly offset. This is perfect for making dual-center-lines:
Copying Styles
You can copy the style of a whole road section and paste it onto another.
To do this on a normal segment of road, press “Right Sift + Return” while pointing at it to get a “group style painter” in your hand.
You can then paint other groups with this same style.
You can also use some pre-made styles which are in the “roads -> style presets” drawer.
Painting twice with the same painter will invert the group.
You can also use a group style with more/less lanes, it will just ignore any extra ones.
Manual Hand-Made Roads
While the intersection generator can make basic types of roads, if you want more customization you can dig deeper into the road system and make much more complex designs!
All intersections are made out of individual pieces, and you can take full control of how they are built if you choose to.
If you want to break an intersection apart into pieces, use the group tool (in the “room -> tools” drawer) and select the “break group” option.
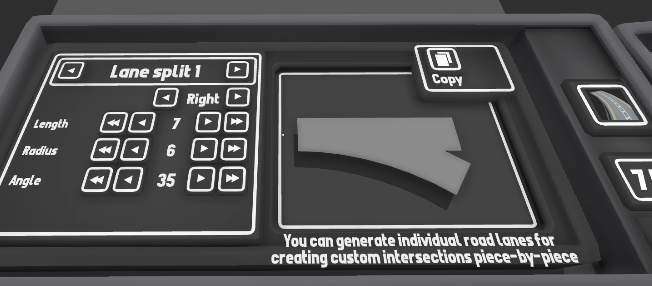
You can add your own new pieces using the “lane generator” (roads -> lane generator):
Here is a step-by-step walkthrough on building a custom intersection:
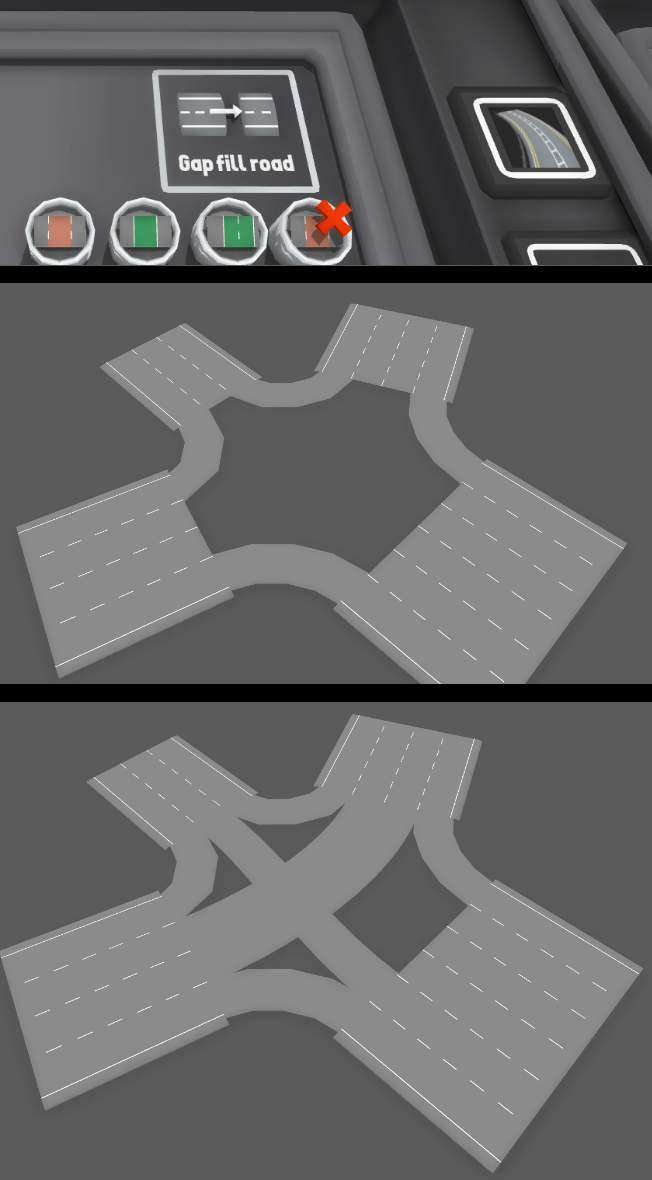
Firstly, use the road generator to make a bunch of road segments with your chosen number of lanes:

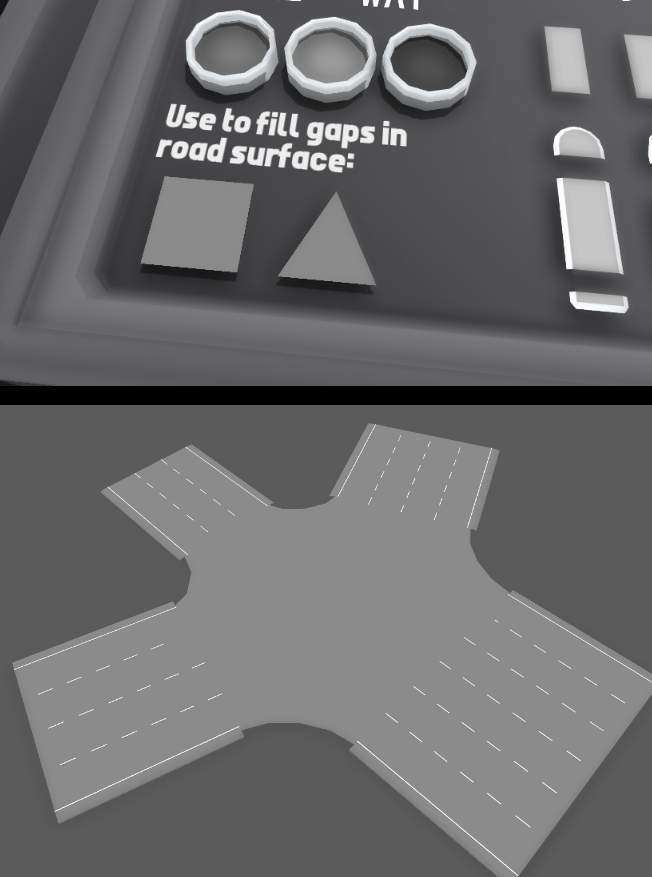
Then use a mixture of gap-fill road pieces (found in the “roads -> road styles 1” drawer) and custom turnouts to connect up any lanes which you want cars to run on.
Depending on how complex you want the car movements to be, you can either make a fully functional intersection (where each lane connects to each other) or simply connect up the lanes which you plan to have cars on:
Lastly, use the flat shape props in the “roads -> road markings” drawer to fill in any visual gaps left over. It helps to use transform-edit-mode (pressing F on a road piece) to align things easier:
You can then add any extra details (like sidewalks, road markings, traffic lights, etc) to finish off the intersection. You can even use the group tool to combine all the pieces back together into a group.
Once you dig deeper into the road system, you can make all kinds of complex intersections!
Side Snapping
The “side snapping” feature helps a lot with building roads manually, or adding more lanes to a road.
You can enable side-snapping for roads in the snapping menu:
“Pause menu -> Custom track -> snapping -> road snap to sides”
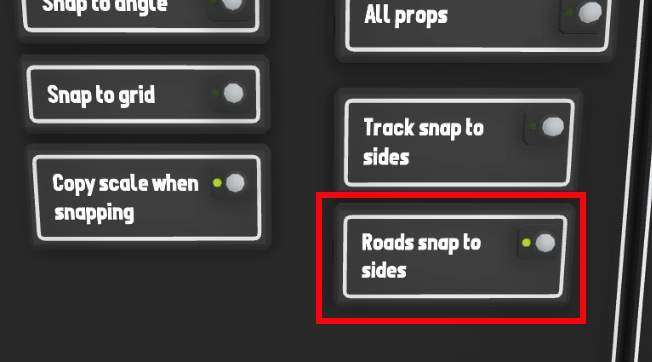
You can also press F7 as a shortcut key to toggle side-snapping (this button can be re-bound in the Controls menu.
When side-snapping is active you can snap single lane pieces of road directly onto the side of roads, like this:
Vehicles
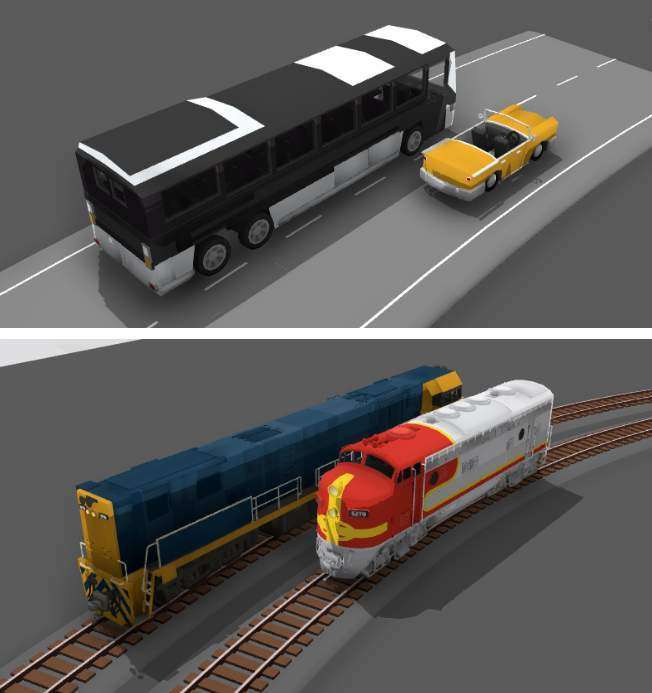
Along with the new road system comes drivable vehicles!
These work exactly like trains, which means that you place them down on a section of road and set their speed with a hand-held controller (or in the driver’s seat).
They will follow the “track” just like a train, so the way cars behave is entirely based on the design of the road they run on.
You can find drivable versions of all the cars in the “vehicles -> cars [drivable]” drawer:
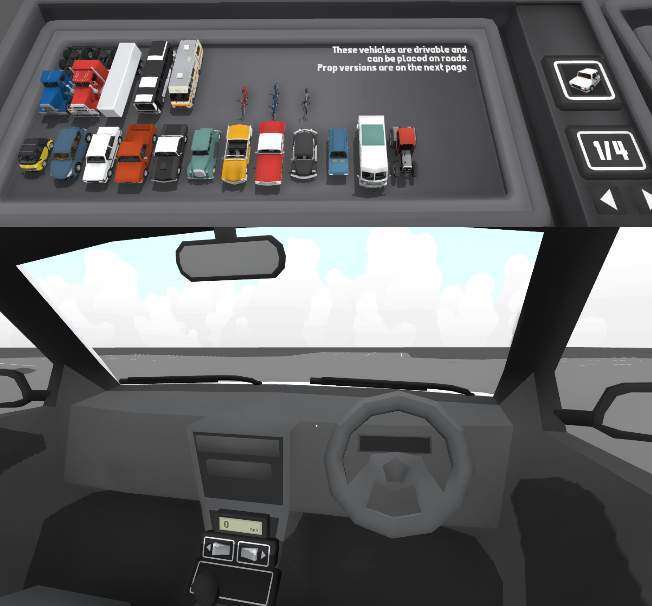
The next drawer “cars [props]” contains prop versions of all the cars, these behave like props and can be placed on the map and not driven.
Be the first to comment