
Tips and tricks to help your colony die less.
Tips and Tricks
Note: Credit goes to FamousAdventurer
Disclaimers
So I’ve been playing for about 130 hours as of this writing, and have just started a new colony after completing the Acolytes on the first map.
I was really surprised by limited number of guides so I thought I’d give a try at writing one. I don’t claim to be an expert on the game yet, but every new game (win or lose) I learn a little bit more. Which has really been the fun for me, it reminds me of gaming in the 90’s where information and resources were limited to word of mouth and Nintendo Power. So I do encourage you to try to figure it out some on your own. It’s incredibly frustrating, but also very rewarding.
With that out the way here’s what I’ve learned that will hopefully help you.
Getting Started
Difficulty levels:

- Hardcore Odyssey – Basically a couple times per day events pop up that generally make like more difficult for you unless you spend influence.
- Zenlike Odyssey – Limited tutorials and removes the event system.
- Zenlike Odyssey + Tutorial – Does what it says on the tin, I didn’t find the tutorials super helpful though.
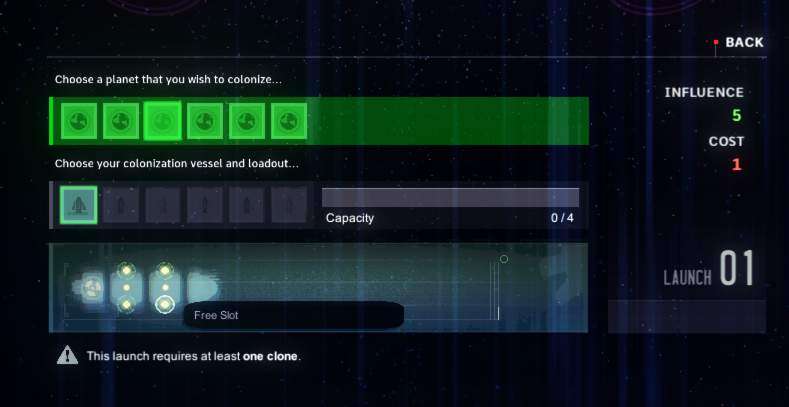
When you first get started with a new colony you have to select a first loadout for your ship.
I haven’t played all the maps yet so I don’t have anything to tell you about those other than they have different resource levels/enemies/topography.
You start with 5 influence but 1 gets taken up by the colony ship itself, so you have 4 to play with.
I prefer to take:
- 3 GEN-1 Clones
- 1 Starter Cargo
I’ve tried a couple times with the Prototype Clones but the margin for error is uncomfortably low for me. You might have better luck or find a more efficient use of your influence for the early game.
I don’t really worry about starting with few supplies because we’re gonna rush for our second ship and it will bring enough supplies until we become mostly self sufficient.
Hit Launch and you’ll load into your game and see something like this:
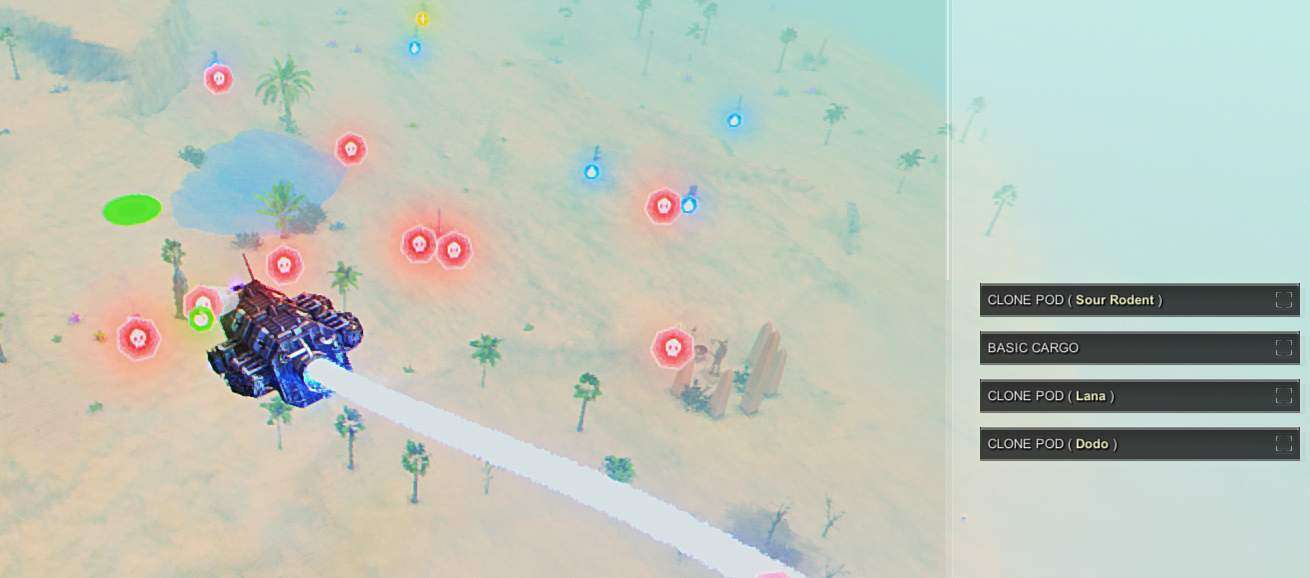
Left click to choose a location to drop your pods.
My most important considerations are:
- Trees – You want at least two close to your colony.
- Water – Being close to a lake makes everything much easier because you’ll be able to collect water every day and eventually fish for food. If you hate eating fish look for the water icons and try to make sure that there are a couple close to your colony. Cactus plants respawn water, water tanks don’t
- Enough flat space to build – a few of my first colonies struggles because I started too close to unbuildable terrain.
Once you find a spot you like, left click to select it then click on the check boxes on the right to carefully and gently lower your colonists to the surface. Then click “Switch Viewport” to move to the surface.
Early on there isn’t too much to worry about danger wise. Most enemies are asleep or at least won’t aggro until night time.
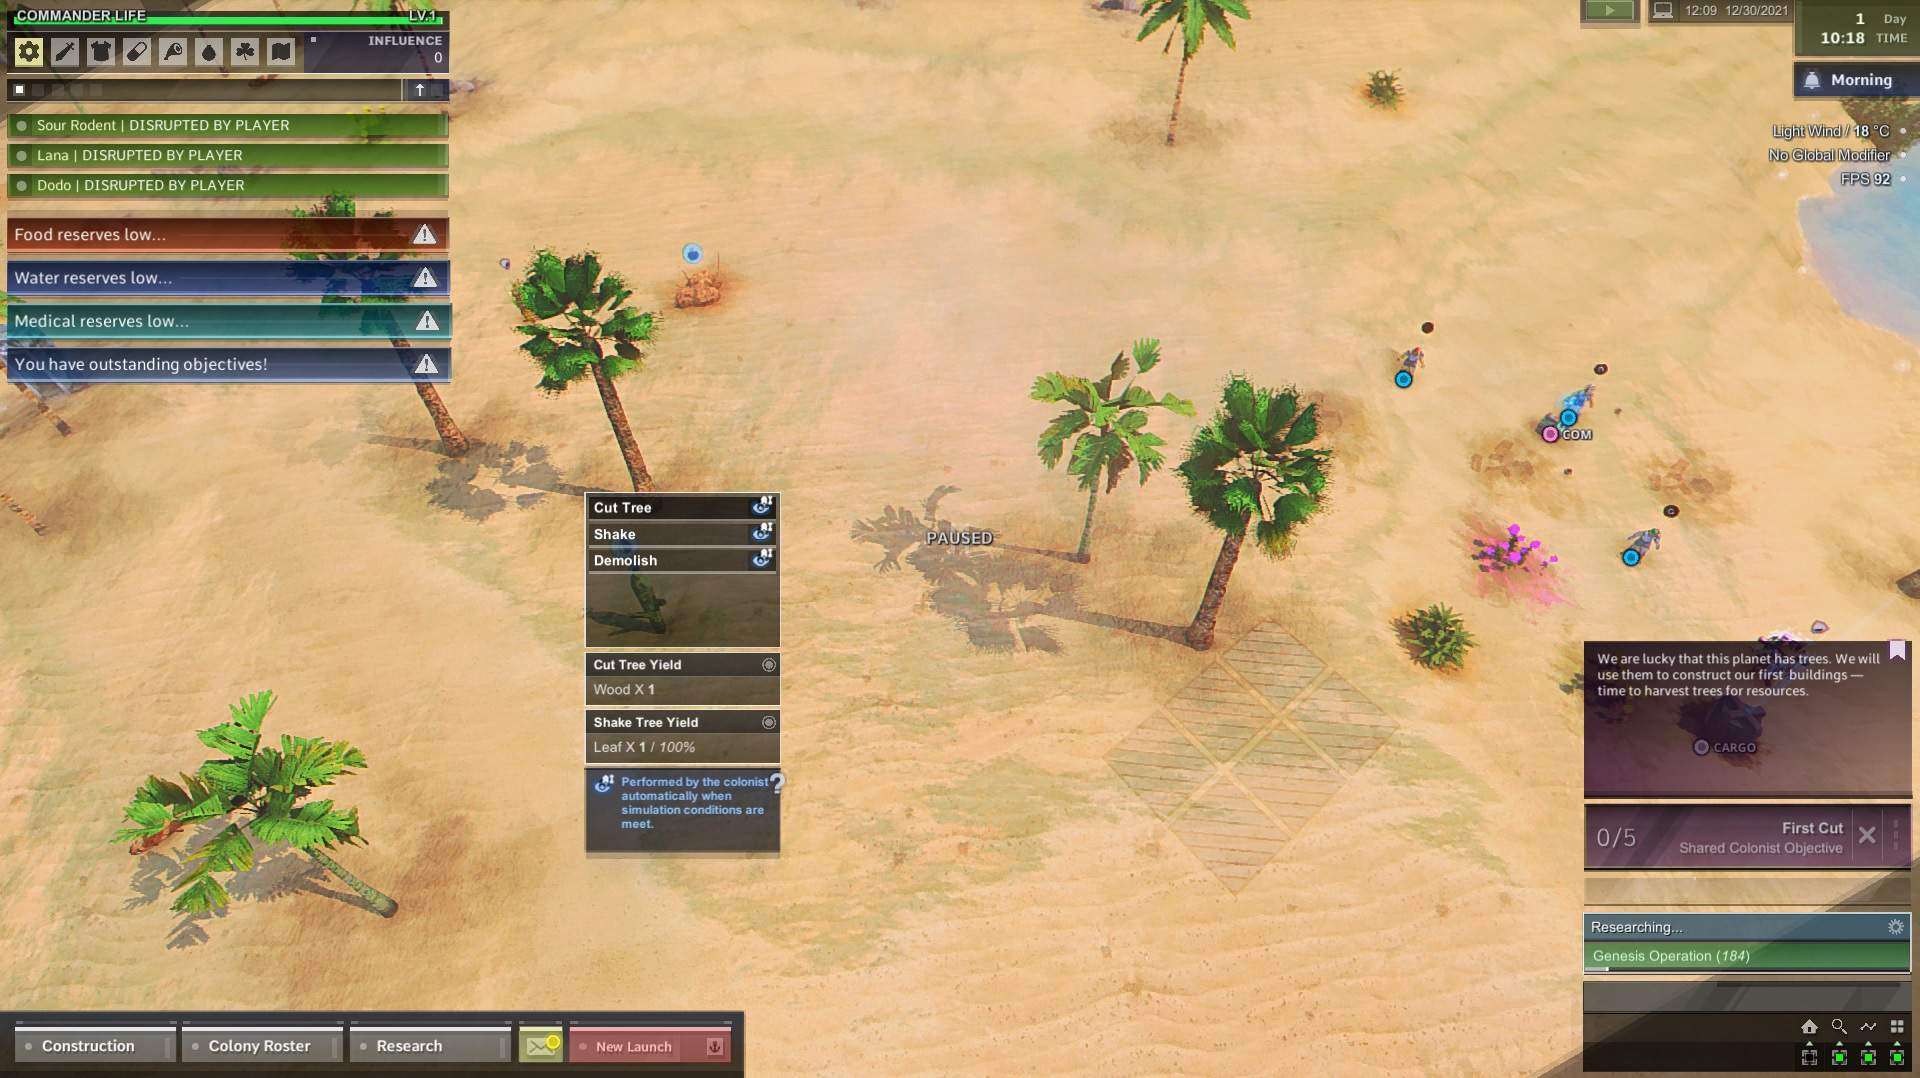
Time to set up the colony:
- Right click the colonists to wake them up.
- Open the research menu and choose “Genesis Operation”
- Open the objective menu and choose “First Cut” – Completing objectives is how you earn influence to call down more colony ships. We’ll talk more about that later.
- Open the Construction Menu – First you need to choose the land you want to claim to build on. You start with three plots for free.
- After you claim your build area, put down about 5-6 spots for Resource Zone – This is where colonists will bring all supplies until we build storage boxes.
- Find a tree nearby to start chopping wood – “Leafe” two trees near the center of your colony standing because we will be using them to gather renewable resources later.
- Right click on the Cargo pod and harvest it for your started resources.
- *Optional – open your colonists profiles to open their Task Grid – I prefer my early colonists to not be assigned to research – the computer will process research on it’s own and we have other more important things to do early.
Here’s what mine looks like once that’s all done
Now that we’re planetside our priority is getting 8 influence ASAP so we can call down a second ship. Some objectives are locked behind research, some require violence here are the orders I generally take.
Research:
- Genesis Operation
- Campfire Basics
- Homeopathy
- Primitive Crafting Blueprints
- Primitive Containers
- Campfire – Upgraded Campfire where you can cook raw meat
Objectives:
- First Cut
- Wood Hoarder
- Primitive Crafting
- Campfire
- Stick Warriors
- Flint
- Shrine of Fire / Bandages (Which one you do first depends on your colonist health/medical supplies situation)
Once you get to 8 Influence you can click “New Launch” at the bottom of the screen to call in a second colony ship. I’ve seen other guides recommend waiting until you have more influence so you can get in more supplies. I prefer to call it in ASAP so I have more bodies to gather supplies and defend the colony. It’s up to you.
Second Colony Ship
Research List:
- Zones
- Rooms
- Objectives Lv. 1 (when you’re ready to start working towards another colony ship)
- Crafting Table
- Plywood Elements
- Room Designations
- Carpenters Table (There is also an objective you can complete to pick up this research)
- Wooden Elements
- Wooden Containers
- Meat Container
- Complex Algorithm (If you need a higher commander level for the last two techs)
- Hash Speed Lv.1 Research (If you need a higher commander level for the last two techs)
- Room Designations Lv.2
- Room Designation Objects
Objectives List:
- Construction Initiative
- Crafting Table
- Carpenter Table (You can can also get this through research)
- Kameks Retreat – Friendly NPCs that will give you 1 scrap for 3 leafs.
- Survival – Workshop
- Lost Cargo
- Nikolas Kage – Friendly NPC
- Skill Capsule LV.1
- Fishing Fantasy – Unlocks Fishing Rod
For my second colony ship I like to bring 3 more GEN-1 Clones and fill the rest with more Starter Cargo. Any leftover influence you have will be banked for future colony ships. You do still need to gain 8 additional influence to call another ship.
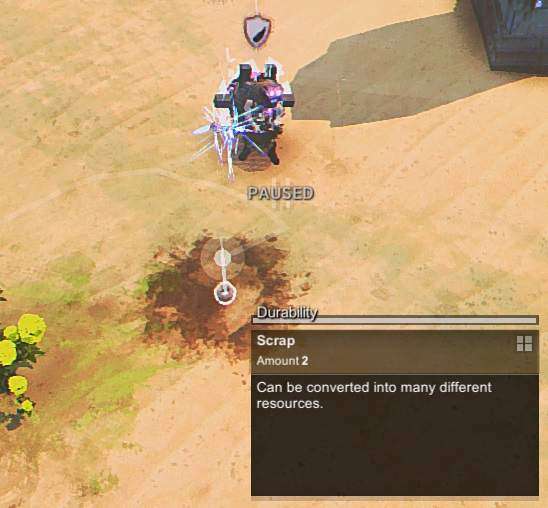
The basic cargo costs 2 influence and is more efficient for supplies like food and water, so that might be a better option. However bringing more Starter Cargo brings you more of some of the most difficult resources to acquire: Emergency Stimpacks and Scrap.
Stimpacks are what let you revive a dying colonist. If you have easy access to Dandelions you can use those to make basic surgery kits, but using those can give your colonists nasty scars that reduce their effectiveness.
You can find scrap lying on the ground from your colonist pods and after you empty a cargo pod. It’s used in many crafting and building recipes.
Next I take a little break from Objectives to outfit my colonists.
The crafting table has recipes for some basic gear and weapons. I try to make sure all of my colonists have:
- Sandals
- Primitive Wraps
- Primitive Foliage Skirt
- Leaf Wristband
- Stone Sword if I have enough stones for everyone
Right click and “Shake” those two trees we left up to get more leaves, you can also chop down bushes that are close by for a quick boost.
If you Shift + Click on a recipe you can order your colonists to keep a supply of them and autocraft more whenever needed. Do that for foliage bandages and large foliage bandages.
Also this is a good time to clear out and Scorpid hives near your base. Scorpids can be a good source of food and venom, but in my experience it’s much better to clear them out before Scorpids start spawning on day 2.

First Night
Be sure to set a fuel on your campfire, I like to start it with one wood then keep it going on leaves because they are much easier to acquire right now. If you’re not using the fire for cooking you can clear the fuel choice to let it burn out and get Charcoal.
The cold will affect your colonists if they spend too long away from the fire, and anyone bleeding out away from a heat source dies much much faster. Good luck.
At night a lot of the Skull Icons you saw flying over will aggro you if you get in their range. The mutated colonists aren’t too difficult if you’re loaded up with stone swords, but if you don’t need the supplies their guarding you can leave them be. Just watch out for colonists pathing so they don’t accidentally start a fight you don’t want.
Once you have completed the research and objectives listed you’re solidly in Midgame. In the workshop you can start crafting wooden spears which should see you through all but the last Acolyte. With those you can start clearing the Aquatic Enemies around the lakes which gives you and easy source of water and if you have the fishing rod fish as well.
From here it’s really up to you how to progress, you can call another colony ship immediately if you’re low on supplies or wait to complete more objectives first so you can fill out the ship. Either way get at least one of the Lv.2 Cargo Pods, they come with Metal which will help you get your crafting building all setup.
Random Advice
Here are just pieces of information as I think of them….
Save Scum
Safe Frequently, nothing worse than losing two hours of progress because a colonist pissed off the wrong Crap Golem
Objectives
Some objectives do not have enough character slots to compete with the enemies they’ll face. Just grab as many colonists as you need and walk their manually. Try to pull enemies one at a time so you can pick them off quickly without taking too much damage – this also works for Acolytes.
Toilet Zone
Once you research zones set up a toilet zone so all your poop is in once place. It might be tempting to stomp all the crap so you don’t have to deal with Crap Golems, but if gives your colonists a nasty debuff and you won’t discover soap for a long time.
Hats
Your colonists have a chance to earn a perk when they perform certain actions. They are usually buffs to make them better at whatever they were doing. But there are two I want to mention.
Cactus Jack – from gathering water from cacti – gives a massive bonus to crit chance – give this person lots of damage modules and more crit chance if you can find it.
Cannibal – Sometimes you get in a bad spot where you can’t save a colonist that’s been downed. Don’t let that delicious meat go to waste! Right click them to choose to cannibalize them. The lucky colonist that gets the meal has a chance to gain the cannibal perk which gives a nice damage buff.
Portable Slot
A lot of objectives will lead you to an item that goes in the portable slot for your colonist. Just right click the item and choose ‘on back.’ The fishing rod is one of these too.

Be the first to comment