
How to make a system for Time allocation in 001 Game Creator.
Guide Contents
Step 1: Create 2 New Global Variables
Note: Credit goes to BatClan
Create a new Global Variable and name it (Time or T is adequate), you can leave the Default Value at 0.
This Variable is your unit of measure for how you choose to keep time.
Create your 2nd Global Variable and name it (Day or Cycle work well) set this Default Value to 1. This will be a counter for how many times your Time Variable reaches max.
Step 2: Create a New Switch
Create a new Switch. Go ahead and name it and leave it’s default value at off.
This Switch will let you turn on or off your Time feature easily.
Step 3: Update Your HUD
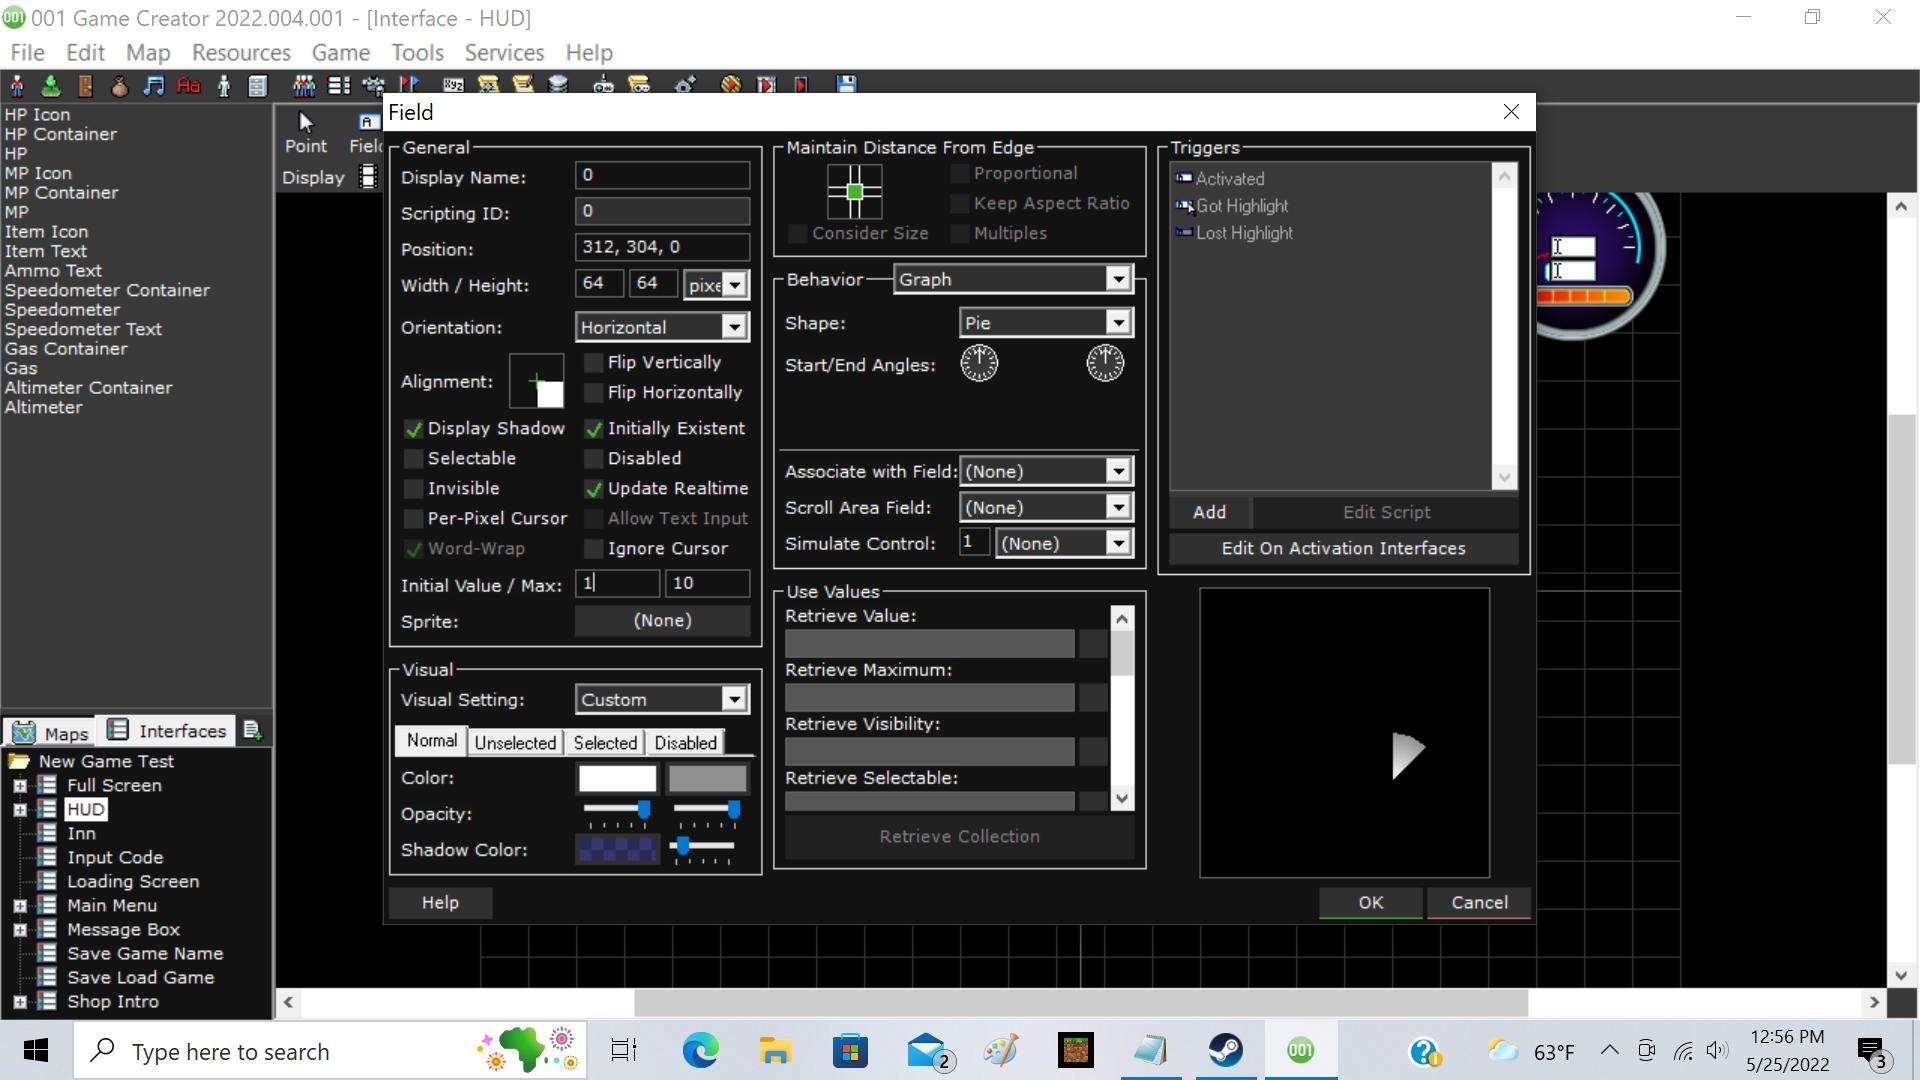
Part A: Visualizing Your Time Variable
Start by creating a Graph where you want to display your Time on your main HUD Interface. If you have the Graph shaped as Pie, and set the Start/End Angles straight up, then your Time feature will behave like a clock. Set the Inital Value to 1, and
Max Value to whatever number suits your time for a full cycle. In the Use Values section, Retrieve Value should be set to use your Global Variable Time. Adjust color.
Next make a field for your Cycle count. In the Use Values Section, Retrieve Value should be set to use Global Variable Cycle.
Part B: Timing Your Time Variable
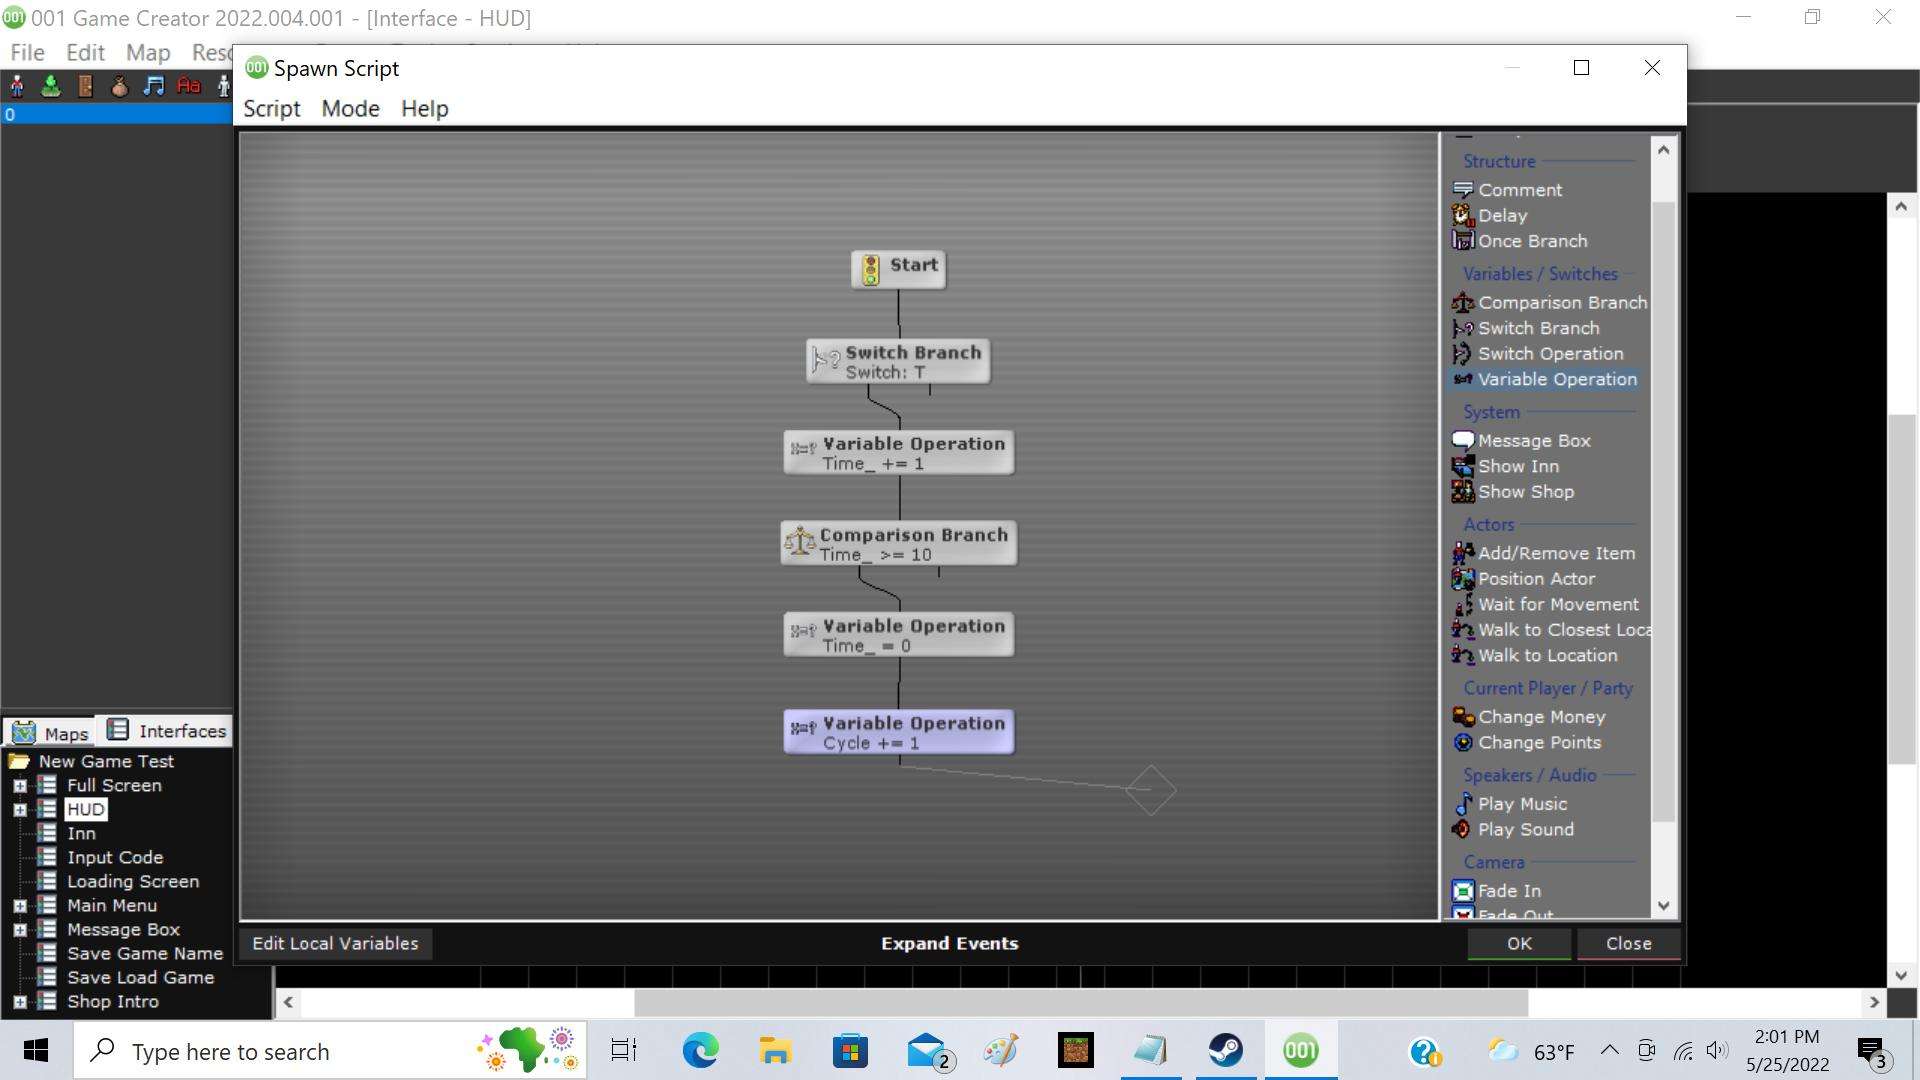
Create a Timer next to your Time Variable Graph. Every Interval will represent your Time Variable as a single unit (your Time cycle is Every Interval of timer + Max Value of Graph). Keep the Number of Ticks at 0 and edit the script of Every Timer Tick.
Start with a Switch Branch (your Time Switch), if it is on path should lead to a Variable Operation that adds 1 to Time Variable.
Continue with a Comparison Branch (expression = Global Time Variable; value = max value of Graph Time Variable), if true leads to another Variable Operation (Global Variable Time set to 0) followed by another Variable Operation (Global Variable Cycle set to Add 1)
Step 4: Controlling Your Time Variable
We added a Switch for that earlier. Having it on will allow your Graph and Count to function effectively keeping track of your time as you have it configured. You can use this Switch to stop your time by having it off.
By begining every map with a Switch Branch to check if your Time feature should be on in the map’s Properties-Player Enters Script you can manage where your Time Variable affects your project. Switch Branch can be used everywhere so remember where you decide to put them in case you need to make changes later.
Another application for your Time feature is to use a Variable Operation to add to Time Variable, just like the Switch you can add it anywhere but instead of toggling your time off it will alter the value.
Step 5: (Optional) Refine and Personalize
Your Time feature is now done… but it does not have to be. Now it is time for your Time feature to be refined and personalized to fit perfectly into your project. Think about its role or purpose, now is when you should add more layers if you need them like continuing the Day cycle with Months.
You should also add to the Graph on your HUD, giving the Graph an overlay graphic could really make your pie Graph look like a clock. Personalize it’s purpose with scripts that are triggered when a cycle is at max, or player takes certain actions like rest, or even has checks for plants to grow or landscapes change.
Be the first to comment