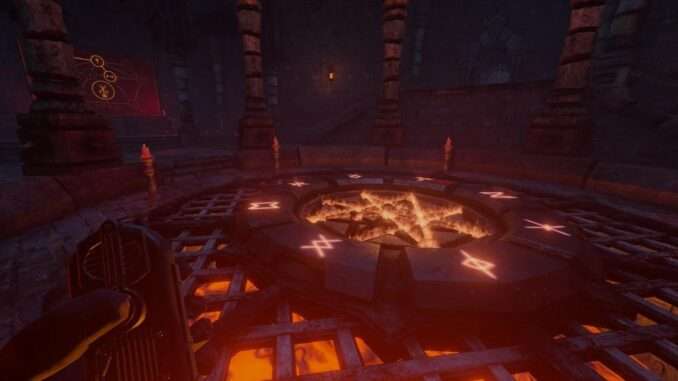
A straightforward guide to solving the puzzles of We Were Here Too with images.
Guide Contents
Room #1
Note: Credit goes to Pauleene
Puzzle #1
- Objective: Solve the cylinder puzzle on Peasant’s side, twice.
- Peasant: There are 3 symbols on a cylinder puzzle and a lever.
- Lord: There is a sewer with the symbols behind them, glowing red. You’ll have to stand right in front of it to see them.
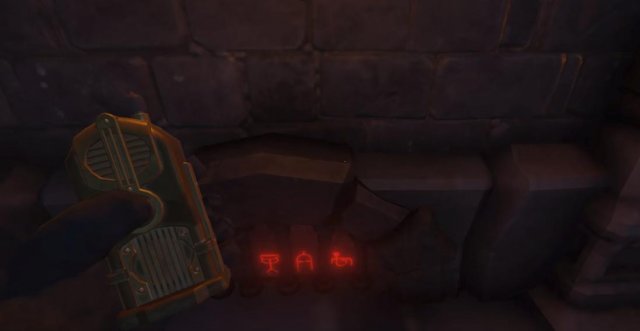

- Peasant: Insert those symbols on your side, and pull the lever.
- Lord: A door on the west side of the room will open with a book and a lever with a lightswitch. The book is a hint that 3 coffins are linked to 3 symbols. Get out of the room and look for the coffins with the symbols above them.
- Peasant: Input those symbols on the puzzle and pull the lever.
- Lightswitch 1: In the room that opens after the first puzzle with the book of the 3 coffins.
Room #2
Puzzle #2
- Objective: Light the candles in order on Peasant’s side using Lord’s book.
- Lord: There is a book with candles on them placed in a circular form. The layout corresponds to the candles on Peasant’s side surrounding some sort of pentagram.
- Peasant: Light the candles in order of the numbers on Lord’s book. TIP: Look at it like a clock.
Puzzle #3
- Objective: Complete Peasant’s symbols using 4 smaller symbols using Lord’s “complete” symbol.
- Peasant: The red and blue banners on each side of the room light up. You will need to form the correct symbol using different smaller symbols.
- Lord: Describe the symbol of the red banner. This symbol is comprised of 4 smaller symbols.
- Peasant: Click on the symbols that may match the description of Lord’s banner. Do the same for the blue banner.


Note: symbols may vary.
Puzzle #4
- Objective: “Draw” the star on Peasant’s pentagram using Lord’s symbols, by pressing the buttons around it in order.
- Peasant: Just like the candles earlier, you will need to press the symbols around the pentagram in the order of Lord’s drawings.
- Lord: Start from either end of the line and describe each symbol as the line goes until it ends.


- Lightswitch 2: When this is completed, behind you there is a lever with the lightswitch in one of the rooms. Pull it before you proceed.
Room #3
Puzzle #5
This is a time-sensitive puzzle.
- Objective: Lord must help Peasant to escape the falling spiral staircase.
- Peasant: Pull the lever with a lightswitch next to the book under the spiral staircase. Run up the stairs, and there will be a “cross” with a compass. TIP: If the compass points north on the west side, change your perspective and look at it as if north was YOUR north (turn your head.) This cross is basically a “laid out” version of a cube. Look up a cube papercraft as an example.
- Lord: There are blocks around the room. You need to find the block that corresponds to the “cross.”) So, north should point to what Peasant’s cross’s north is pointing to.
For example: Peasant’s north is pointing to a triangle, and its east pointing to a square. Lord must find the cube with the north pointing to a triangle and its east pointing to a square, and so on. i.e.


- Lord: Place it on the switch in the centre of the room. Keep going until Peasant reaches the top of the staircase.
Room #4
Puzzle #6
This is a time-sensitive puzzle.
- Objective: Peasant must place the correct weapons on the four knights on the right hands, to match the same knights in Lord’s room.
- Lord: Take note of the knights around the room. The room is getting smaller, with a wall ready to squish you to bits and diminishing your view of the knights as time runs out.
- Peasant: There is a wheel in the centre of the room. Use this to unwind and reverse the wall backwards for Lord time to time so he doesn’t die. Around the room are different weapons of shapes and sizes, and 4 knights with different flags on top of each of them. Each hand must match the knights on Lord’s side. Whenever you get a knight correct, its eyes glow red.
Room #5
Puzzle #7
- Objective: Peasant must complete 3 sets of glass paintings using pieces from other glass paintings in the room.
- Lord: There are 3 sets of glass paintings. Each painting is comprised of 3 pieces. Describe each piece from top to bottom.
- Peasant: Find the right pieces according to Lord’s description from 6 different glass paintings in your room and place them in the centre of the room (behind the chessboard looking platform) to complete each set of painting.
- Lightswitch: To the left of the chessboard, there is a room that should open sometime during the puzzle.
Puzzle #8
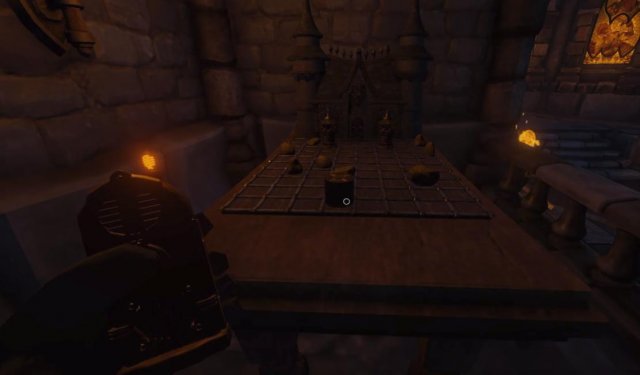
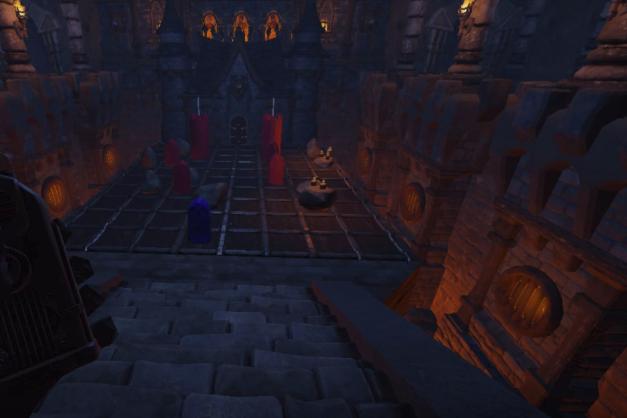
- Objective 1: On the chessboard, Peasant must slay the soldiers using the knight with the blue cape using Lord’s chessboard placed on the left of his room of the glass paintings.
- Peasant: You must direct Lord to move the knight towards the other soldiers on the board protecting the castle. TIP: Lord can’t see the soldiers except for the controllable knight.
- Lord: Listen to Peasant, lol. KILL ‘EM.
Also, Tip: there may be some rocks that Lord can’t see that Peasant can.
The next 2 stages/objectives will comprise of TWO knights now, and with Lord only able to see and control one of them on his chessboard, the two knights move at the same time on Peasant’s board.
Tip: The knight’s placement on Peasant’s board may not correspond to its position on Lord’s board.
So, without further ado! We go onwards to…
- Objective 2: Slay the towers at the SAME TIME.
- Objective 3: Enter the castle at the SAME TIME.
Room #6
Puzzle #9
This is a time-sensitive puzzle.
- Objective: Peasant must escape the maze using Lord’s help as he sees the bird’s eye view of the maze.
- Peasant: Once Peasant steps on the circle in the middle of the maze, the walls rise from the ground eliminating much of your view of the area.
- Lord: You must guide Peasant towards each X’s (also known as the checkpoints of the maze) in the maze.
Tip: Every time Peasant reaches a checkpoint, let Lord take some time to figure out the directions before proceeding to the next checkpoint.

Room #7
Puzzle #10
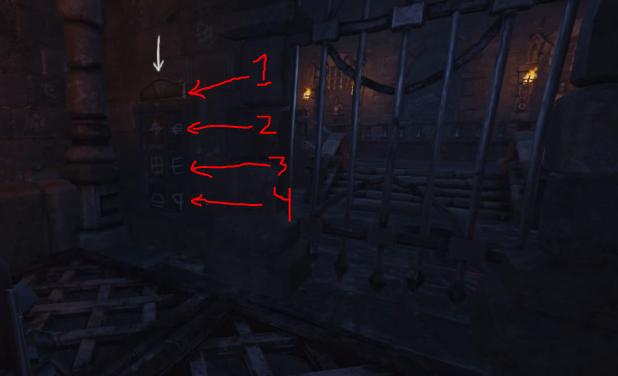
- Objective: Free Peasant from burning from the lava beneath his prison cell. TIP: the best way to do solve the puzzle is to not click on any of the pieces of the cylinder puzzles! Although it may still work otherwise. I haven’t tried it.
Author’s note: literally the most difficult puzzle that we had to solve. D:
- Lord: Starting from the right puzzle first, you must match the symbols to Peasant’s. Wait until Peasant describes his first symbol on his side.
- Peasant: In your cell, an arrow points downwards to a drawing of a symbol on a frame. That is Lord’s FIRST symbol that he must input on HIS side of the puzzle. Once the first piece of the puzzle moves, that symbol is Lord’s SECOND symbol.
For example: The drawing on the frame is A, Lord must input A on the first piece of his cylinder puzzle on the right. Note: you cannot see A on your side of the puzzle. Now that the first piece (NOT the frame) has moved on Peasant’s side, which is B, Lord’s next SECOND piece of the puzzle would be B. And so on and so forth…
There is a reason for Peasant’s side to only have 5 moveable symbols, while Lord’s 6. That reason being Peasant’s first symbol is not moveable and is a drawing on the wall.

Room #8
Puzzle #11
- Objective: Go upstairs using the elevator with only one person at a time, and reaching the last 3 lightswitches of the game. If two people step on the elevator, the elevator will fall from the weight and kill both of you. Don’t worry, there’s no leaving anyone behind later!
Instead of saying “one of you,” repeatedly in this section, I’ll just suggest the roles beforehand. It works both ways, so, Peasant or Lord can go up the elevator first. I will also break this down into different sections.
Step 1: Pull the lightswitch from the previous puzzle.
- Lord: Go up the elevator. Pull the lightswitch. On top of it are 6 symbols. Remember the symbols in the previous puzzle?
- Peasant: Downstairs, go back to the 6 symbols and input the same symbols from Lord’s side on top of his lightswitch.
- Important note for good ending: If this happens to be your last switch and the gate opens, whoever is upstairs must NOT leave the castle yet! Wait for your partner to return to you!
Step 2: Reach the first lightswitch across the elevator (within the walls.) You know… where that hideous ghost was hiding?
- Peasant: Go back to the room of the elevator. Press the down button on the left side of the room to call the elevator. Enter it and go upstairs.
- Lord: While the elevator moves upwards, wait for it to reach a certain height upstairs for you to step ON THE ROOF of the elevator. This will make the elevator fall downwards, giving you enough time to reach the lower lightswitch within the walls (you must face away from the gates.) Jump off and pull the lightswitch.
Step 3: Reach the second lightswitch above the upper floor (within the walls as well.)
- Peasant: Once Lord jumps off, the elevator will once again ascend. Once you reach the upper floor, press the down button inside the elevator and leaving it quickly for the elevator to descend without you. Basically, stay on the floor.
- Lord: Once the elevator descends to its lowest height, jump on the roof again.Peasant: Press the up button your floor to bring the Lord upwards to the second lightswitch. Then press the down button inside the elevator and run off again before the elevator descends.
FAQ
How to select chapter to continue the game?
You can manually turn on all checkpoints by going to the config file and put UnlockAllCheckpoints on ‘true’ instead of ‘false’.
The config file is in a hidden folder, so to select checkpoints you can go to:
- C:\Users\YOURUSERNAME\AppData\LocalLow\Total Mayhem Games\We Were Here Too\Config
Then change the number in:
<WeWereHereToo>9</WeWereHereToo> With 9 being the last chapter.
Spoiler! Which ending is canonical?
I have only played 1 and 2, about to play 3. Based off the names alone I recon the first being We Were Here indicates the original 2 people. We Were Here Too indicates the 2 people from the first game that noticed the other 2 went missing and tracked them down from the flare thus hints the “Too”.
(All 4 people in the cutscene from the 1st game have now been in the castle) Given the 3rd game is called We Were Here Together I speculate that indicates the 2 that get left behind find each other IN the castle since they both got left behind.
This is hinted at the walkie going off right before the fade to black at the end if you didn’t get all the switches. If this whole theory is correct then the whole “you both get out” ending is just for fun for players to have a “look I did it” kind of thing. Canon must be there was a left behind person each time.
After beating the game with all the switches, they actually made it play out so BOTH endings are canon! That’s awesome!
How does pairing/hosting work?
You can use the lobbies/matchmaking in-game to join a lobby created by someone else or host your own lobby so that someone else can join yours. You will get matched to random people, so if you enjoy playing with them I’d recommend adding them on Steam so you can play with the same person again if you decide to stop halfway.
If you get matched with a different person next time you play, you’ll have to start over. You can also directly invite people from your Steam friendlist to the game. The game will save the progress you have with the same player.


The only problem is with the last puzzle the guide makes it a little bit confusing to understand